Built Work · 2019
Deck Rebuild
The dirt side had no real support and sank until it started breaking boards. Torn down, re-poured, re-framed, and rebuilt in Azek, diagonal decking, picture-frame border, fascia wrap, built-in lighting, and a vinyl privacy fence.
The Transformation
Before & After
Drag the handle to compare.
Project Walkthrough
Phase by Phase
Teardown
The original deck started with a small concrete slab right outside the door, likely poured first, then the deck extended outward from there on bare dirt with no proper support. That unsupported side sank badly over time, breaking boards on the deck surface. Railings came off first, then the boards, then everything down to the framing to see exactly what was there.
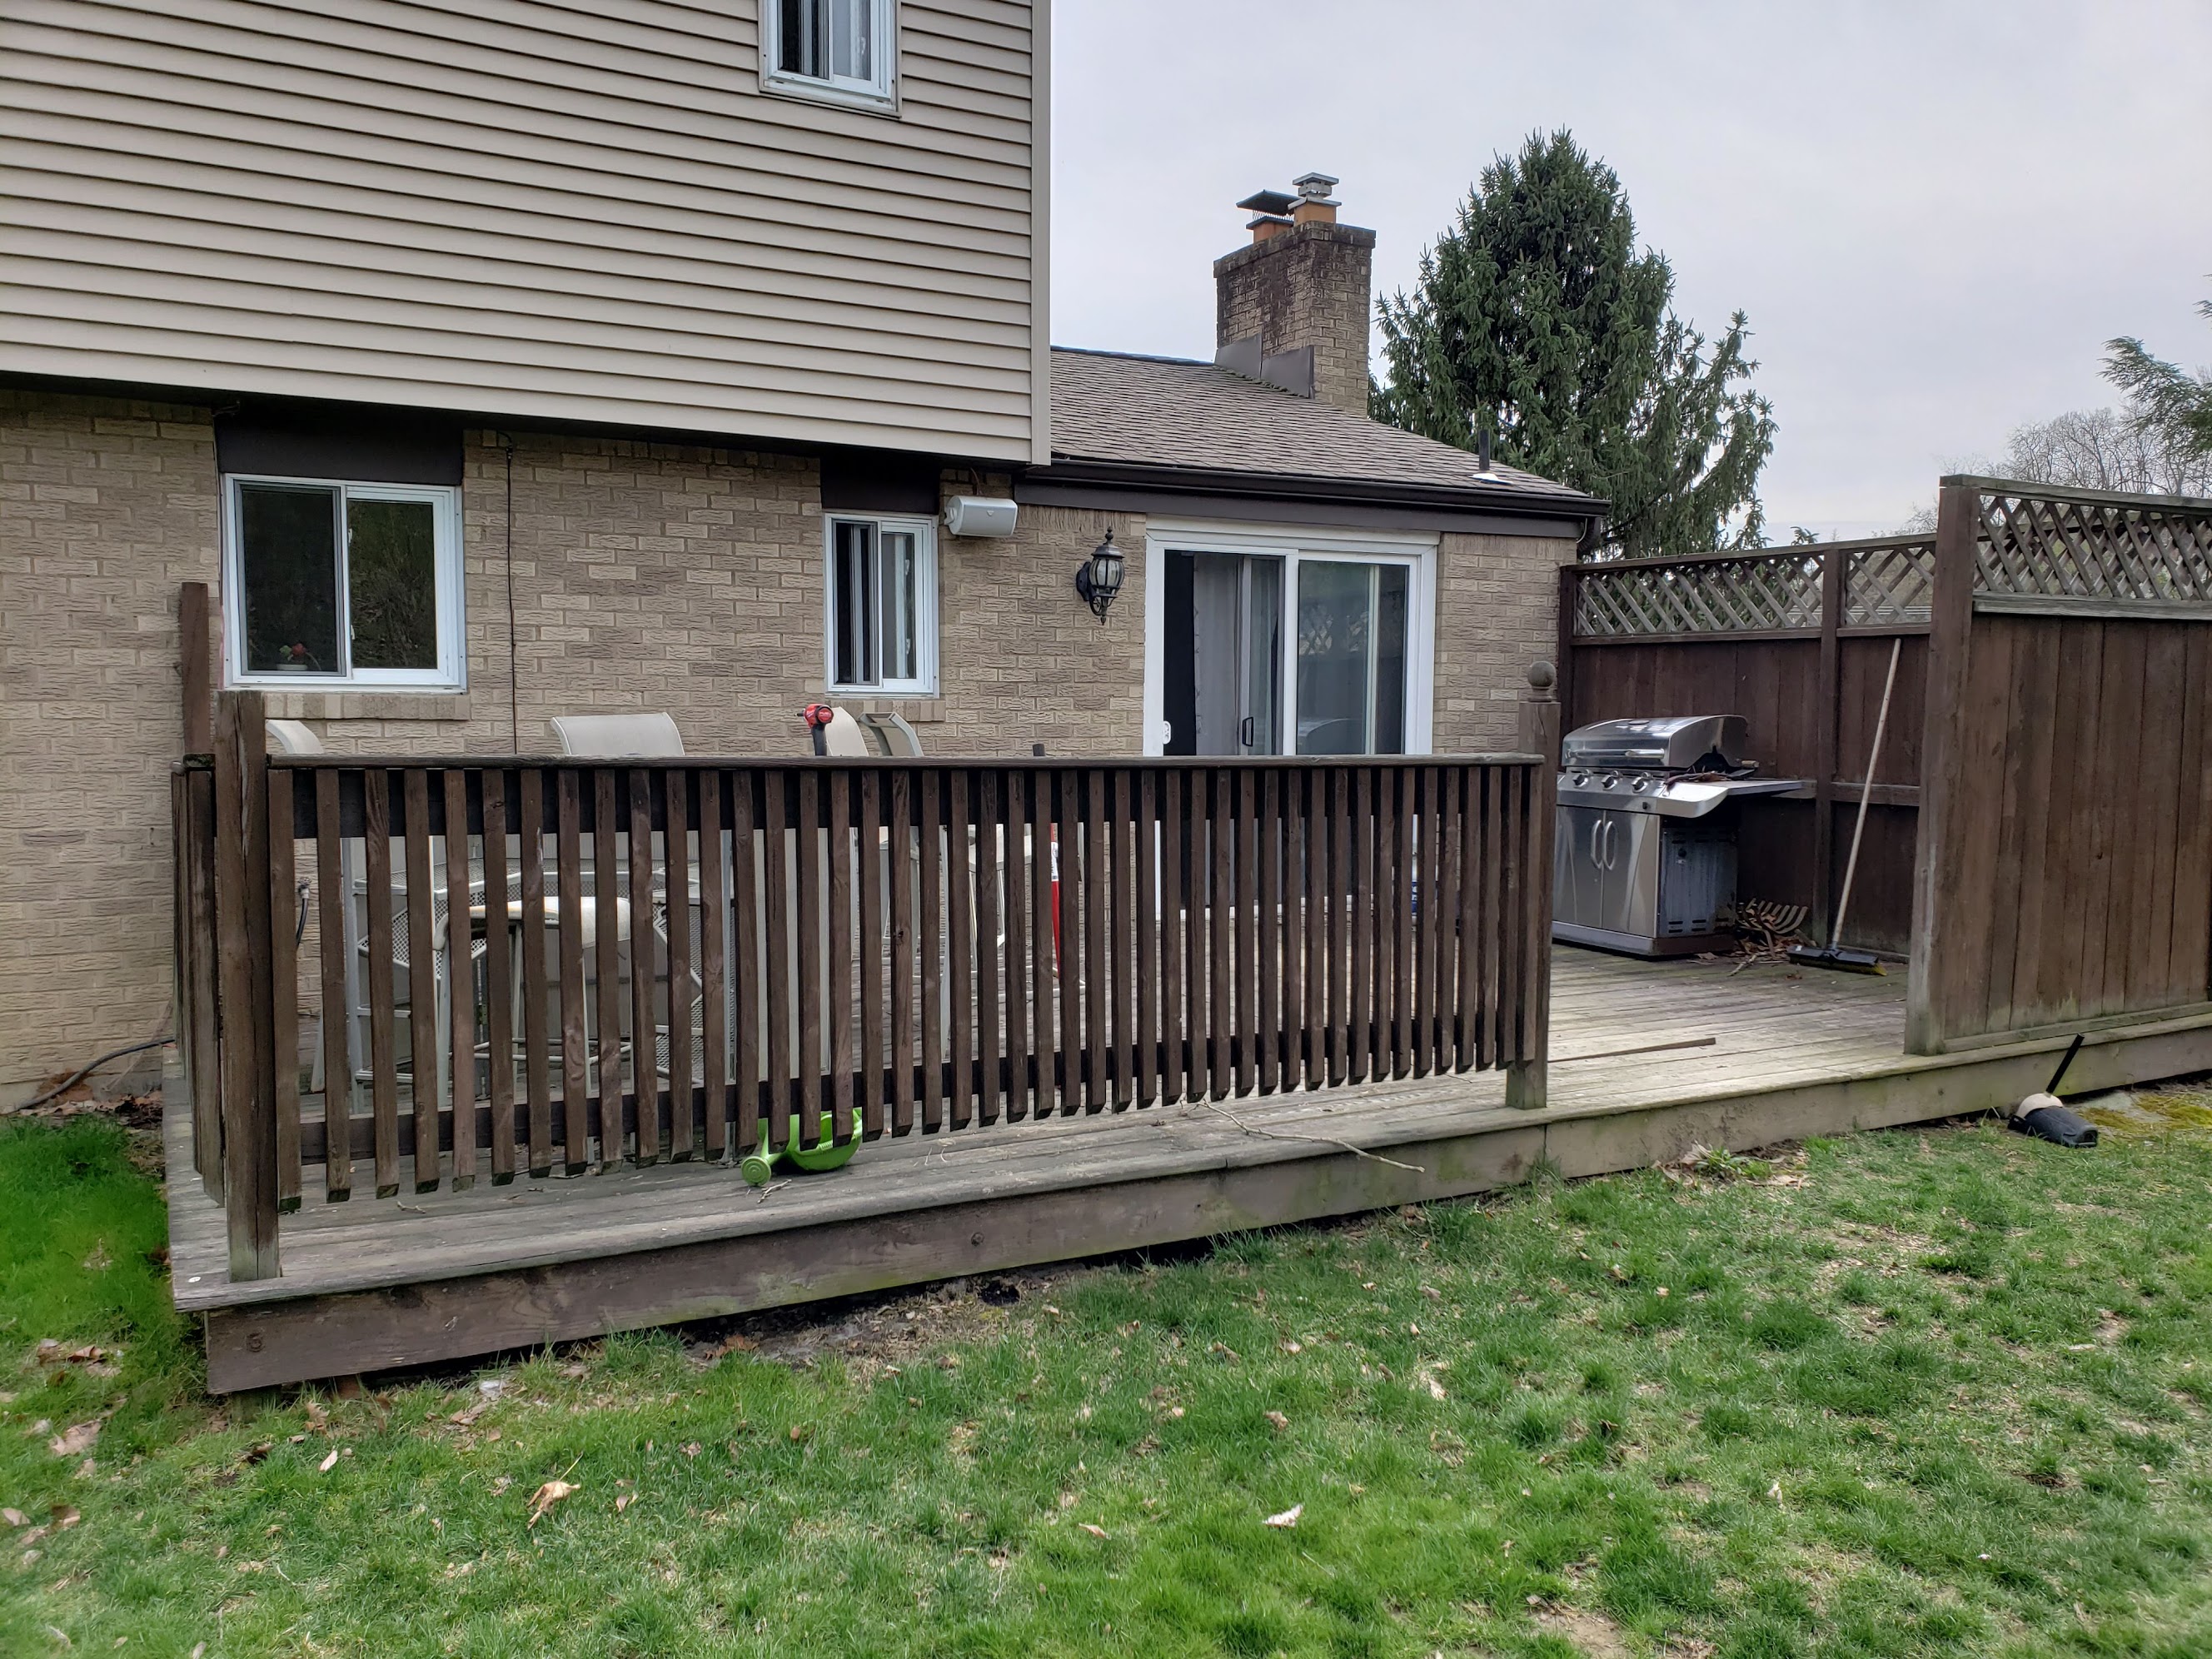 The original deck, April 2019
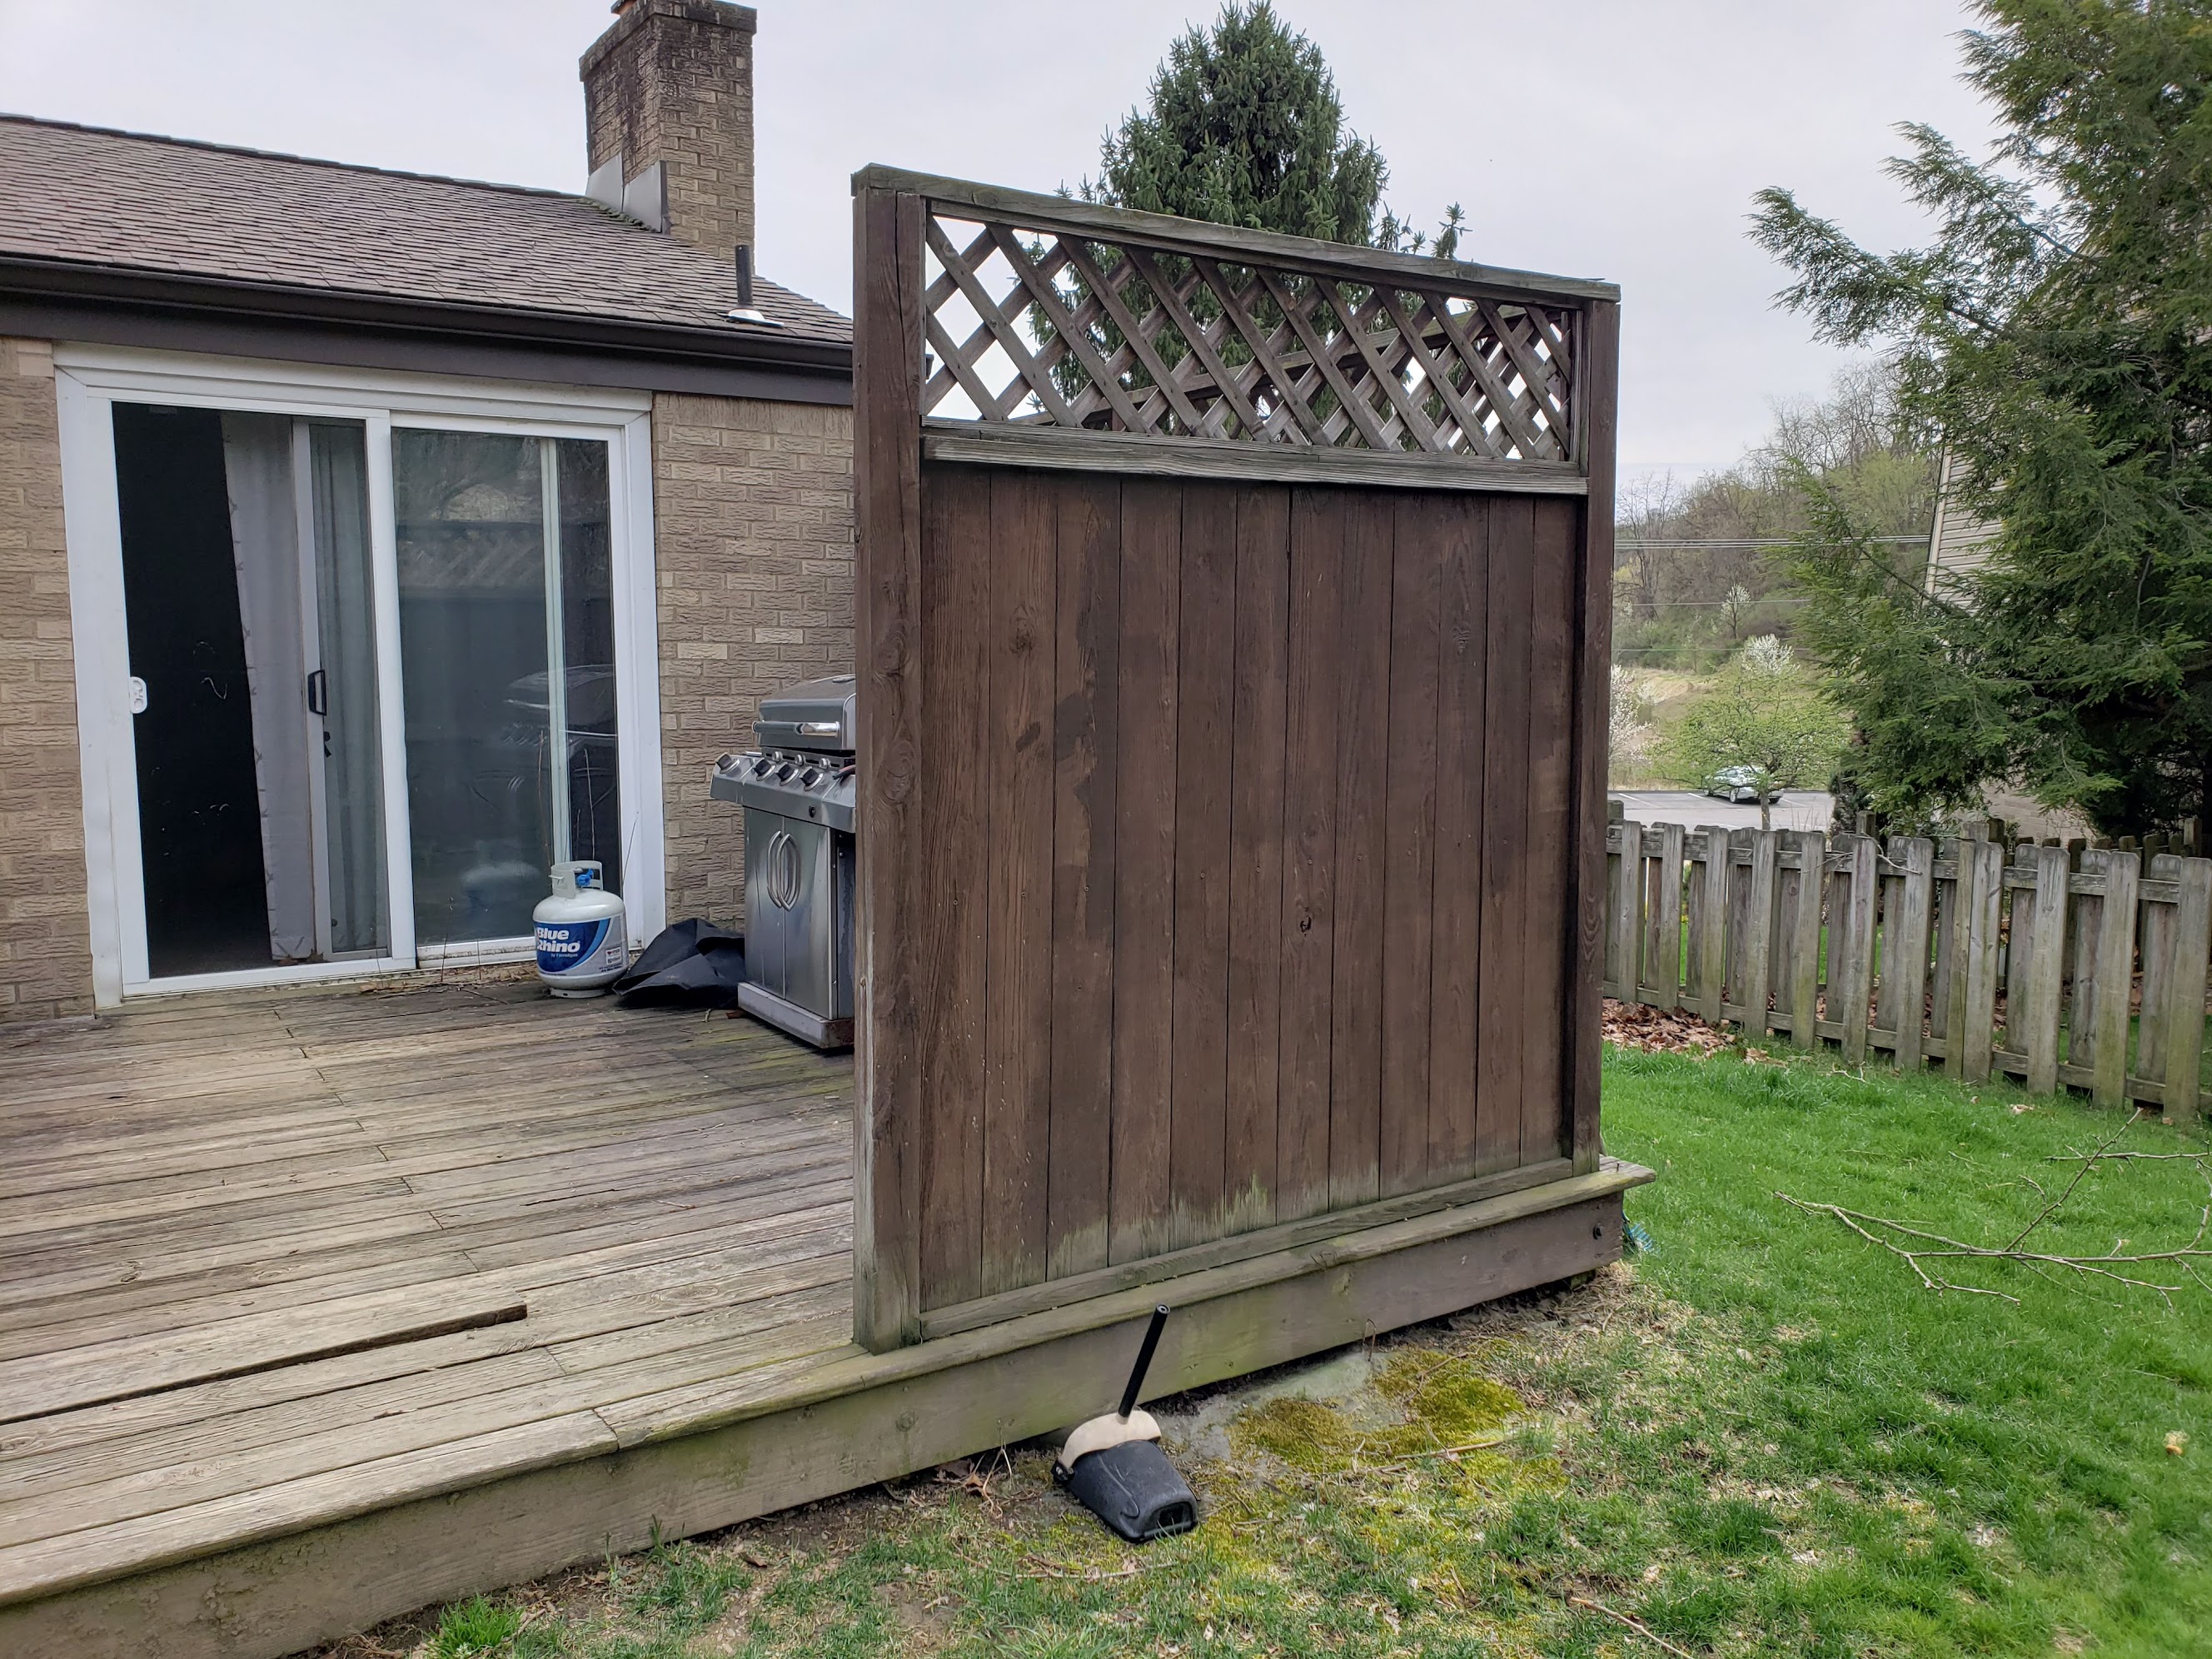 Old wood privacy panel
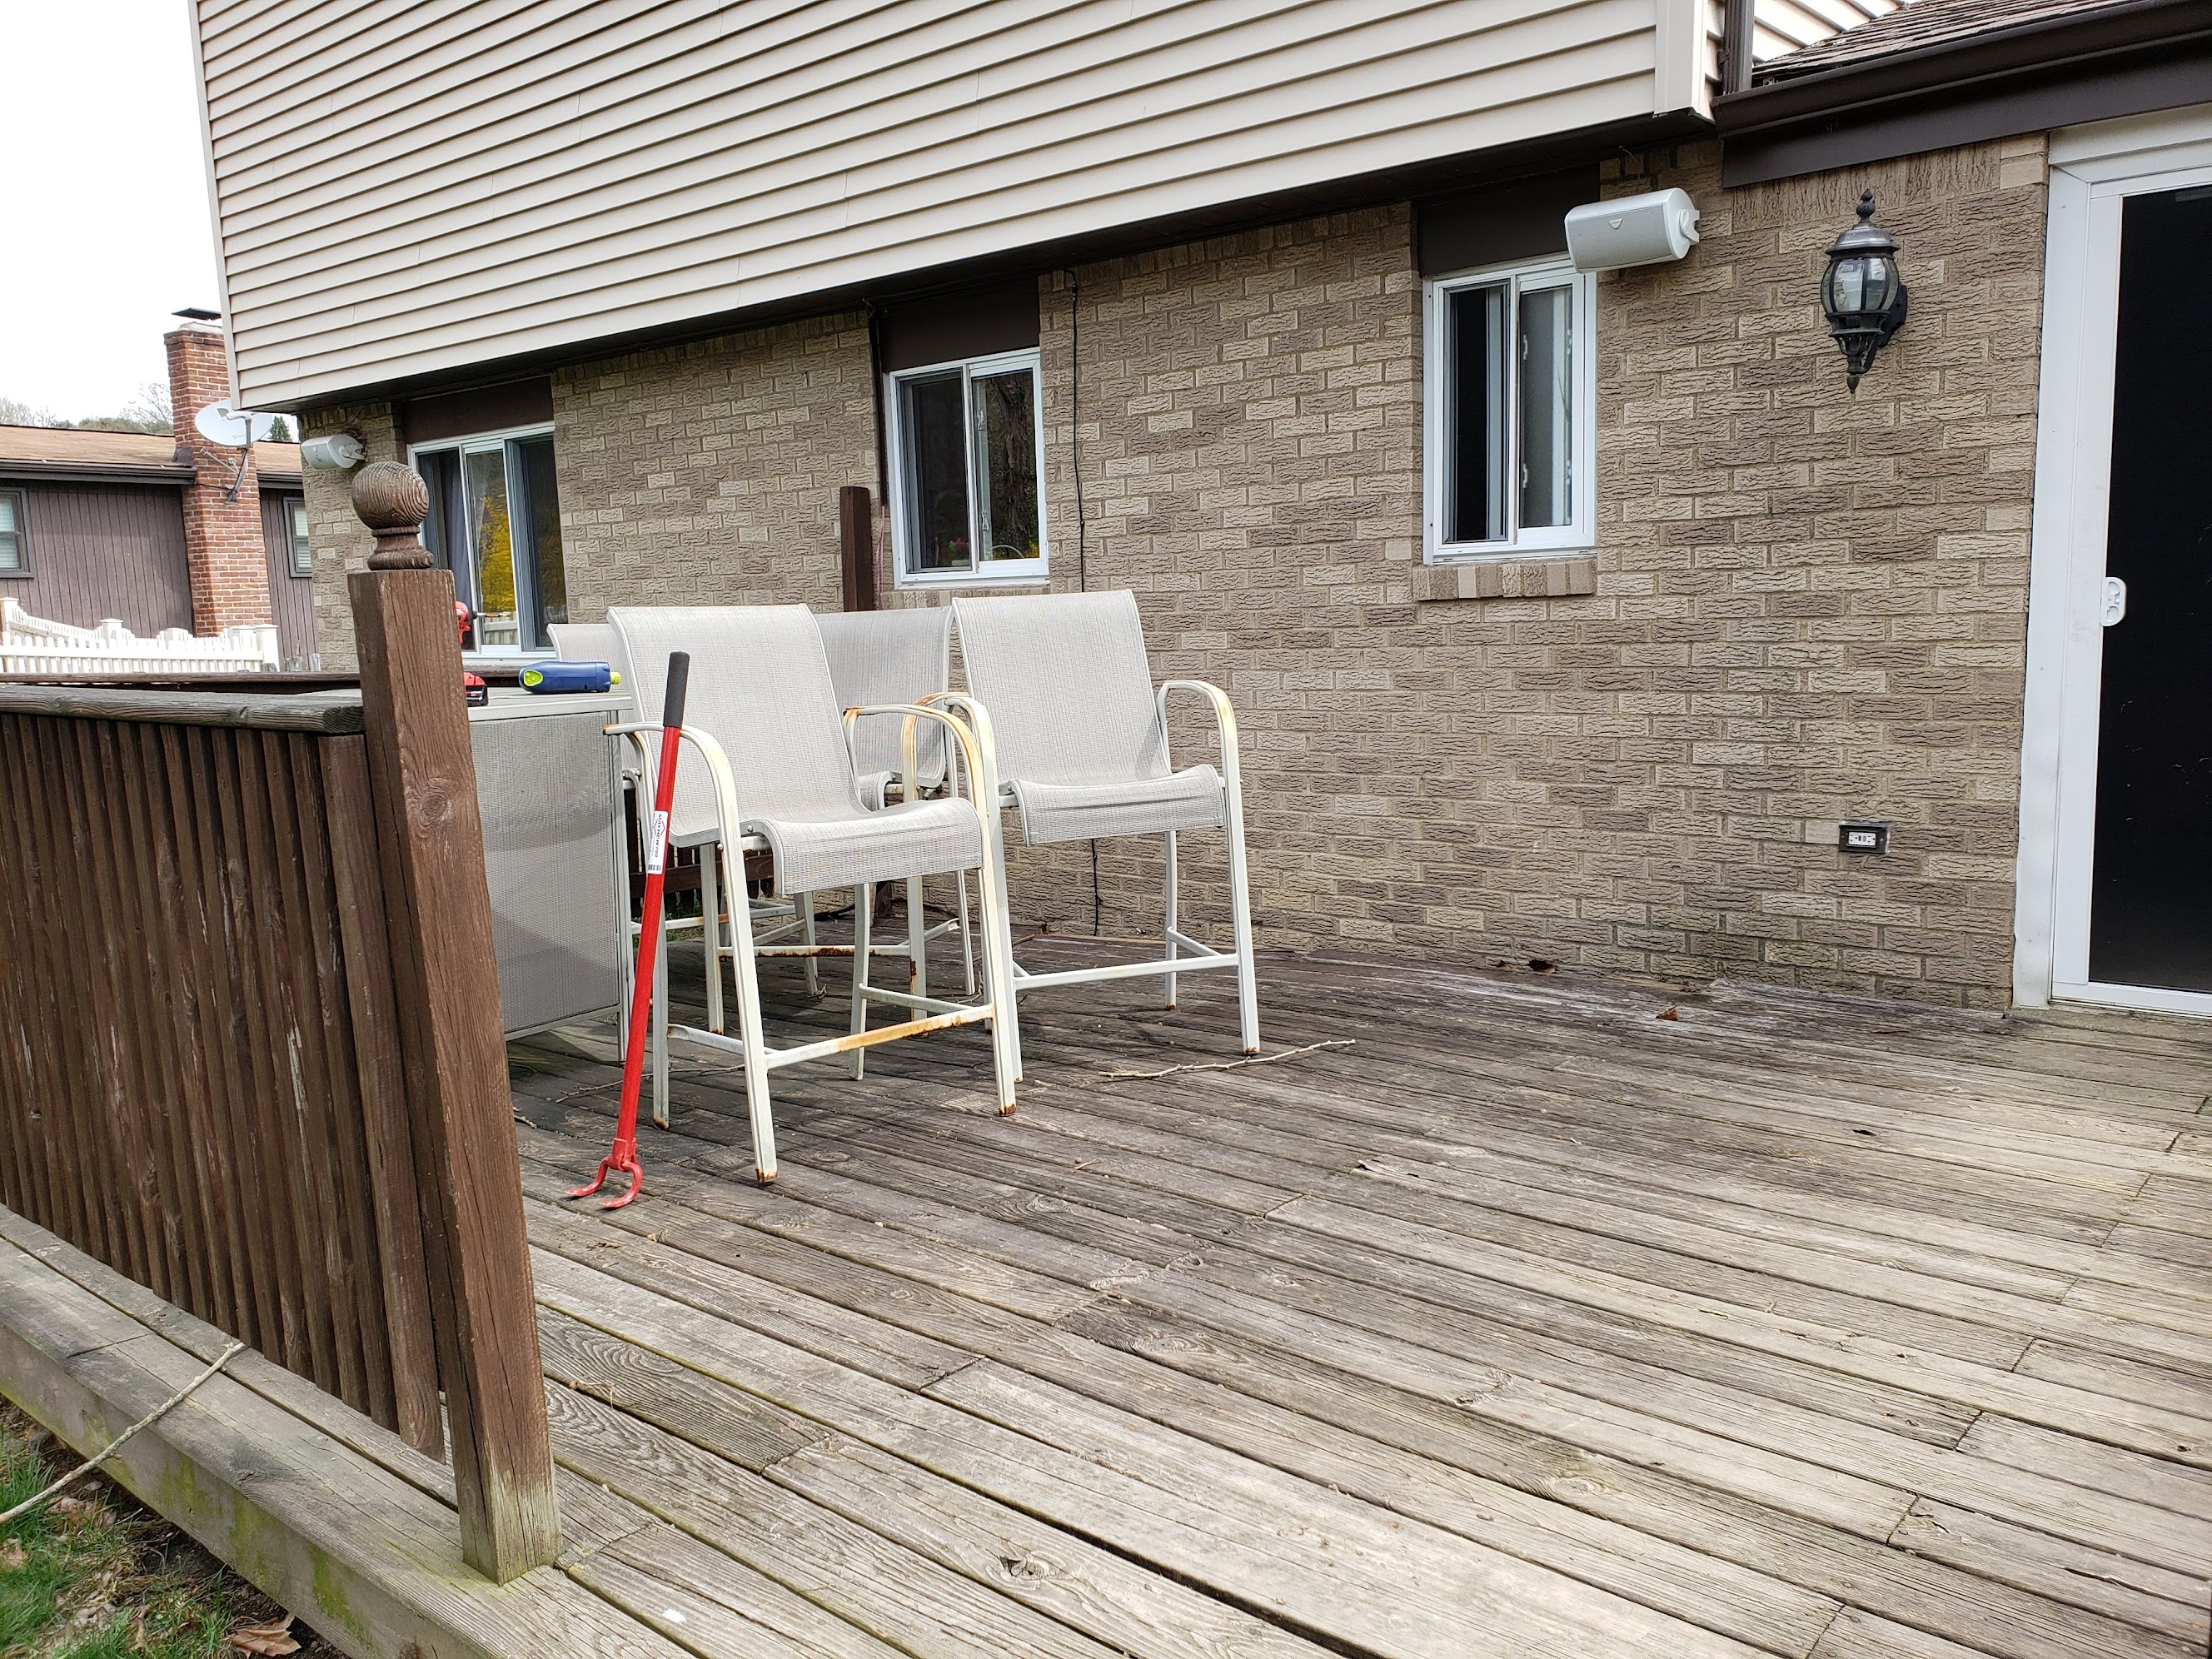 Standing on the deck looking toward the house
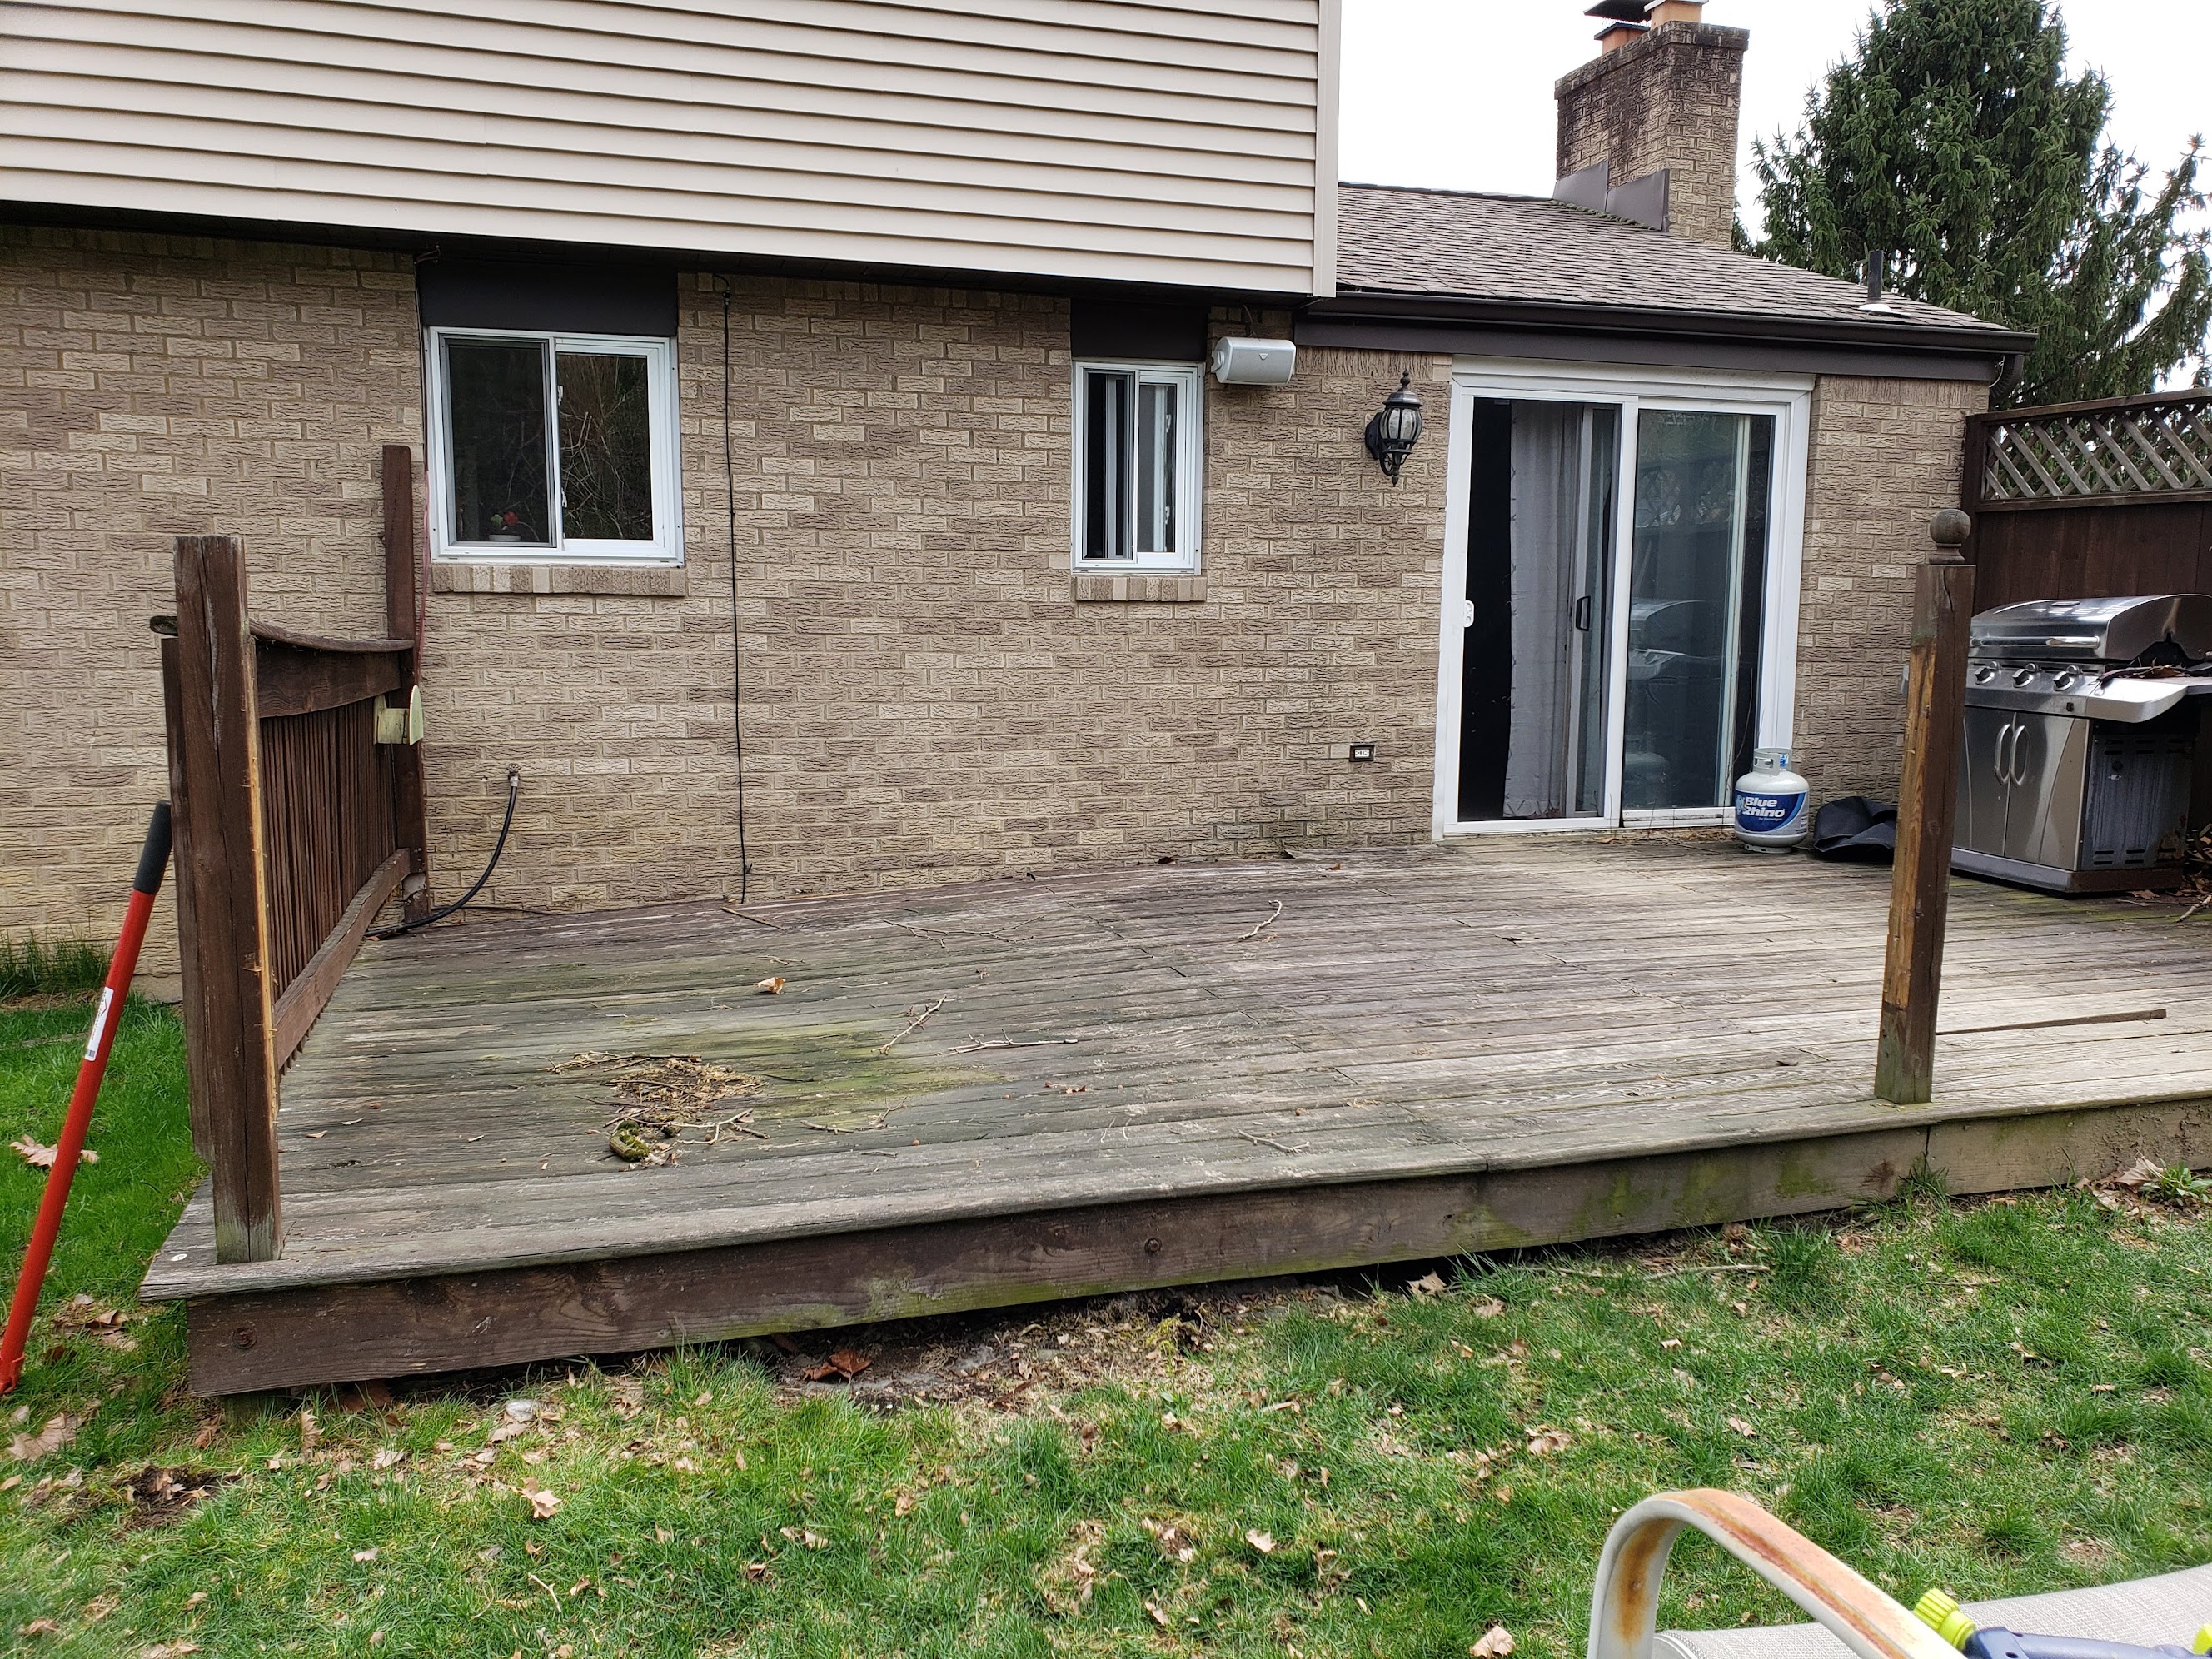 Railings stripped, teardown underway
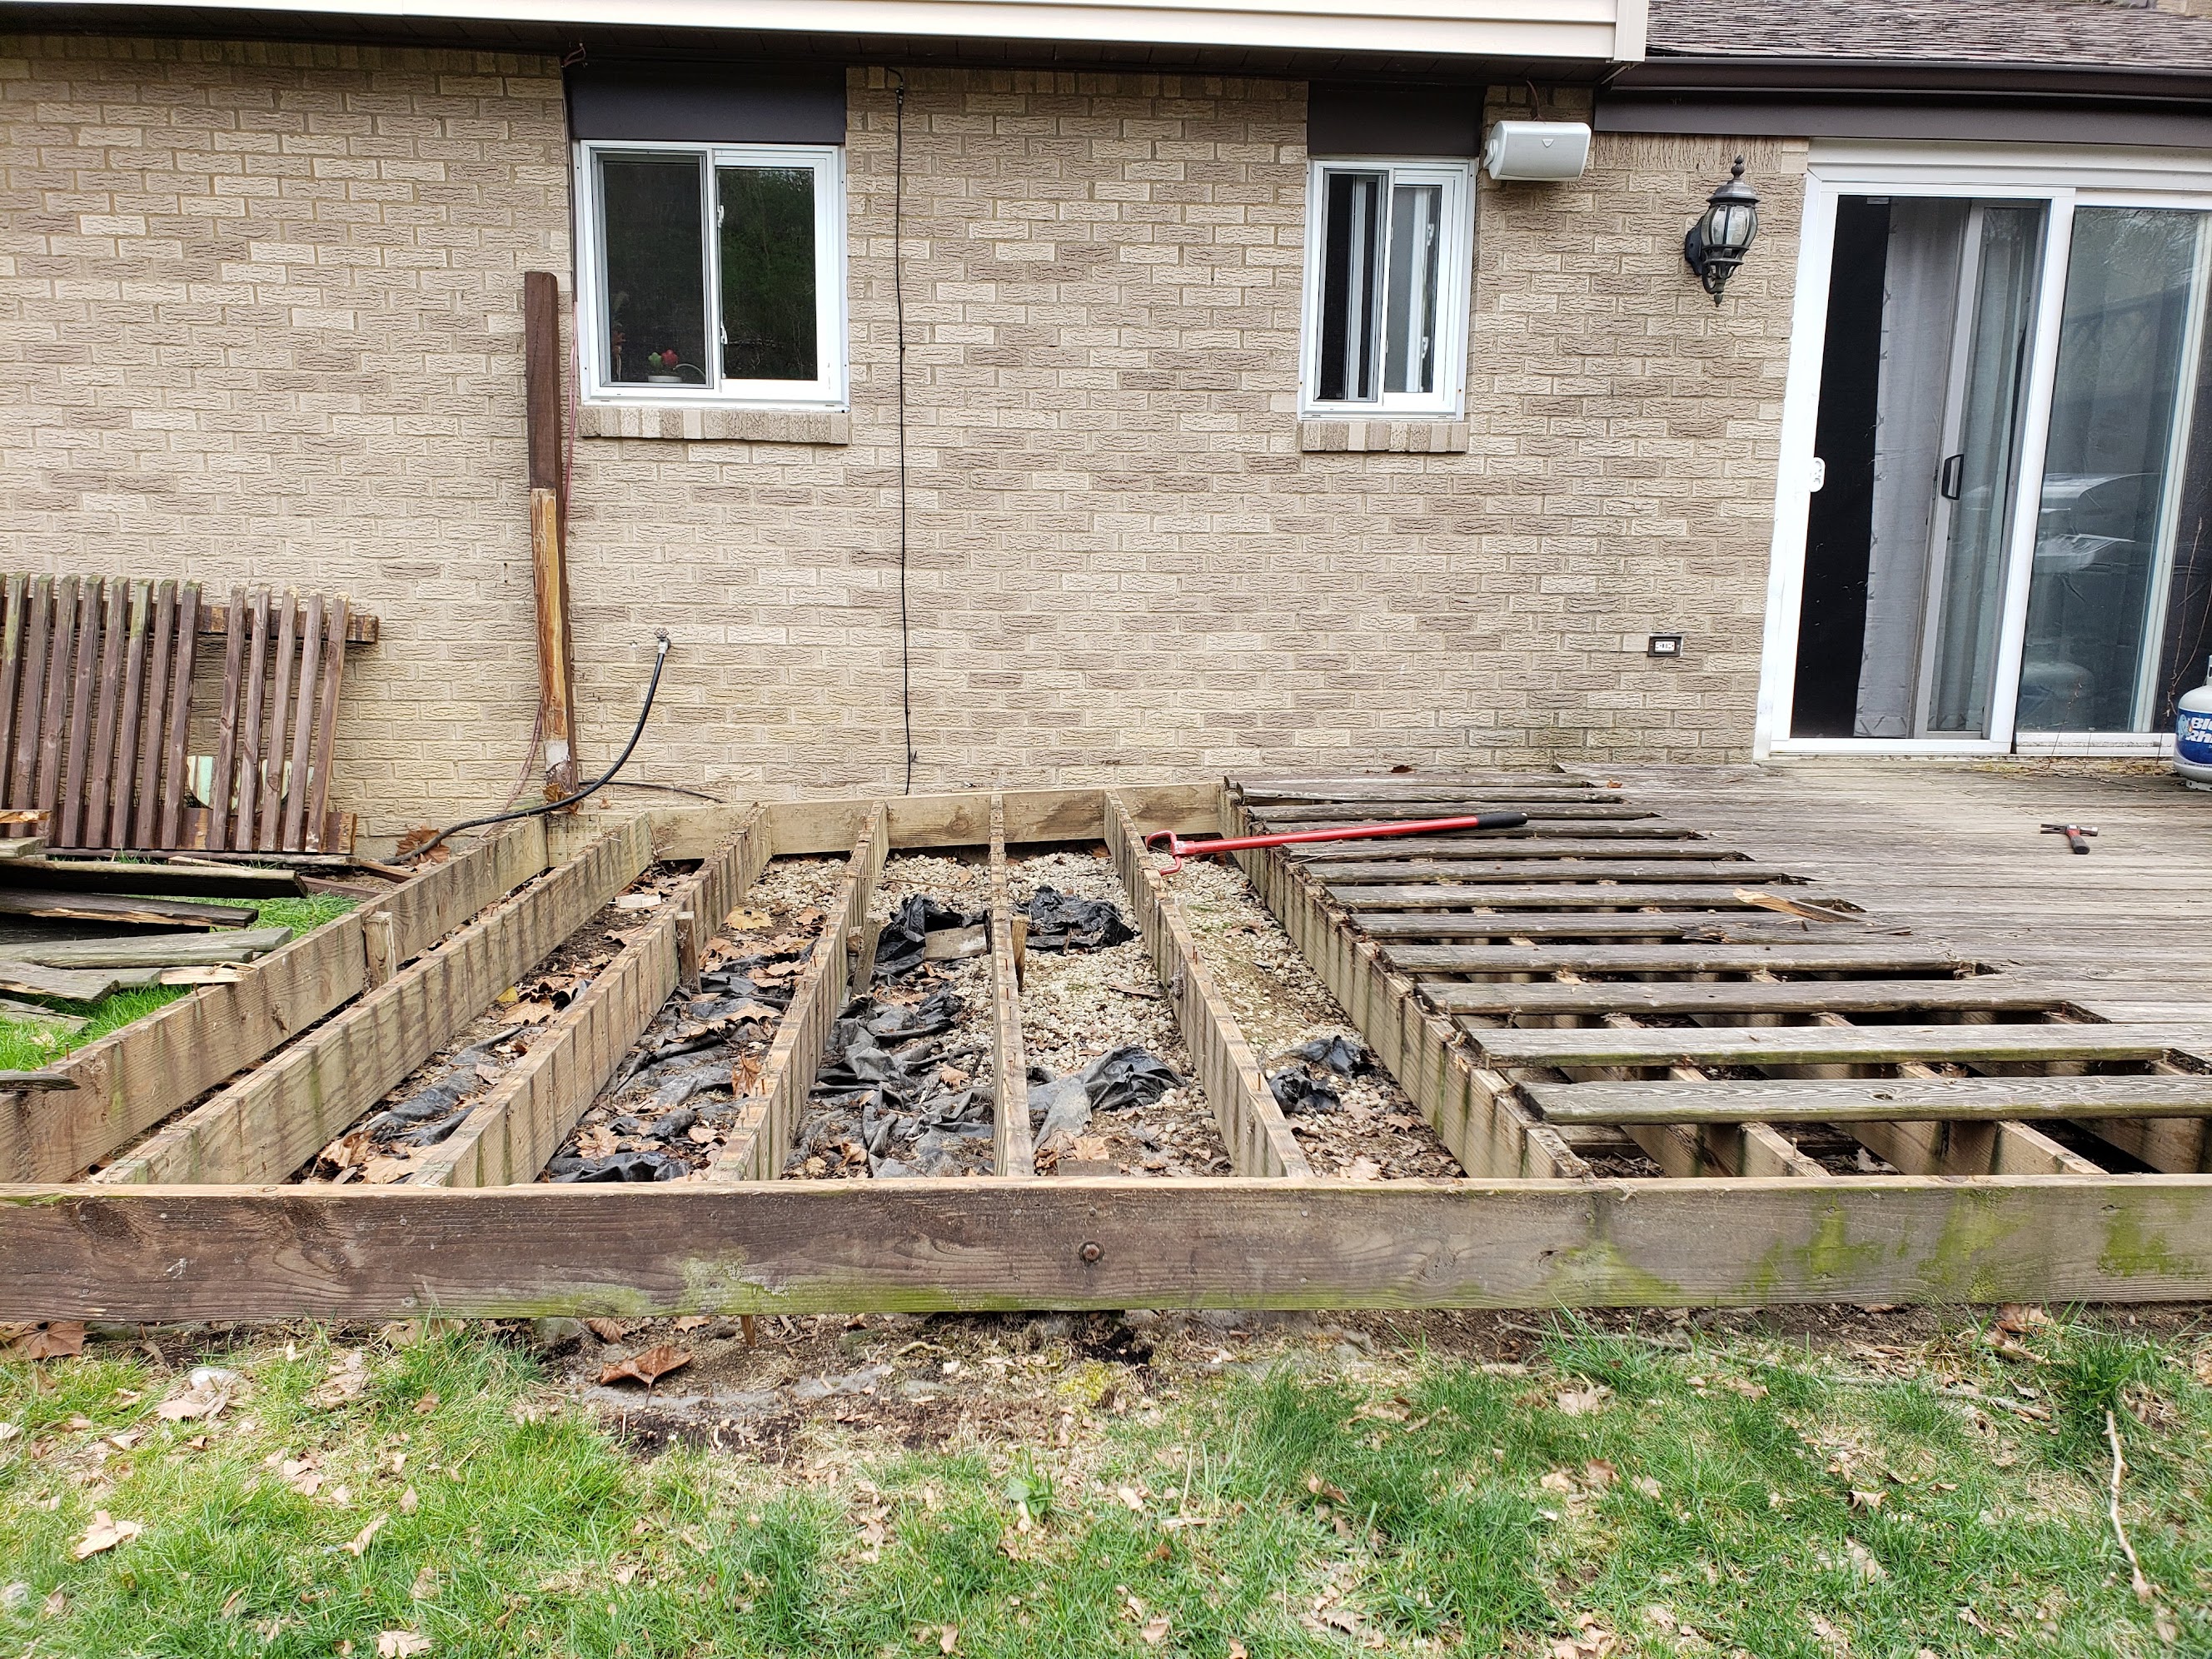 Old framing exposed, rot underneath
Leveling & Support
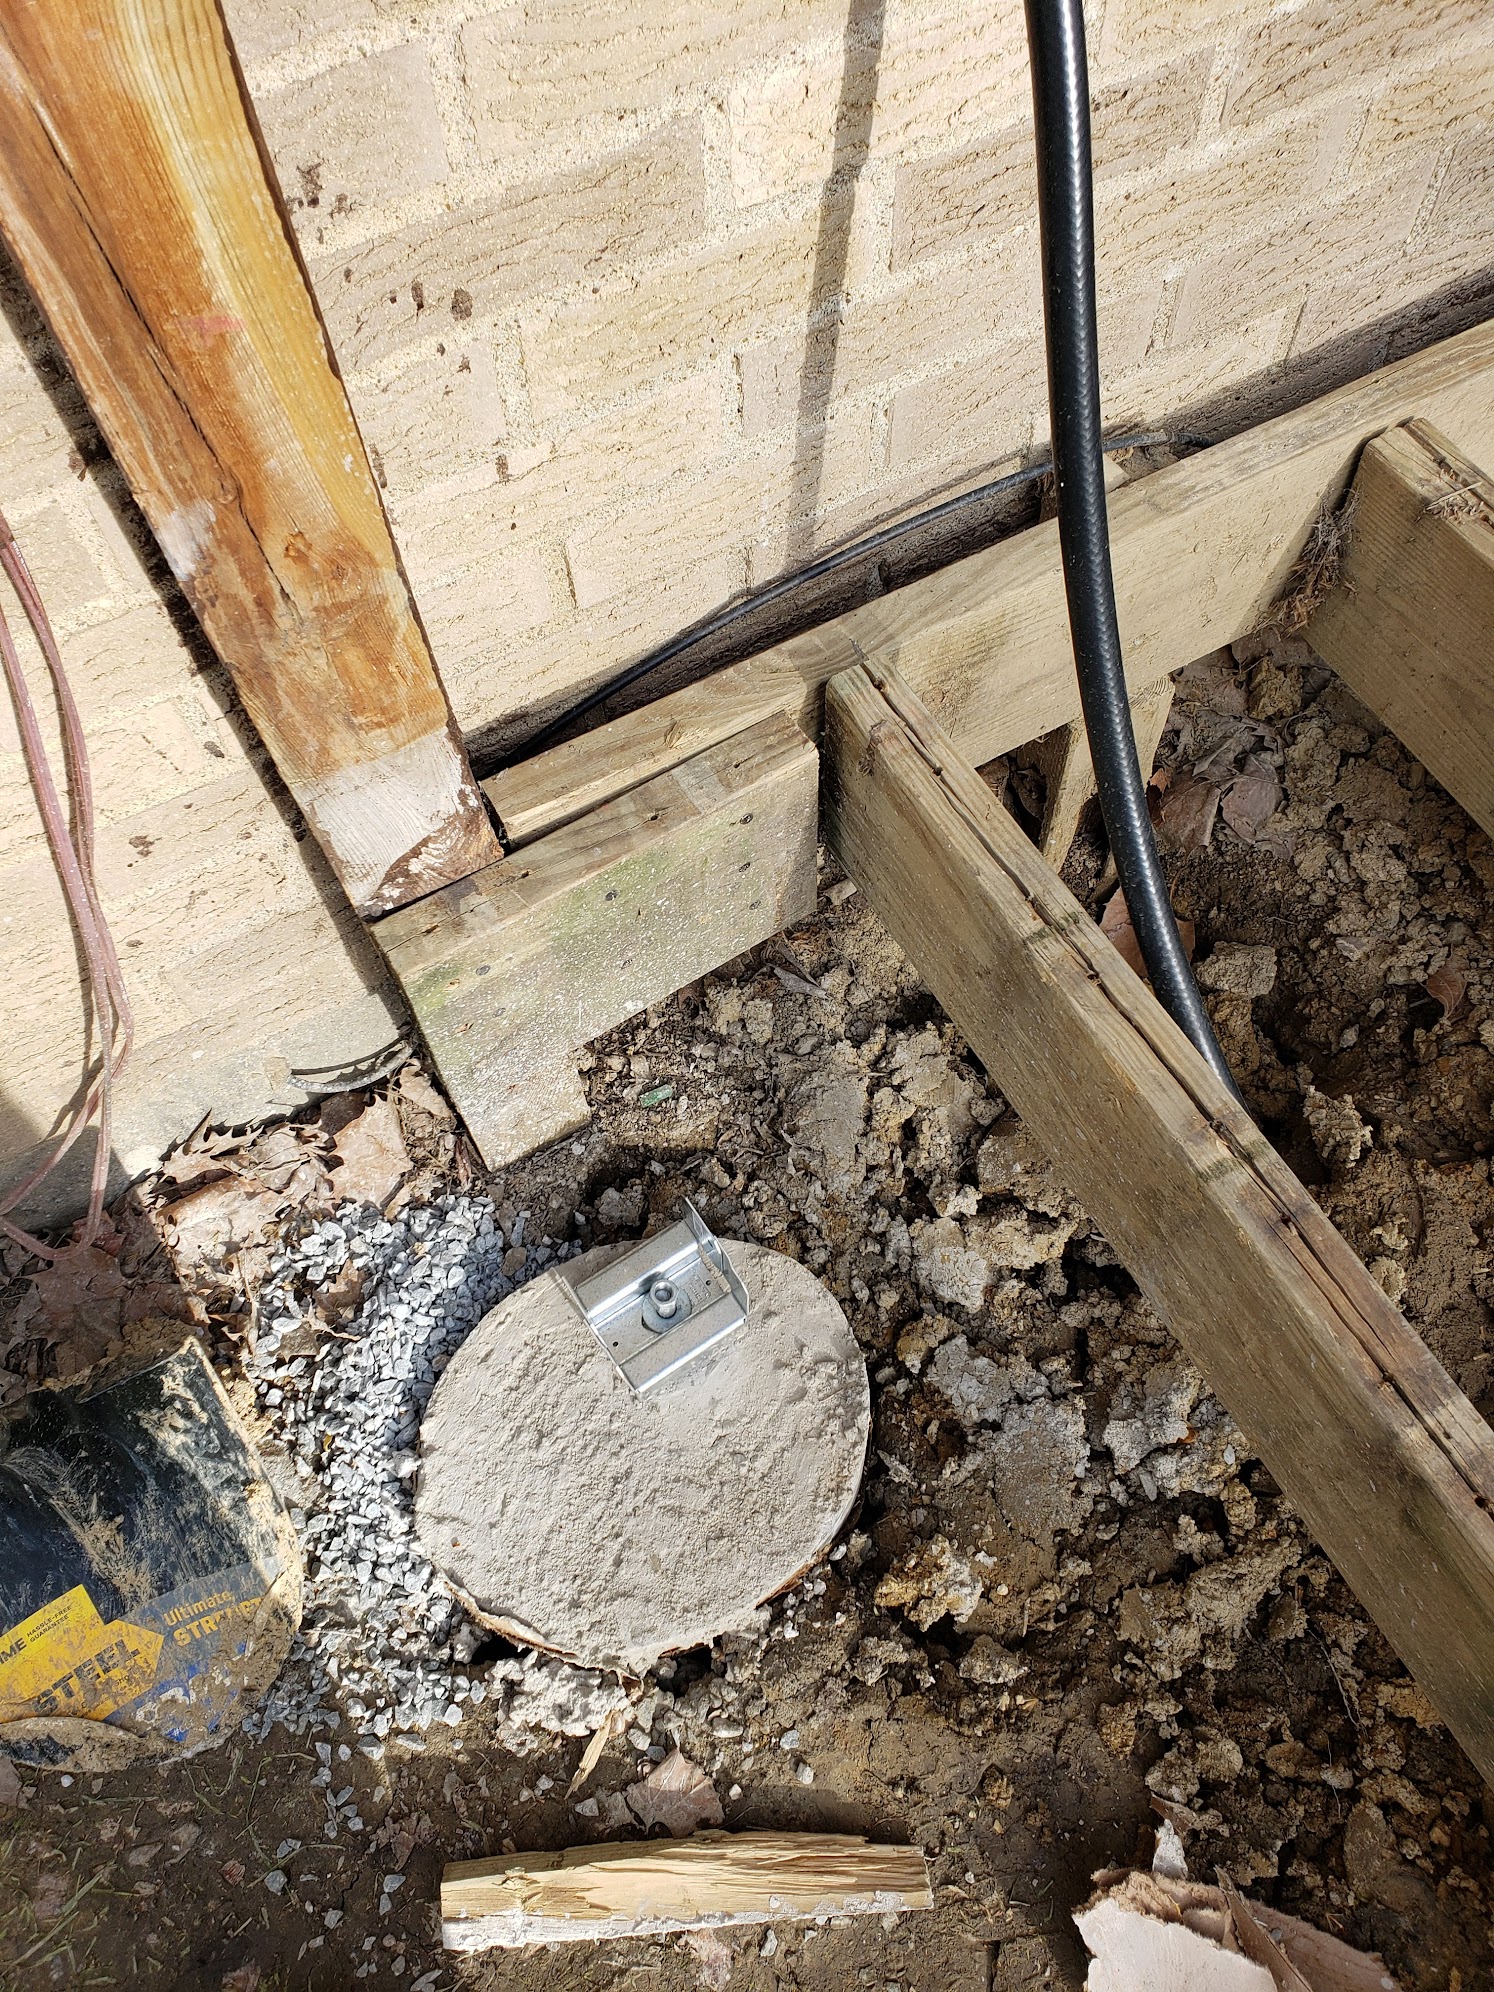
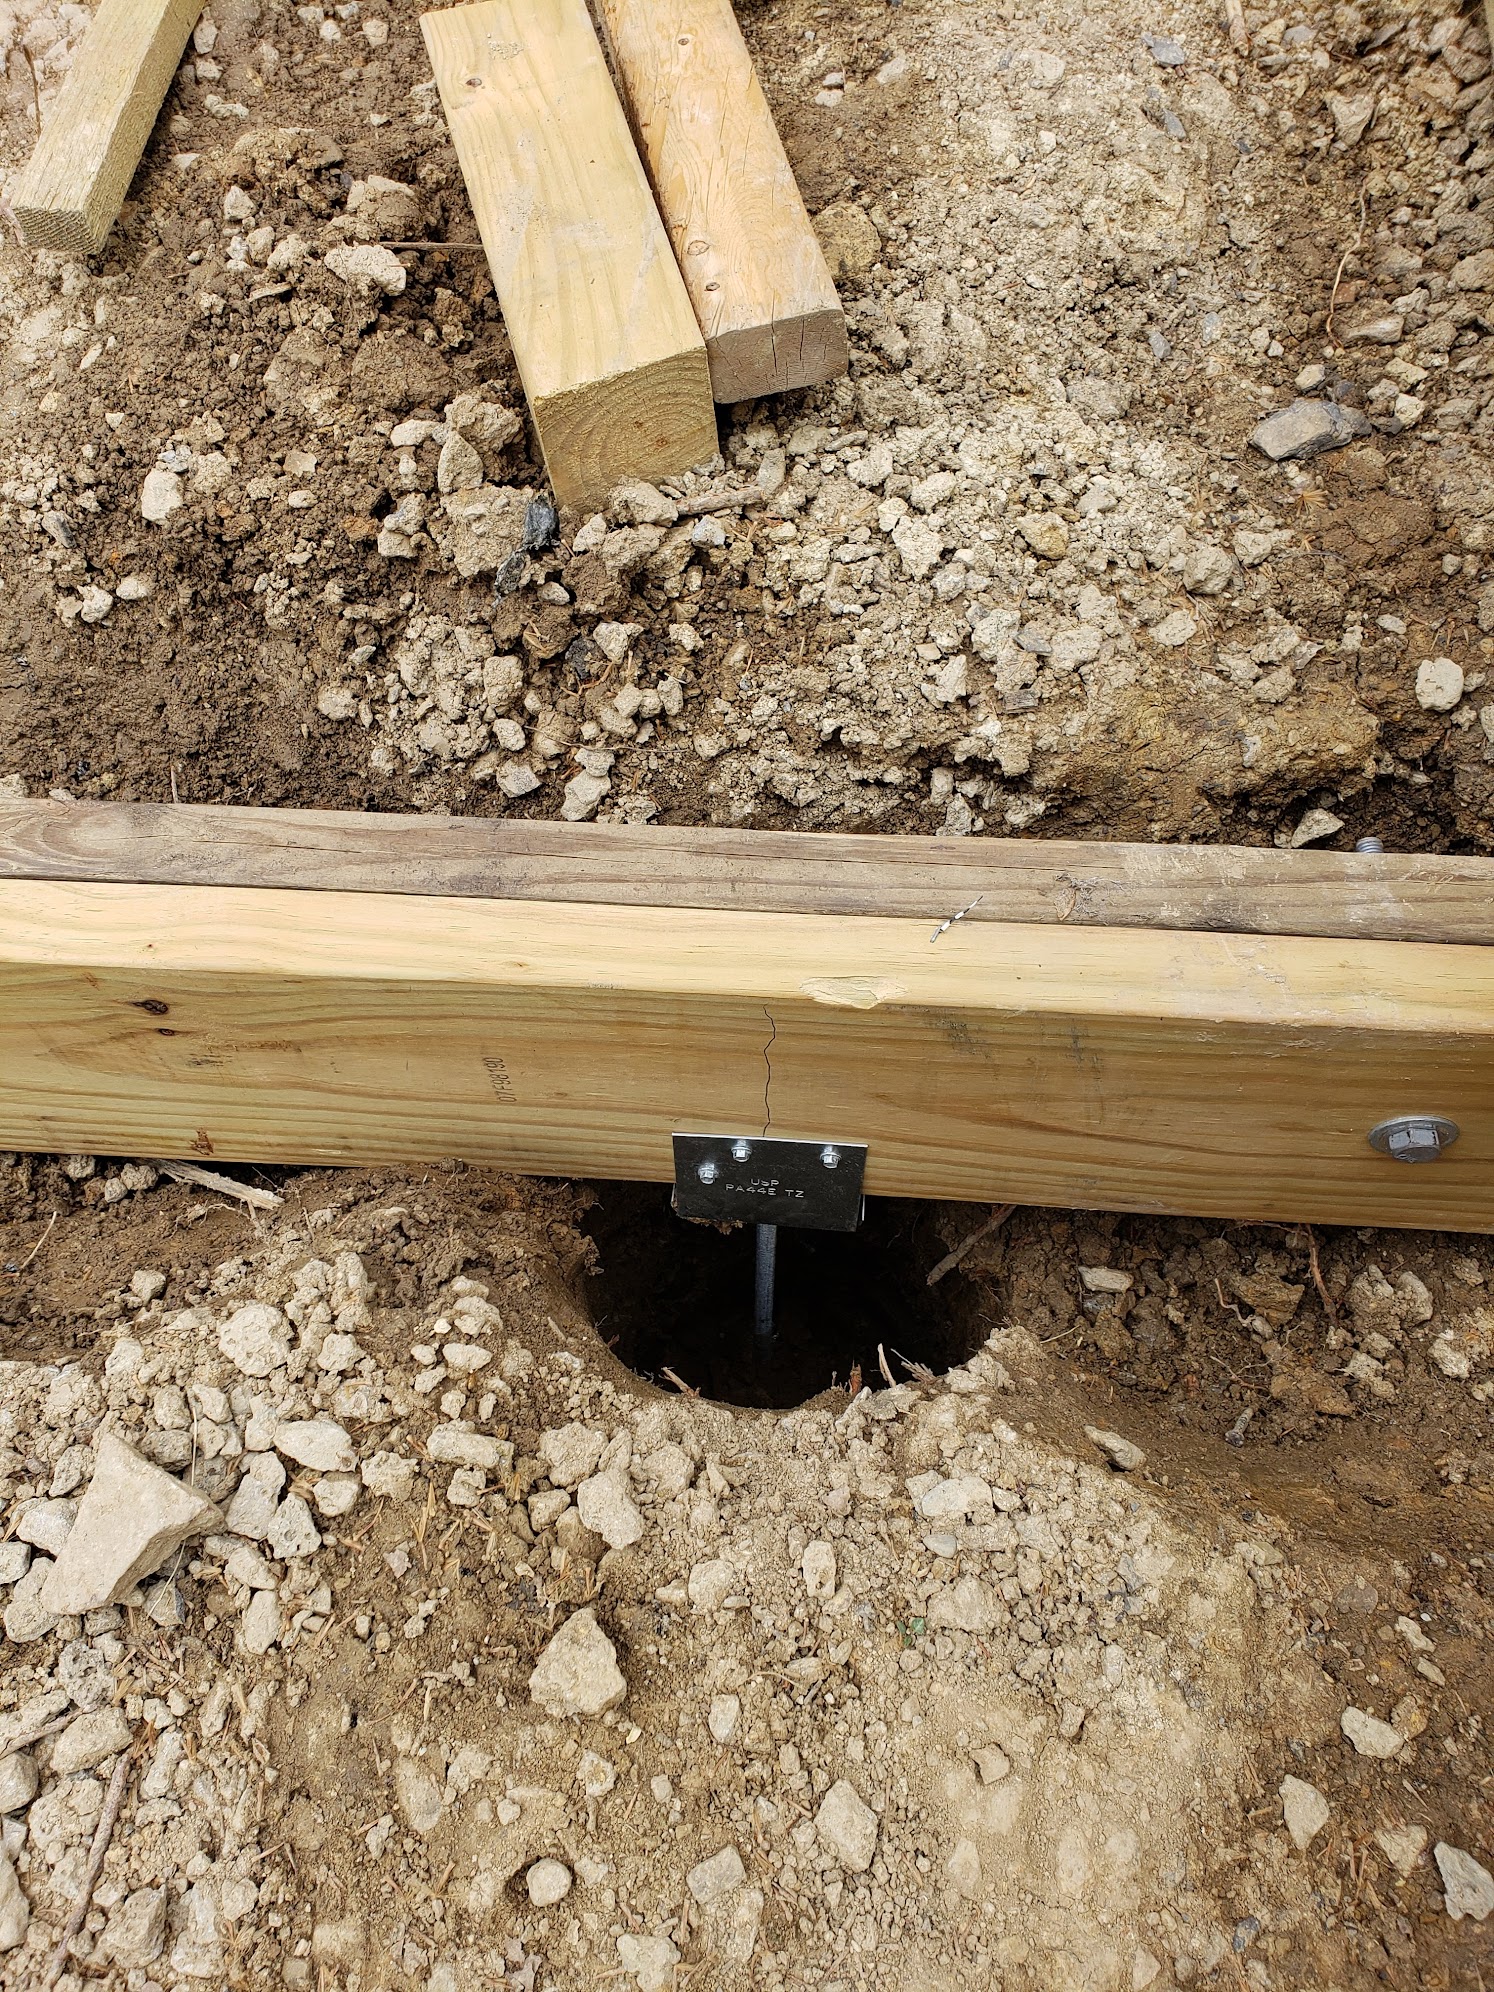
The slab side had a concrete base but no hardware anchoring anything to it, posts just sitting on top. The dirt side had nothing at all. New holes were dug, poured with concrete, and fitted with metal 4×4 post bases to keep the wood above ground and properly anchored. That way posts last longer and can be replaced without breaking up the slab. Same method for the mid-span support, something the original completely skipped.
 Original post, no base hardware
 New post base hardware set into the pad
 Beam on new post base, properly supported
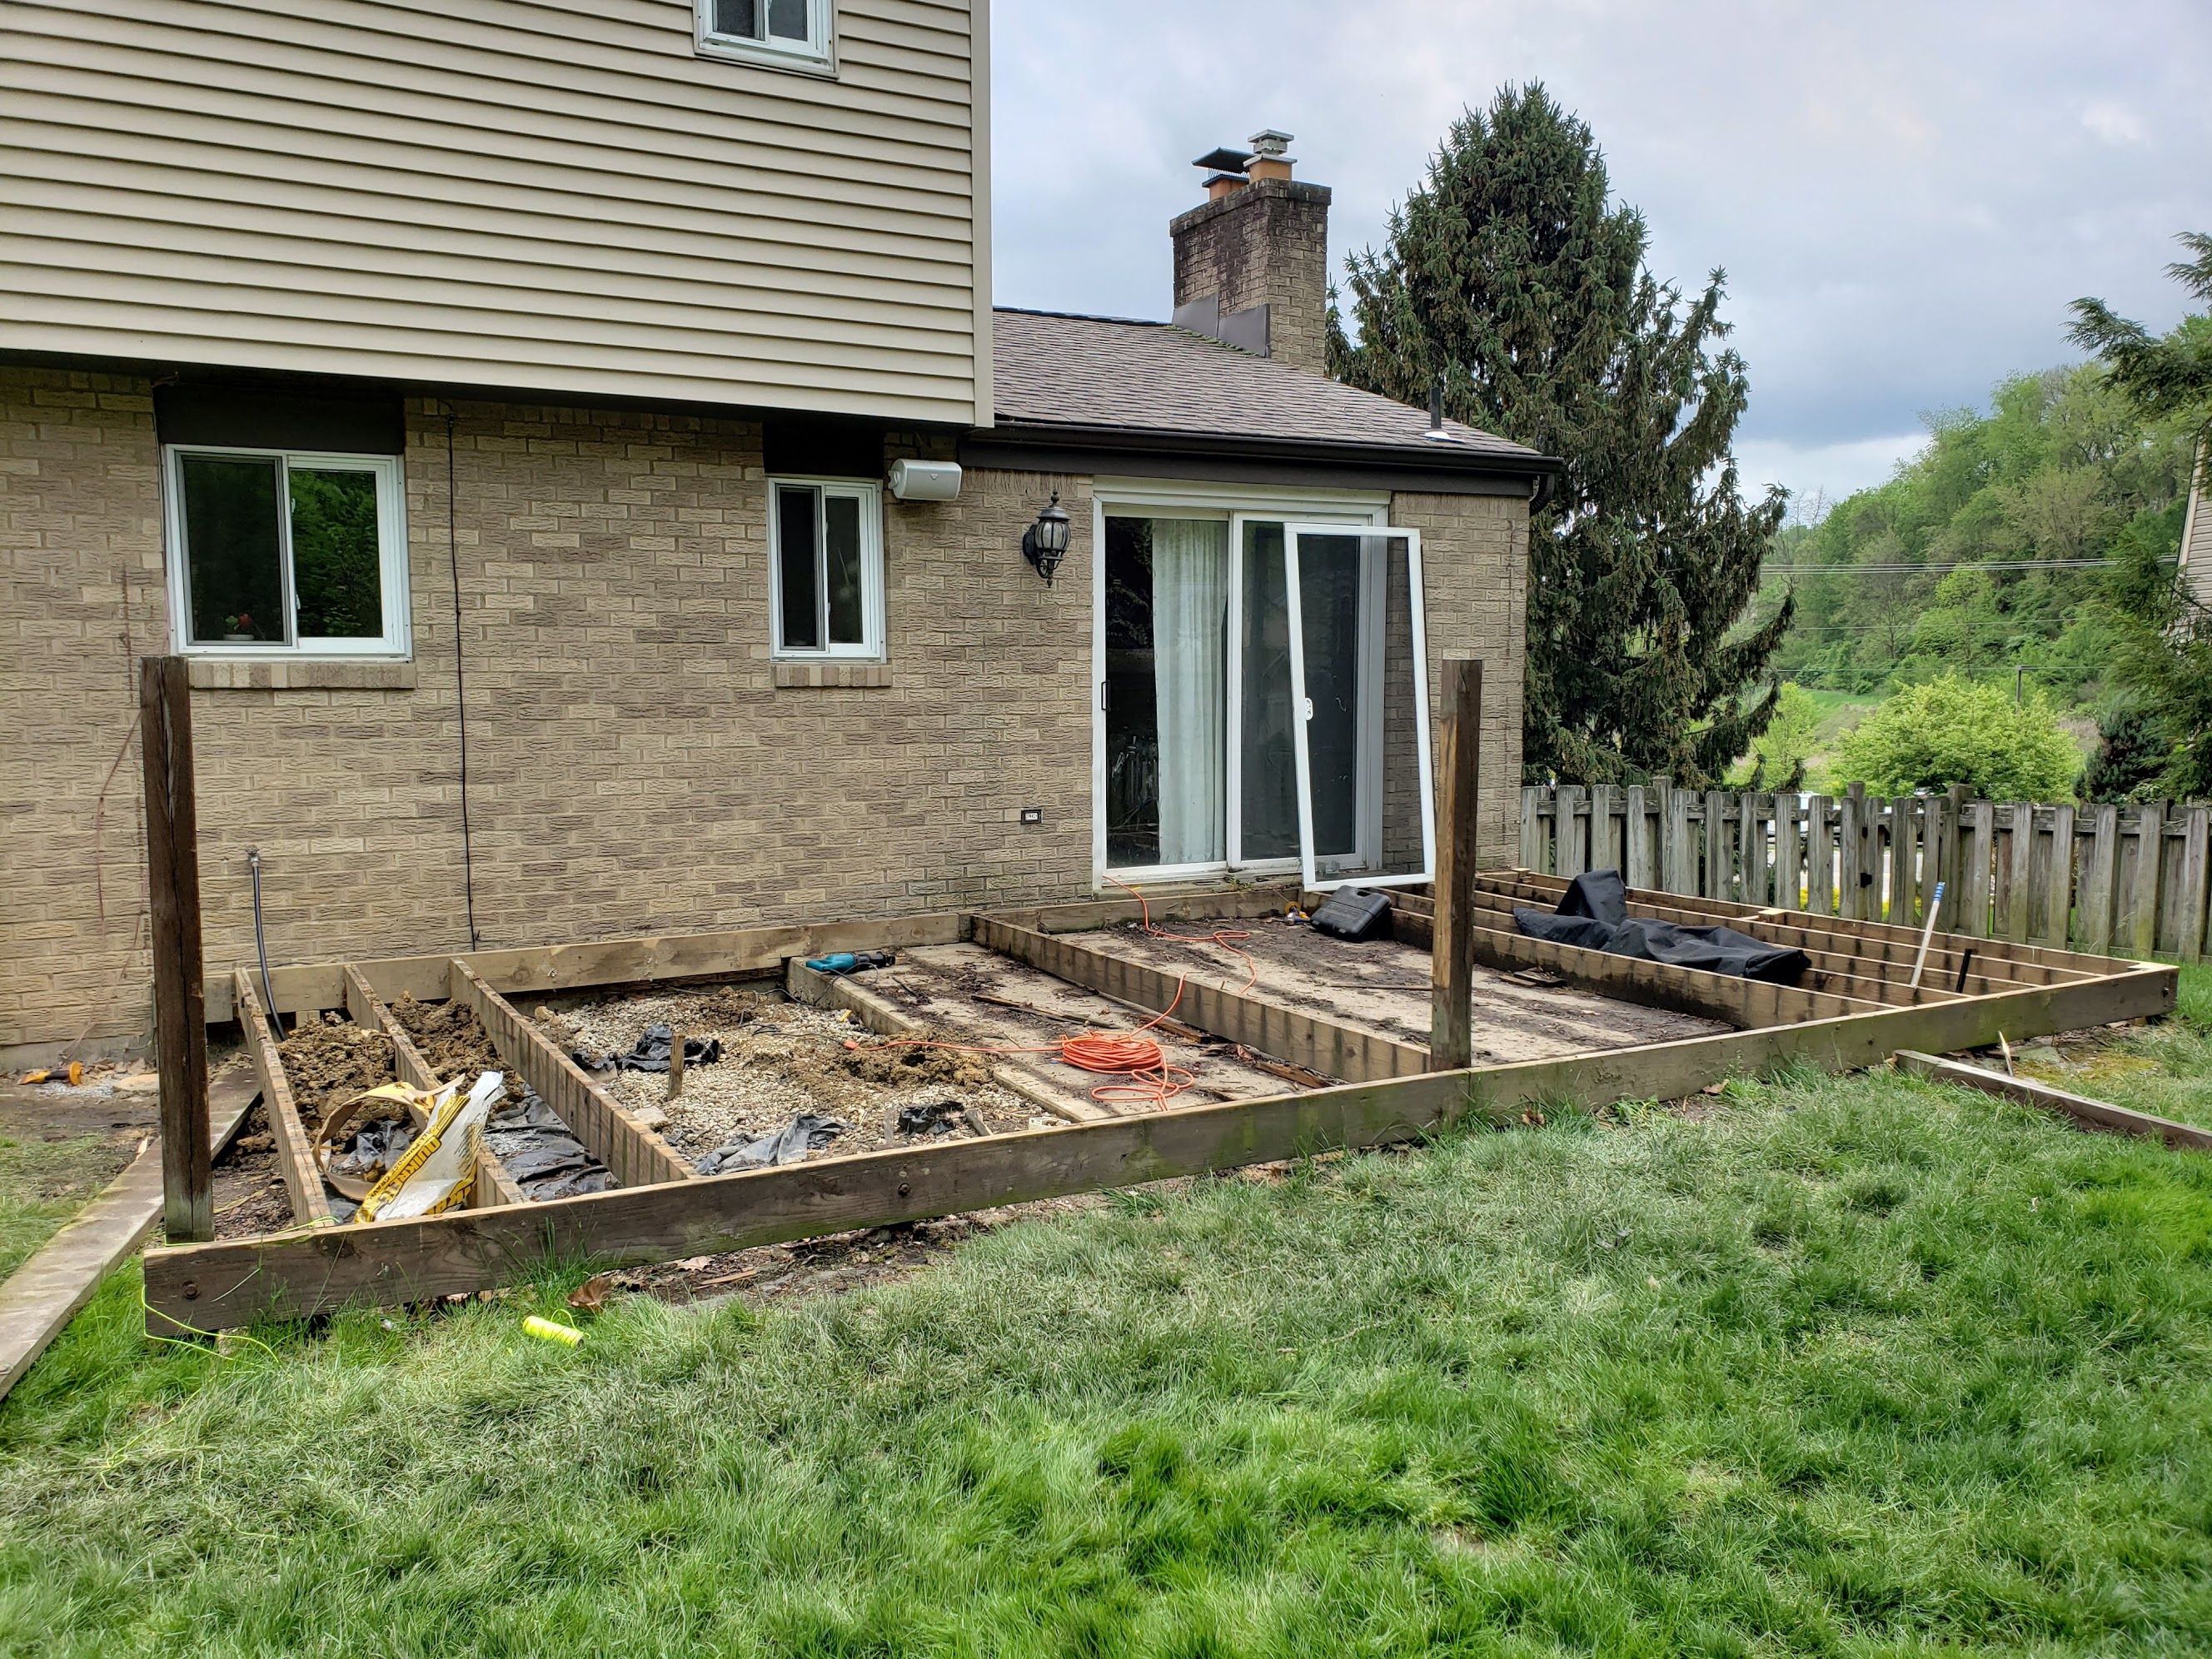
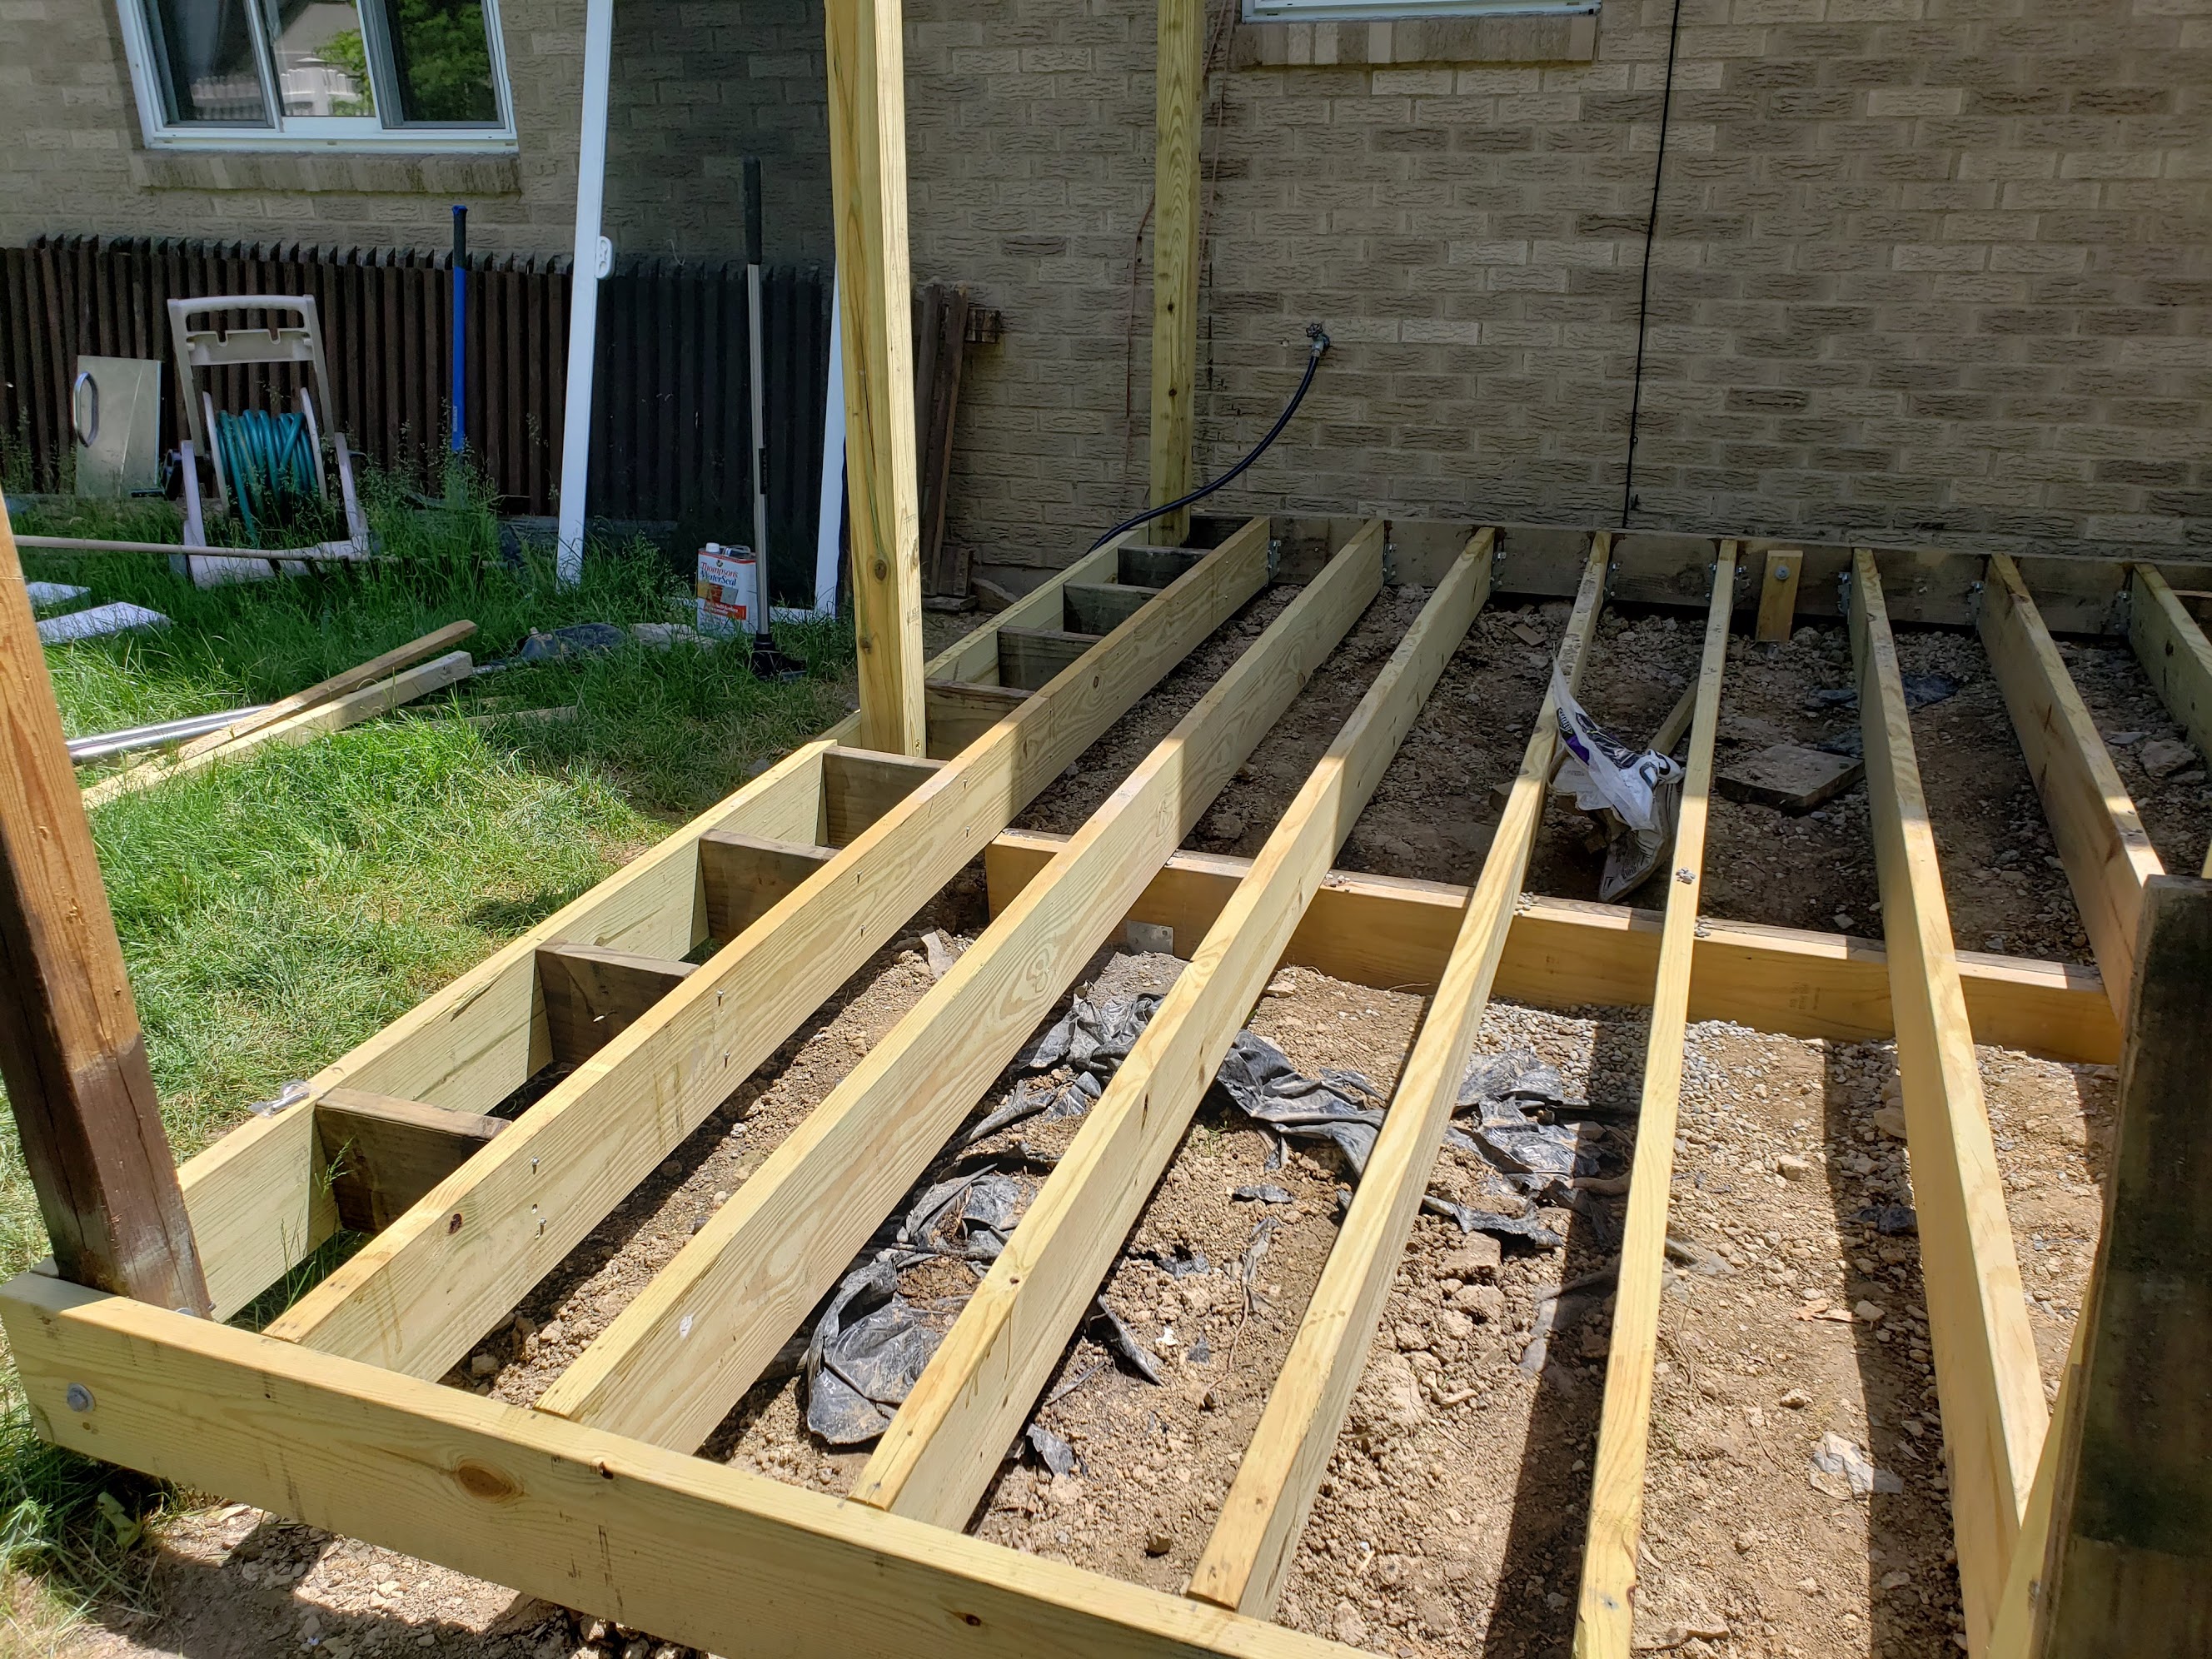
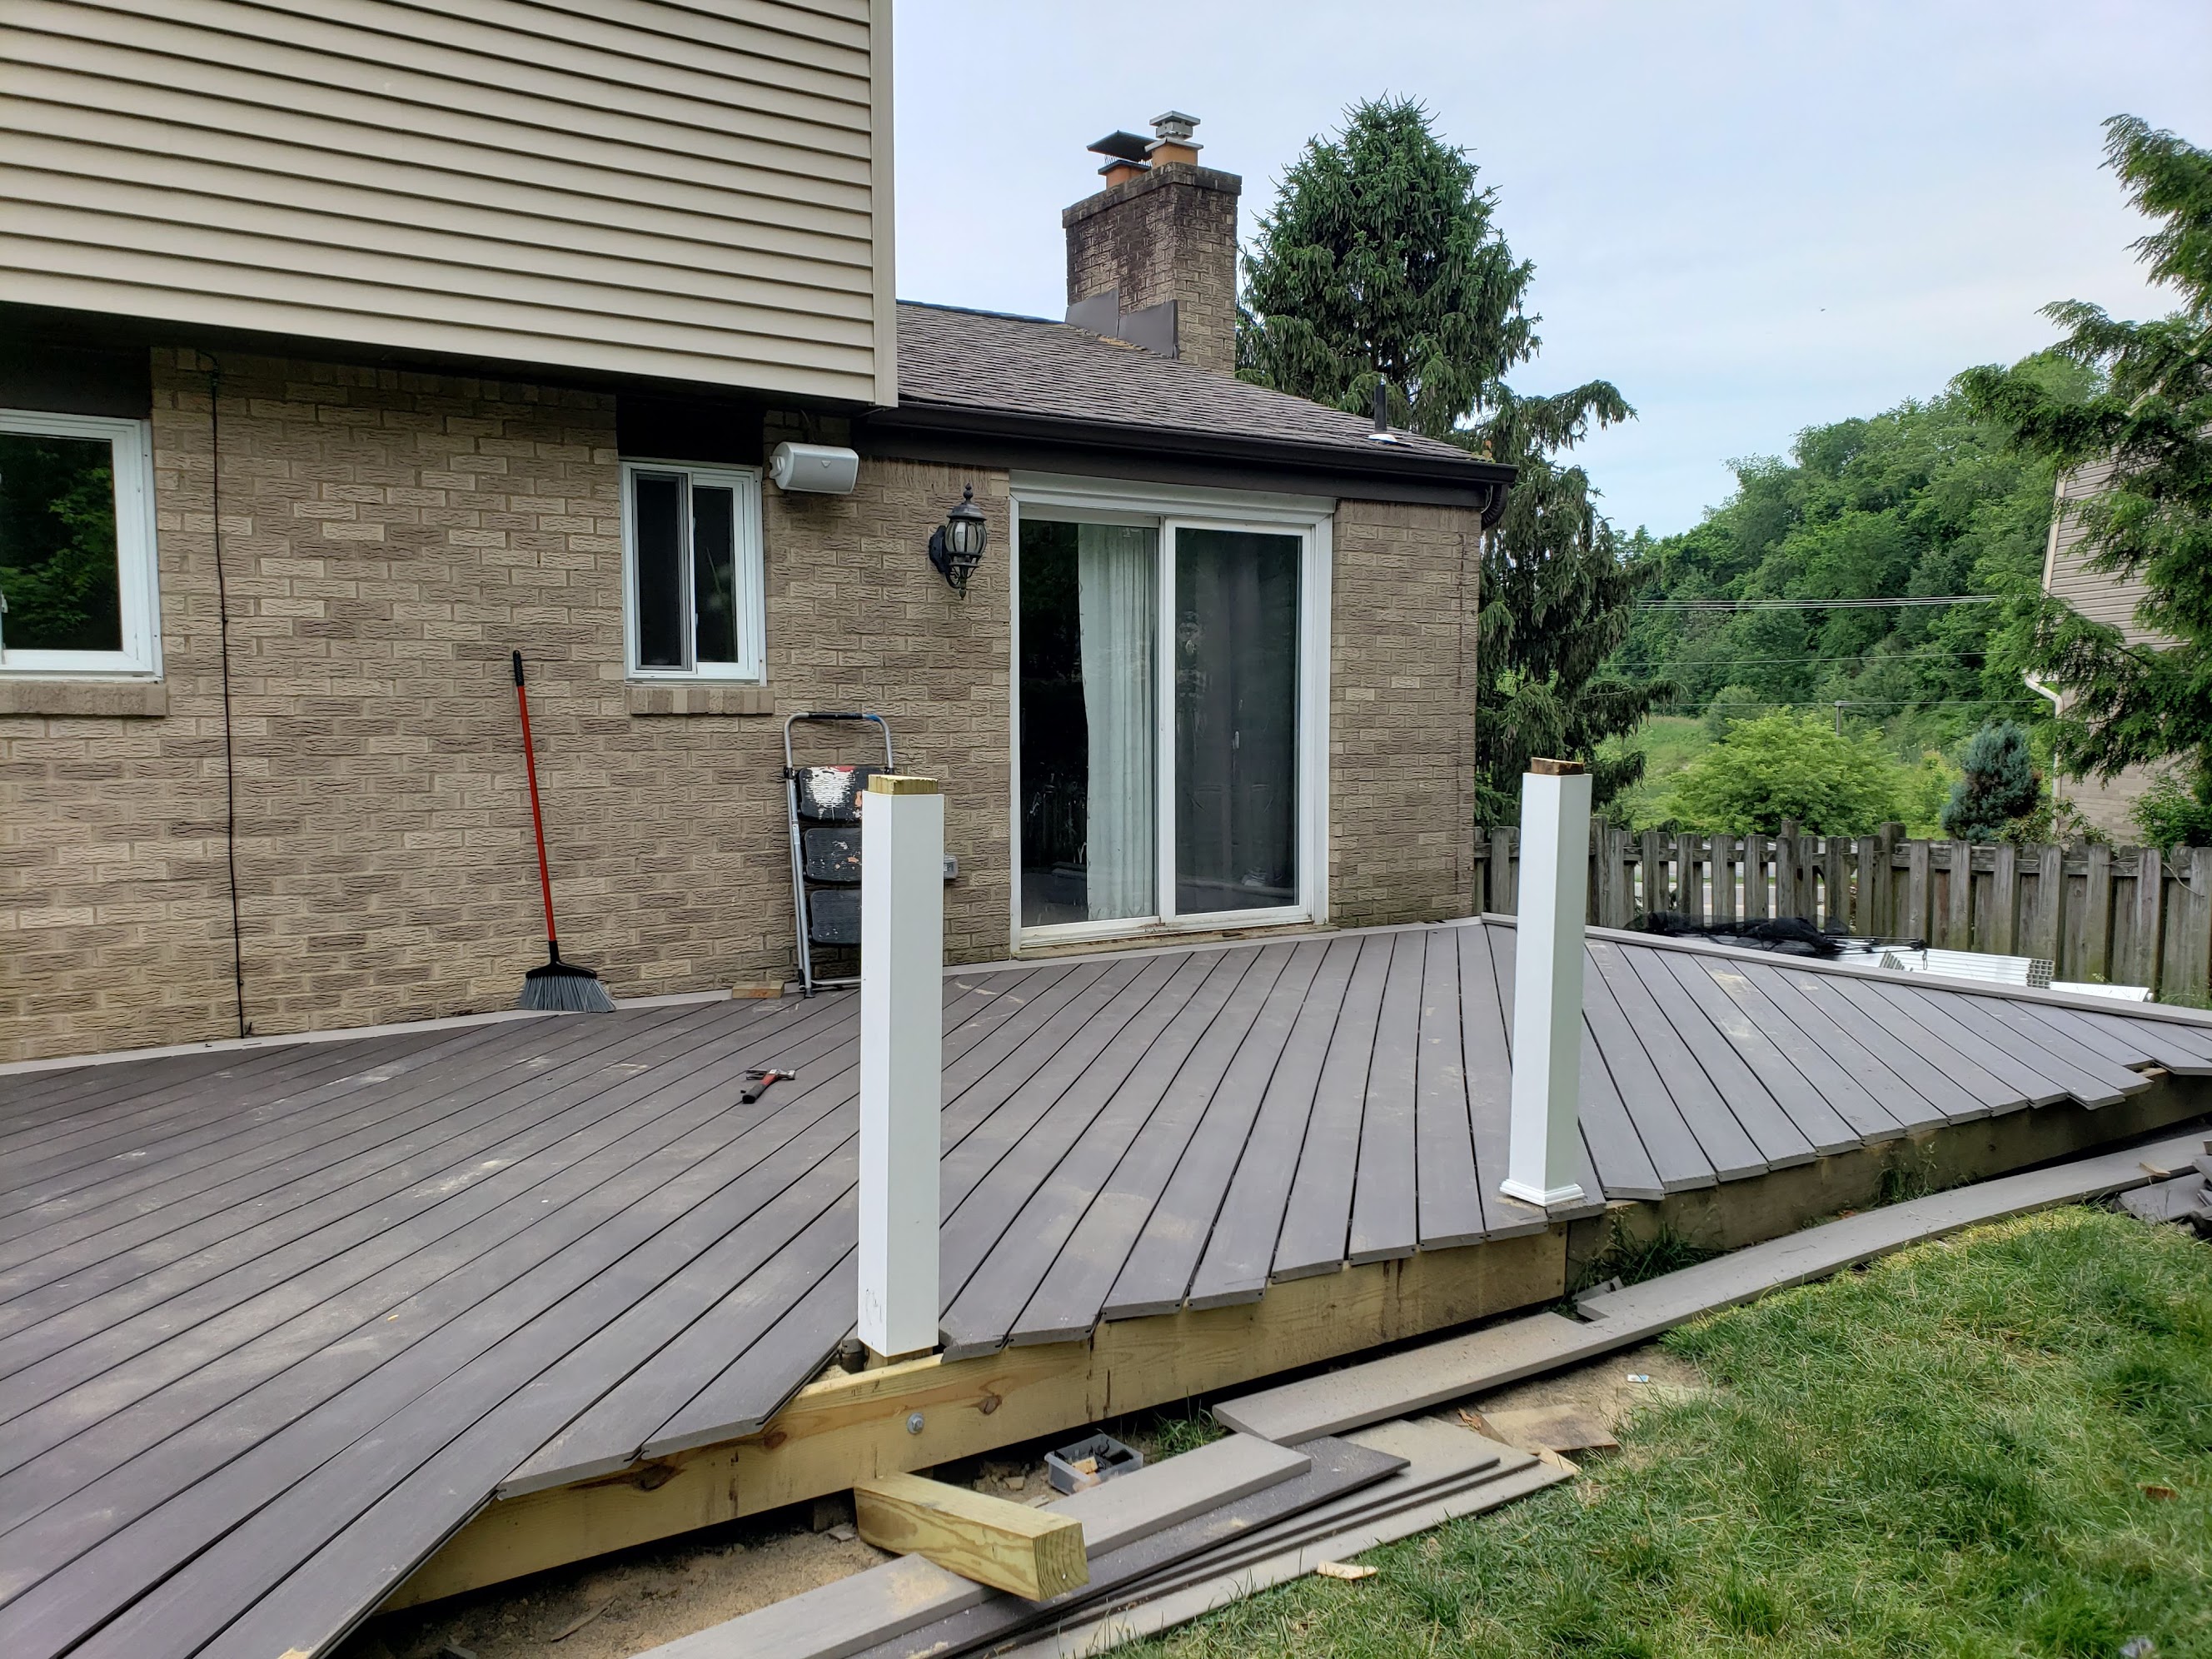
Framing
All new joists using doubled 2×10s held up by the same metal post-base system, two beams sistered together for a solid, stable platform. Spacing went from 16" on center down to 12" on center specifically to handle the diagonal decking load. Diagonal boards don't span the same way as straight runs, so tighter spacing was non-negotiable. The Azek boards sat in the yard waiting while the frame was dialed in.
 Frame taking shape, boards waiting in the yard
 Frame further along, fence posts set
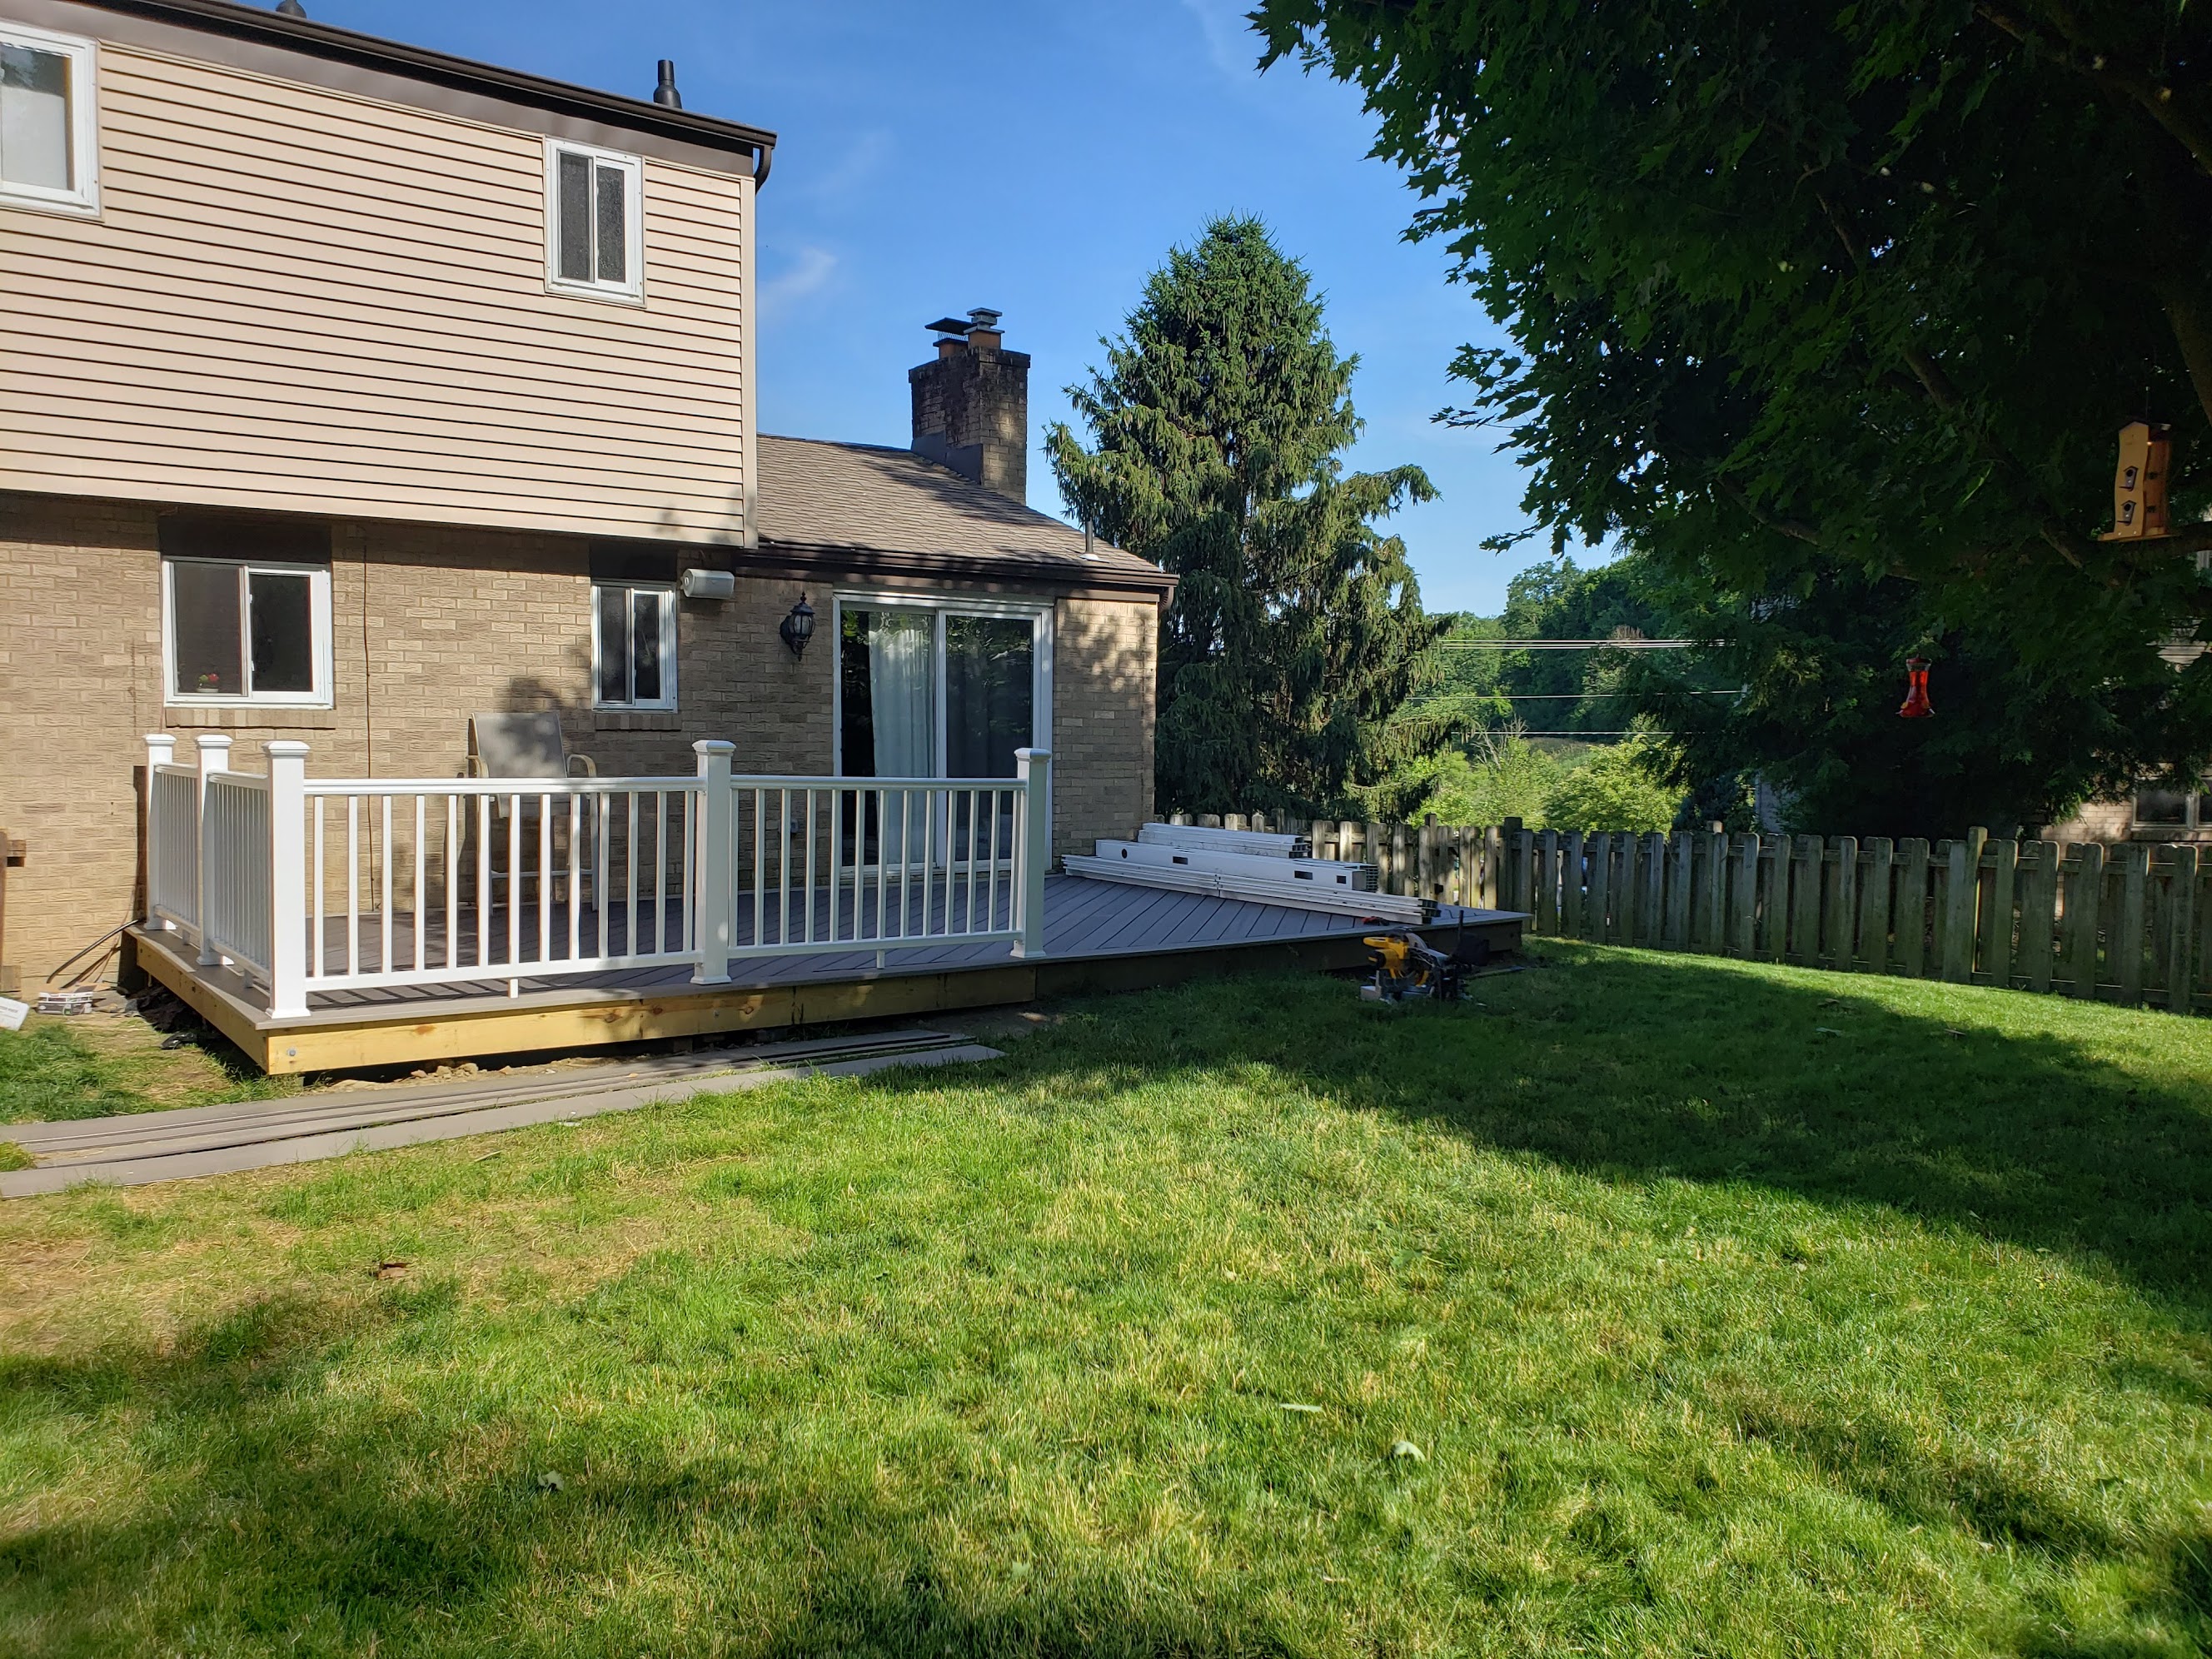
 Frame complete, ready to start laying boards
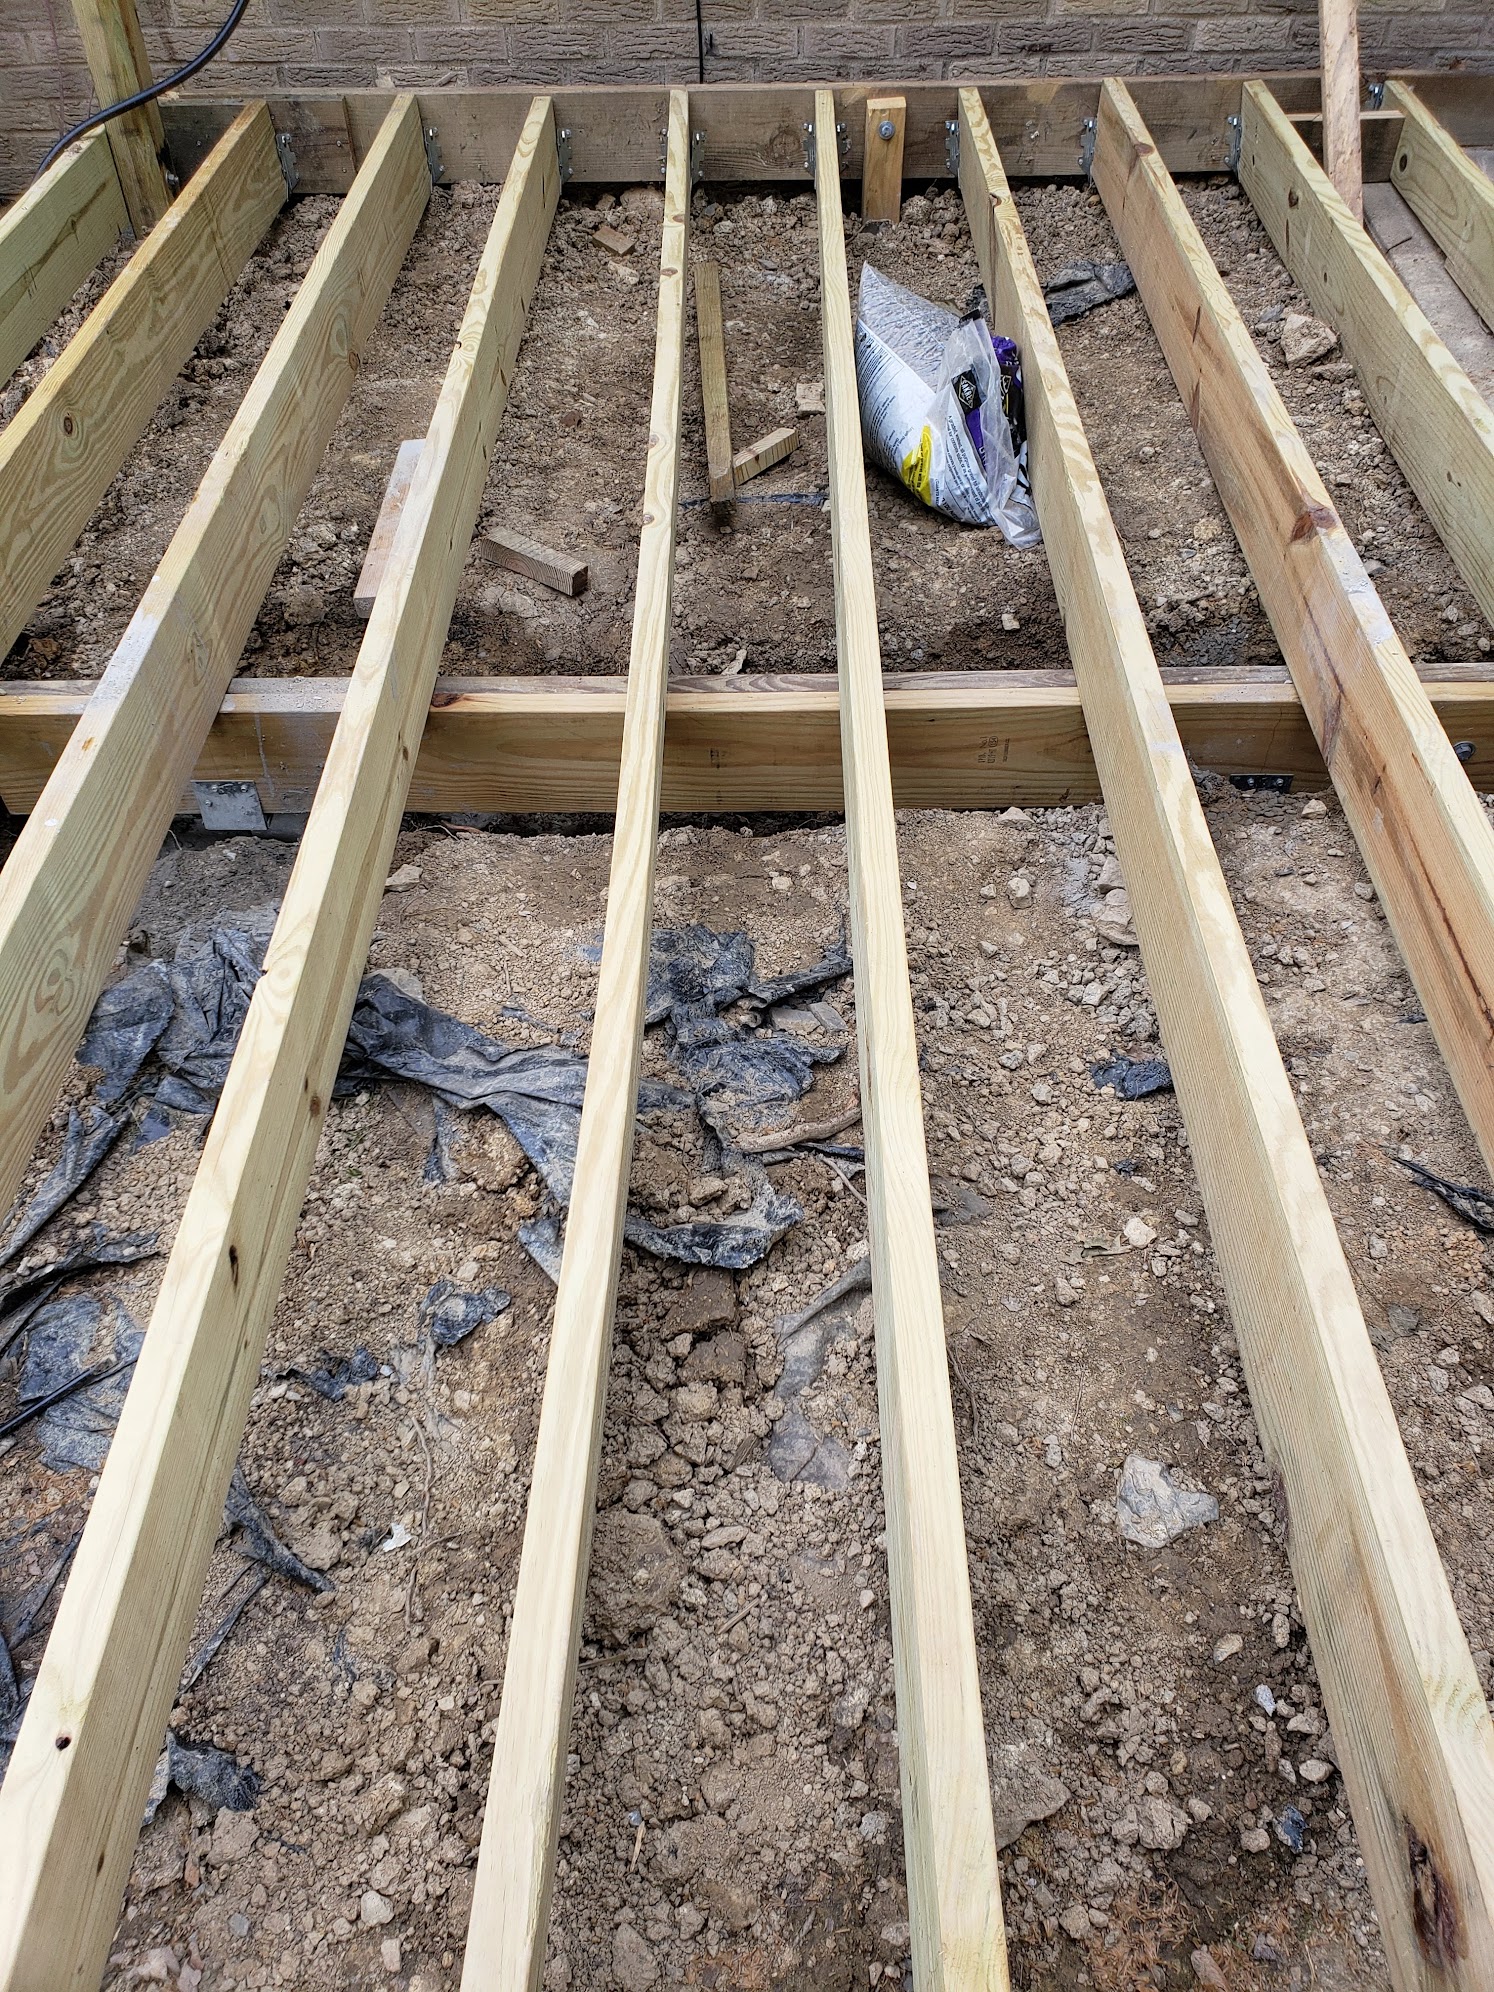 Looking down at the joist layout
 Frame from the corner, square and level
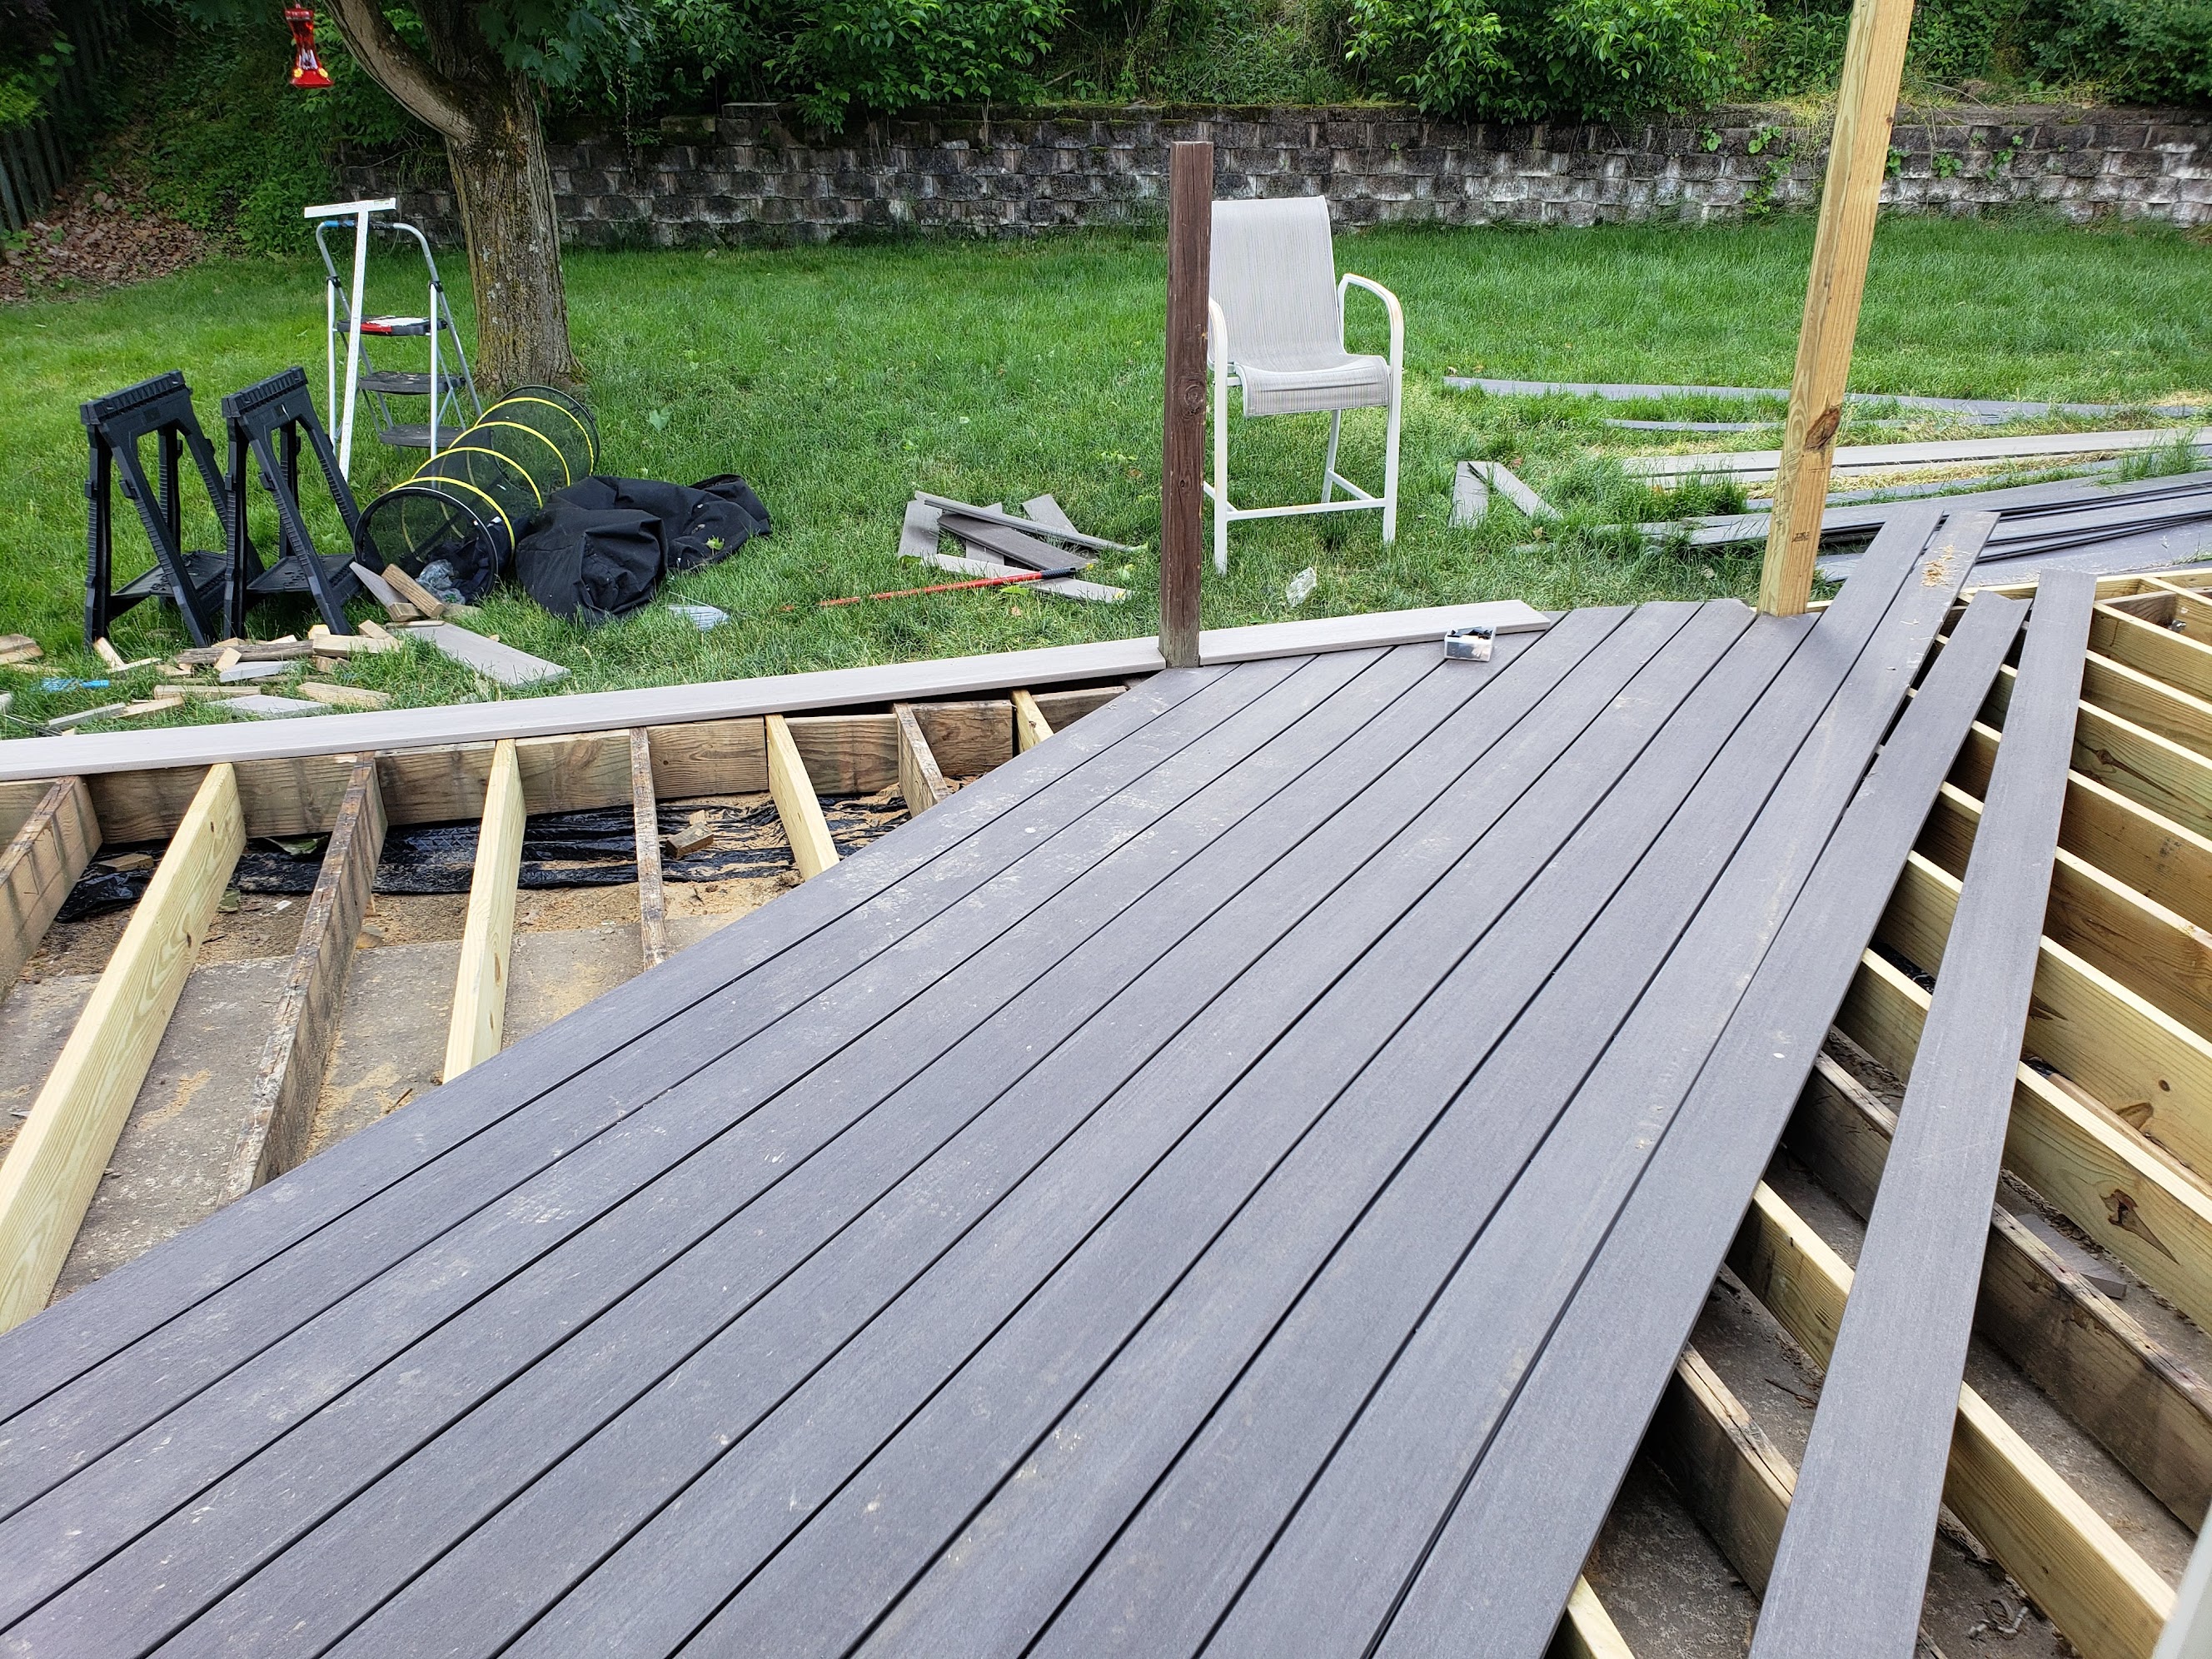
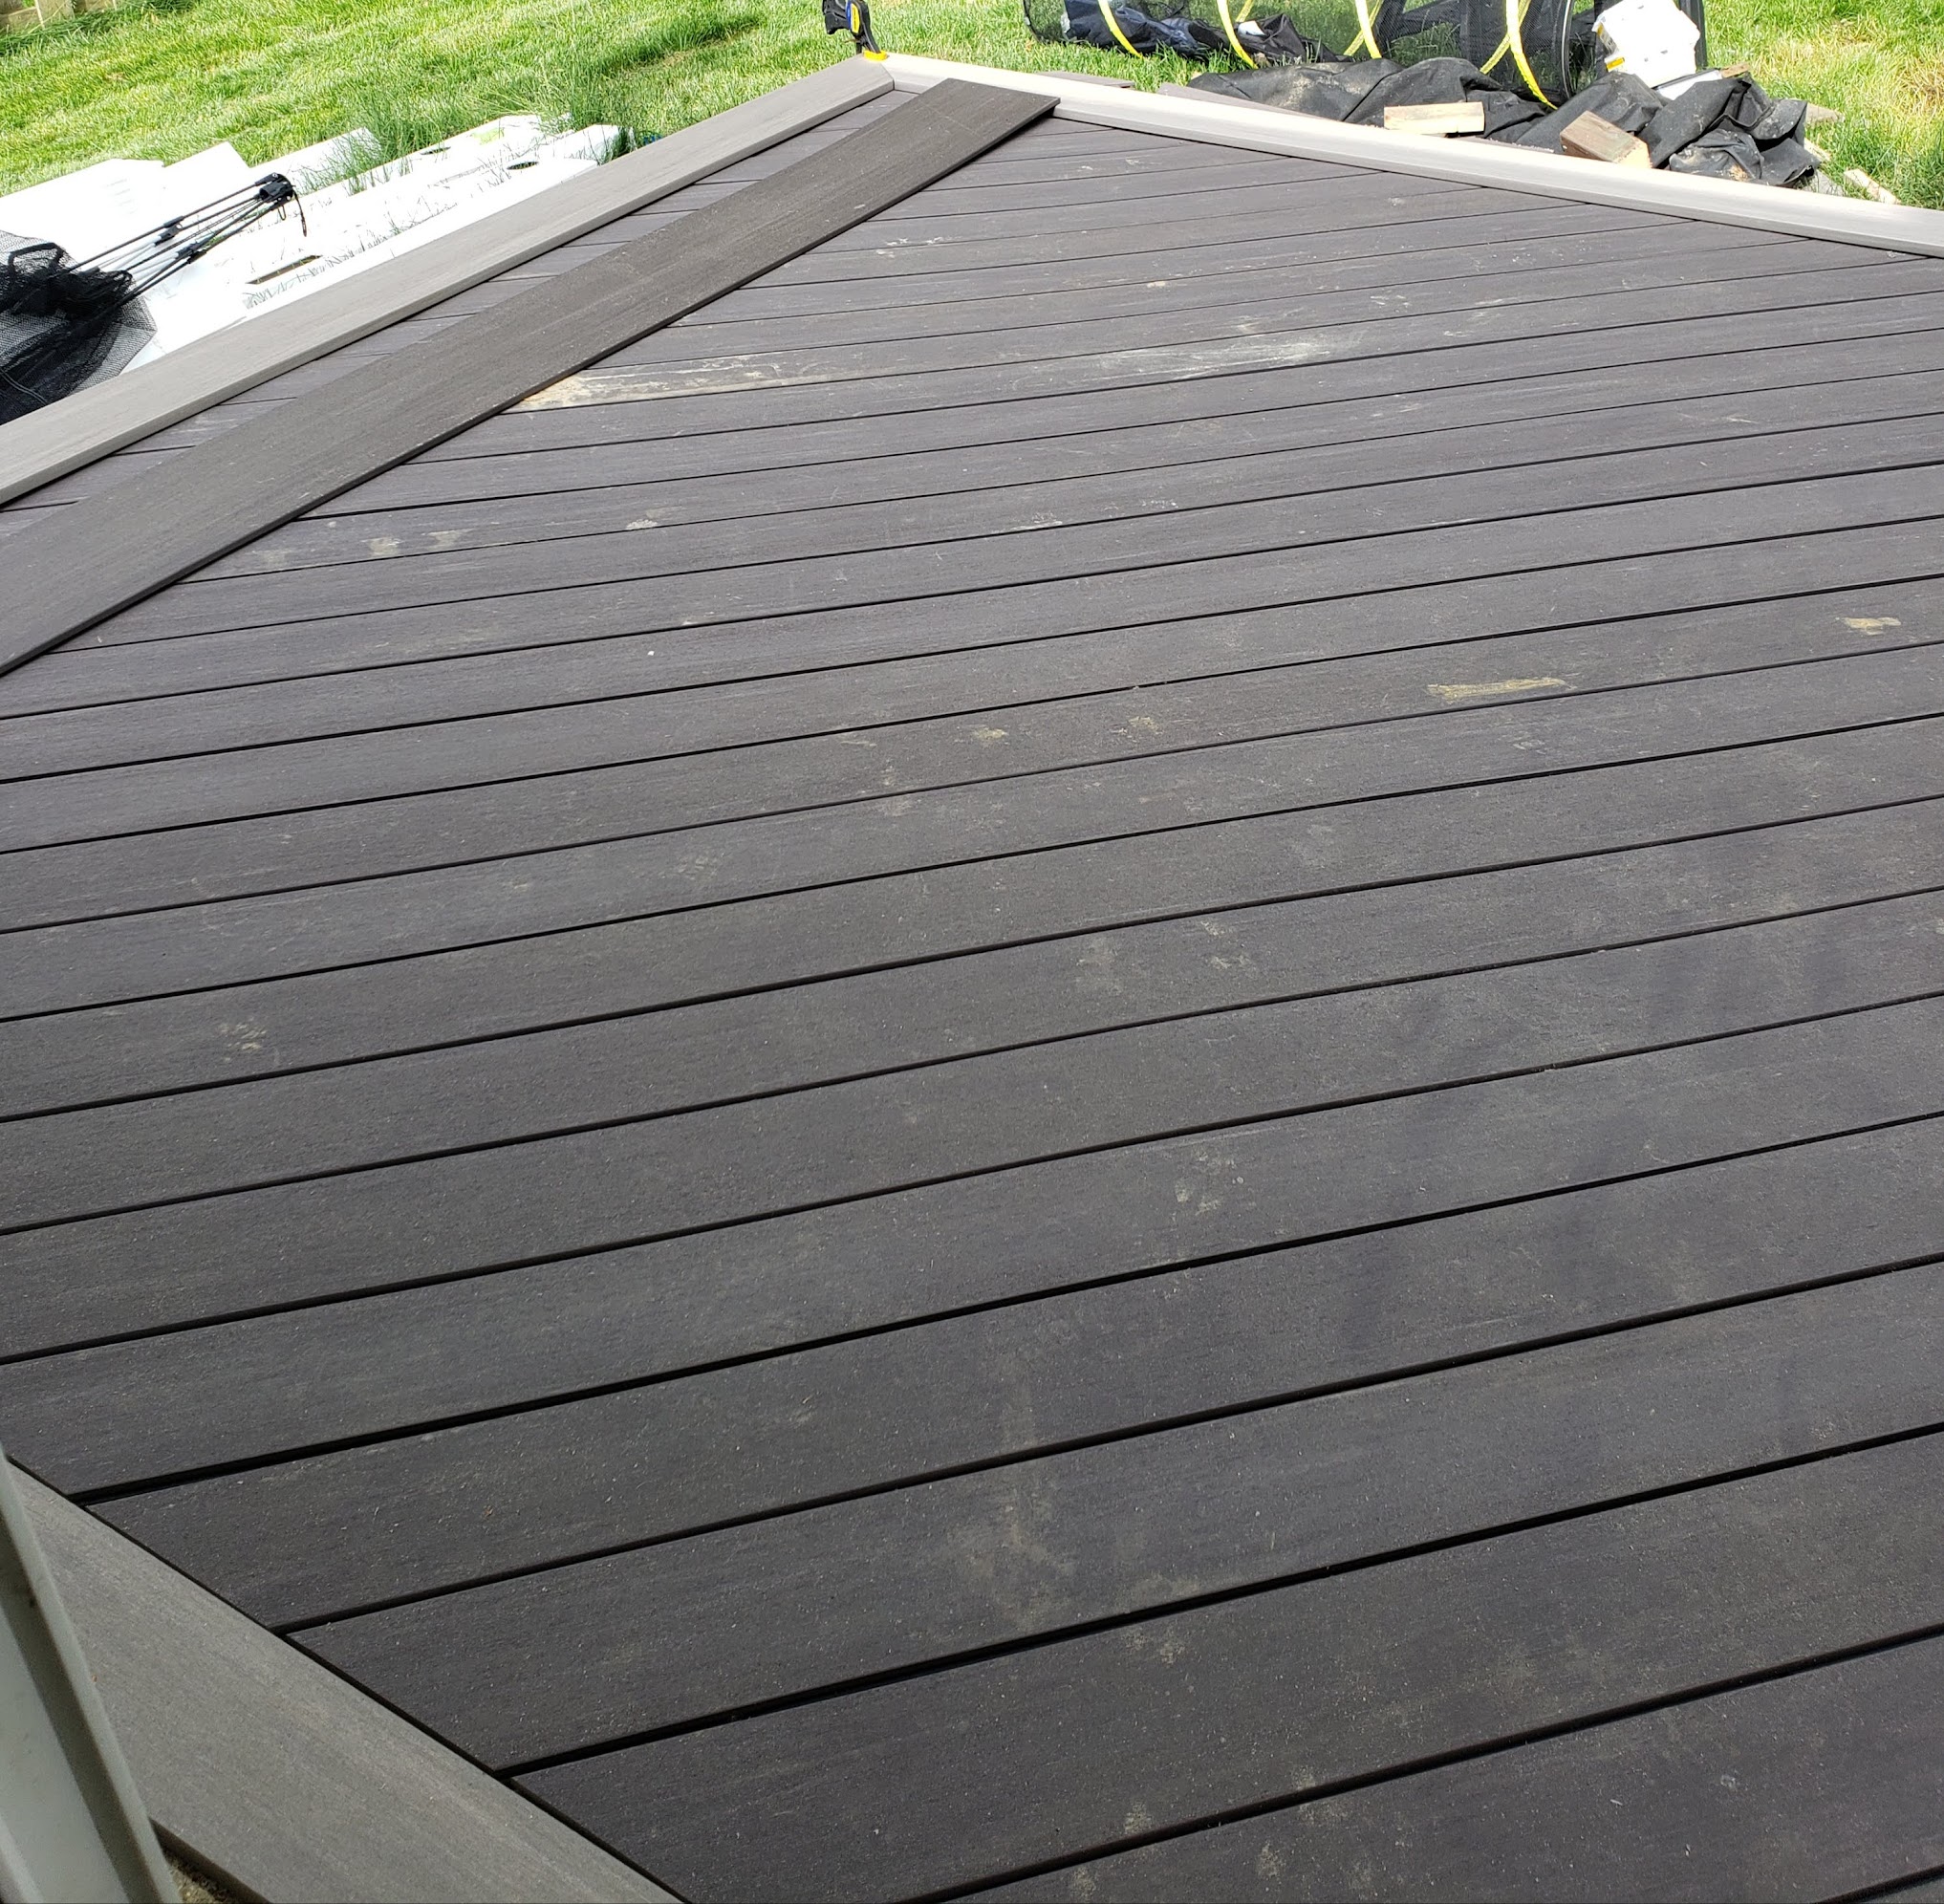
Diagonal Boards
Azek boards run at 45° from corner to corner, zero maintenance, won't rot, won't splinter. The longest boards cross the full width of the deck. The critical cut wasn't off the outer edge, it was the line where the diagonal field meets the picture frame border. Because the border is a contrasting light gray, that seam is always visible. One wavy cut and the whole design falls apart. Measured carefully, cut once. One of the posts got marked along the way: June 2019, Deck Building.
 First boards, establishing the angle
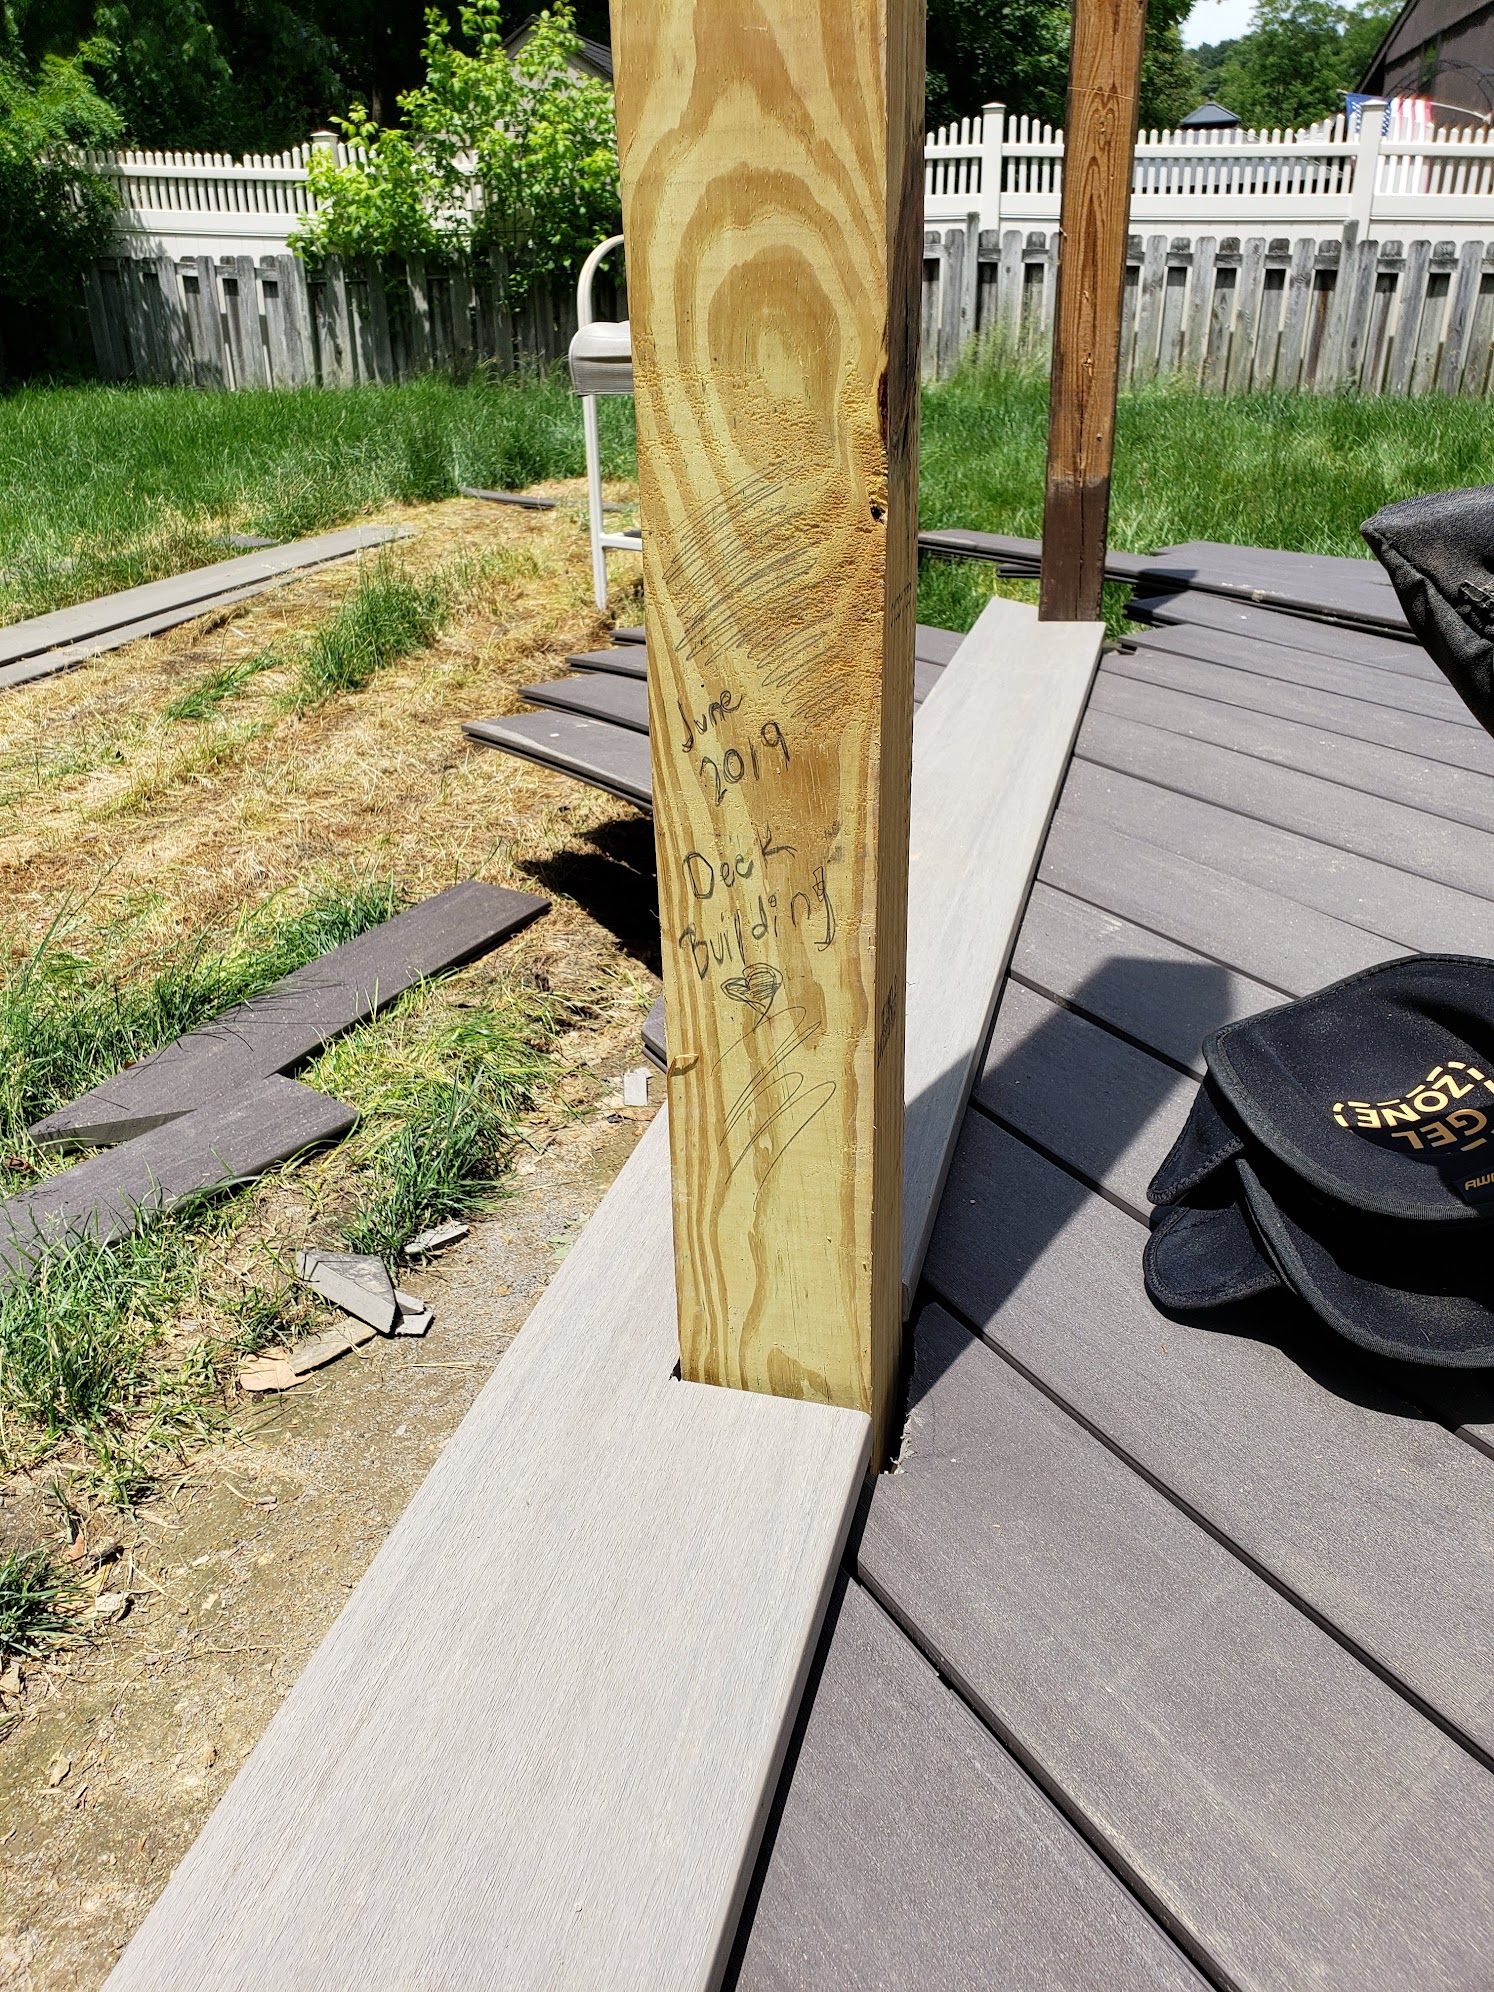 "June 2019, Deck Building", marked on the post
 Most of the field covered
 Looking across the diagonal surface
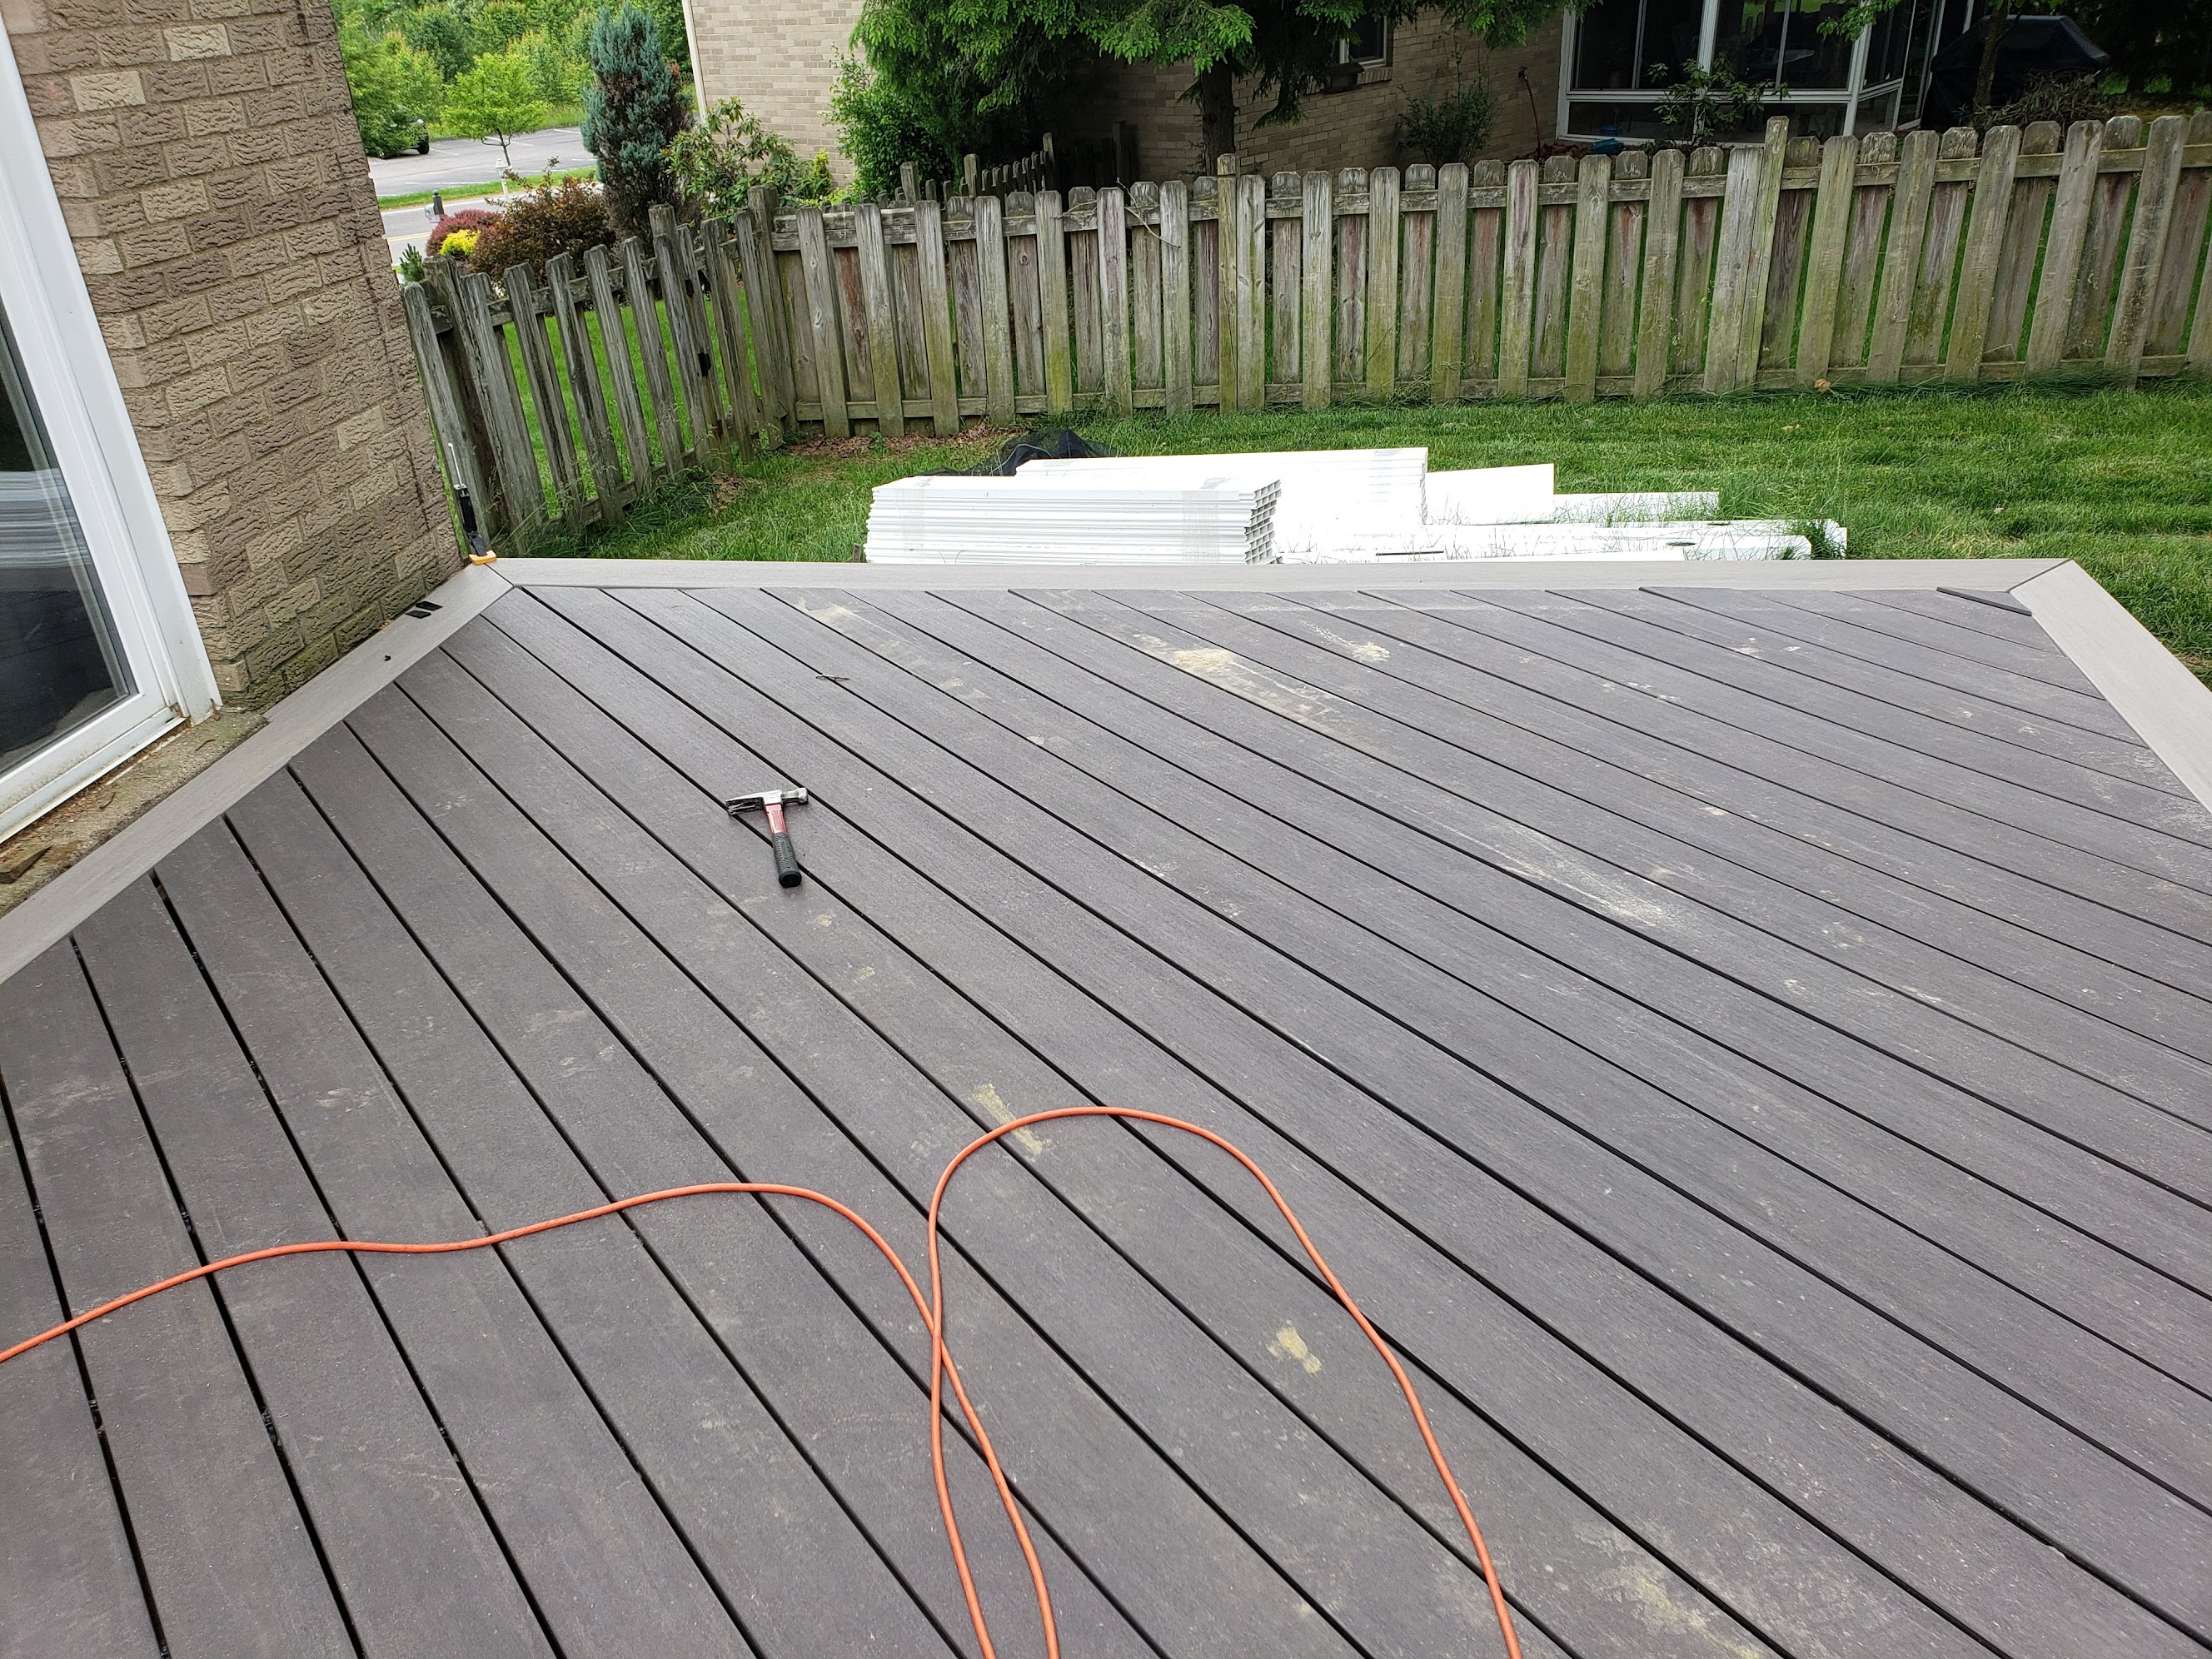
 Field nearly complete, border next
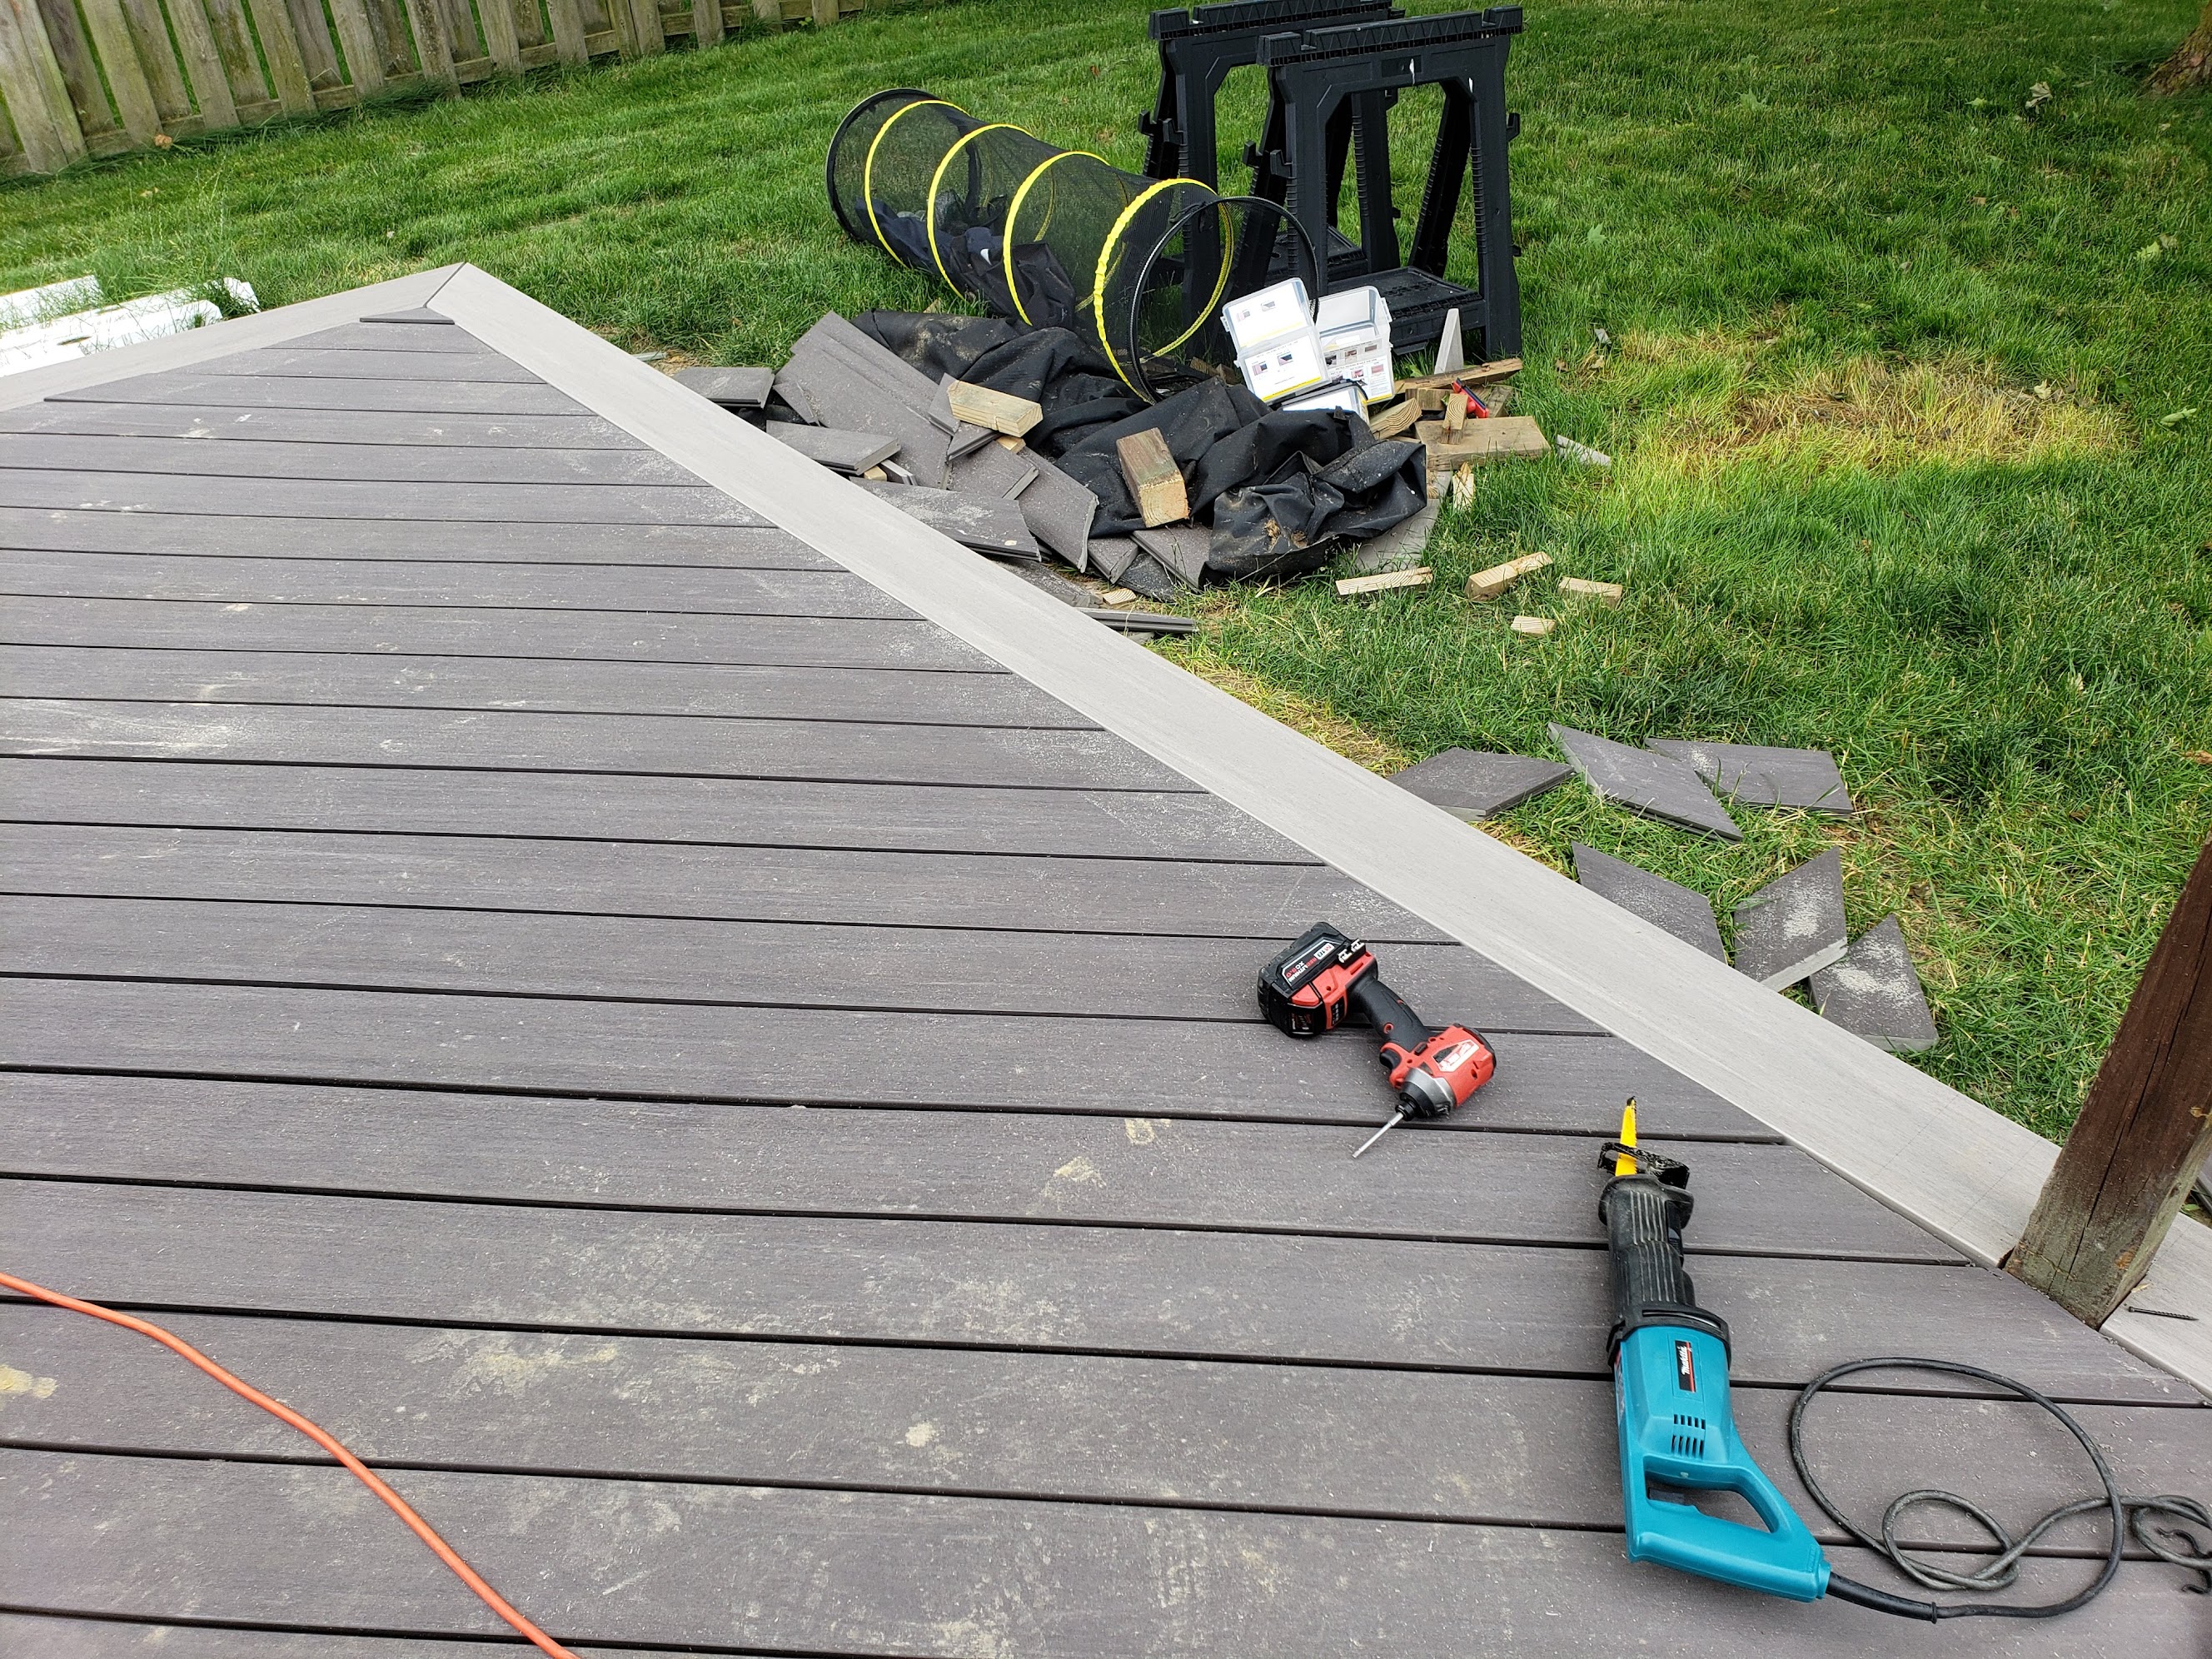
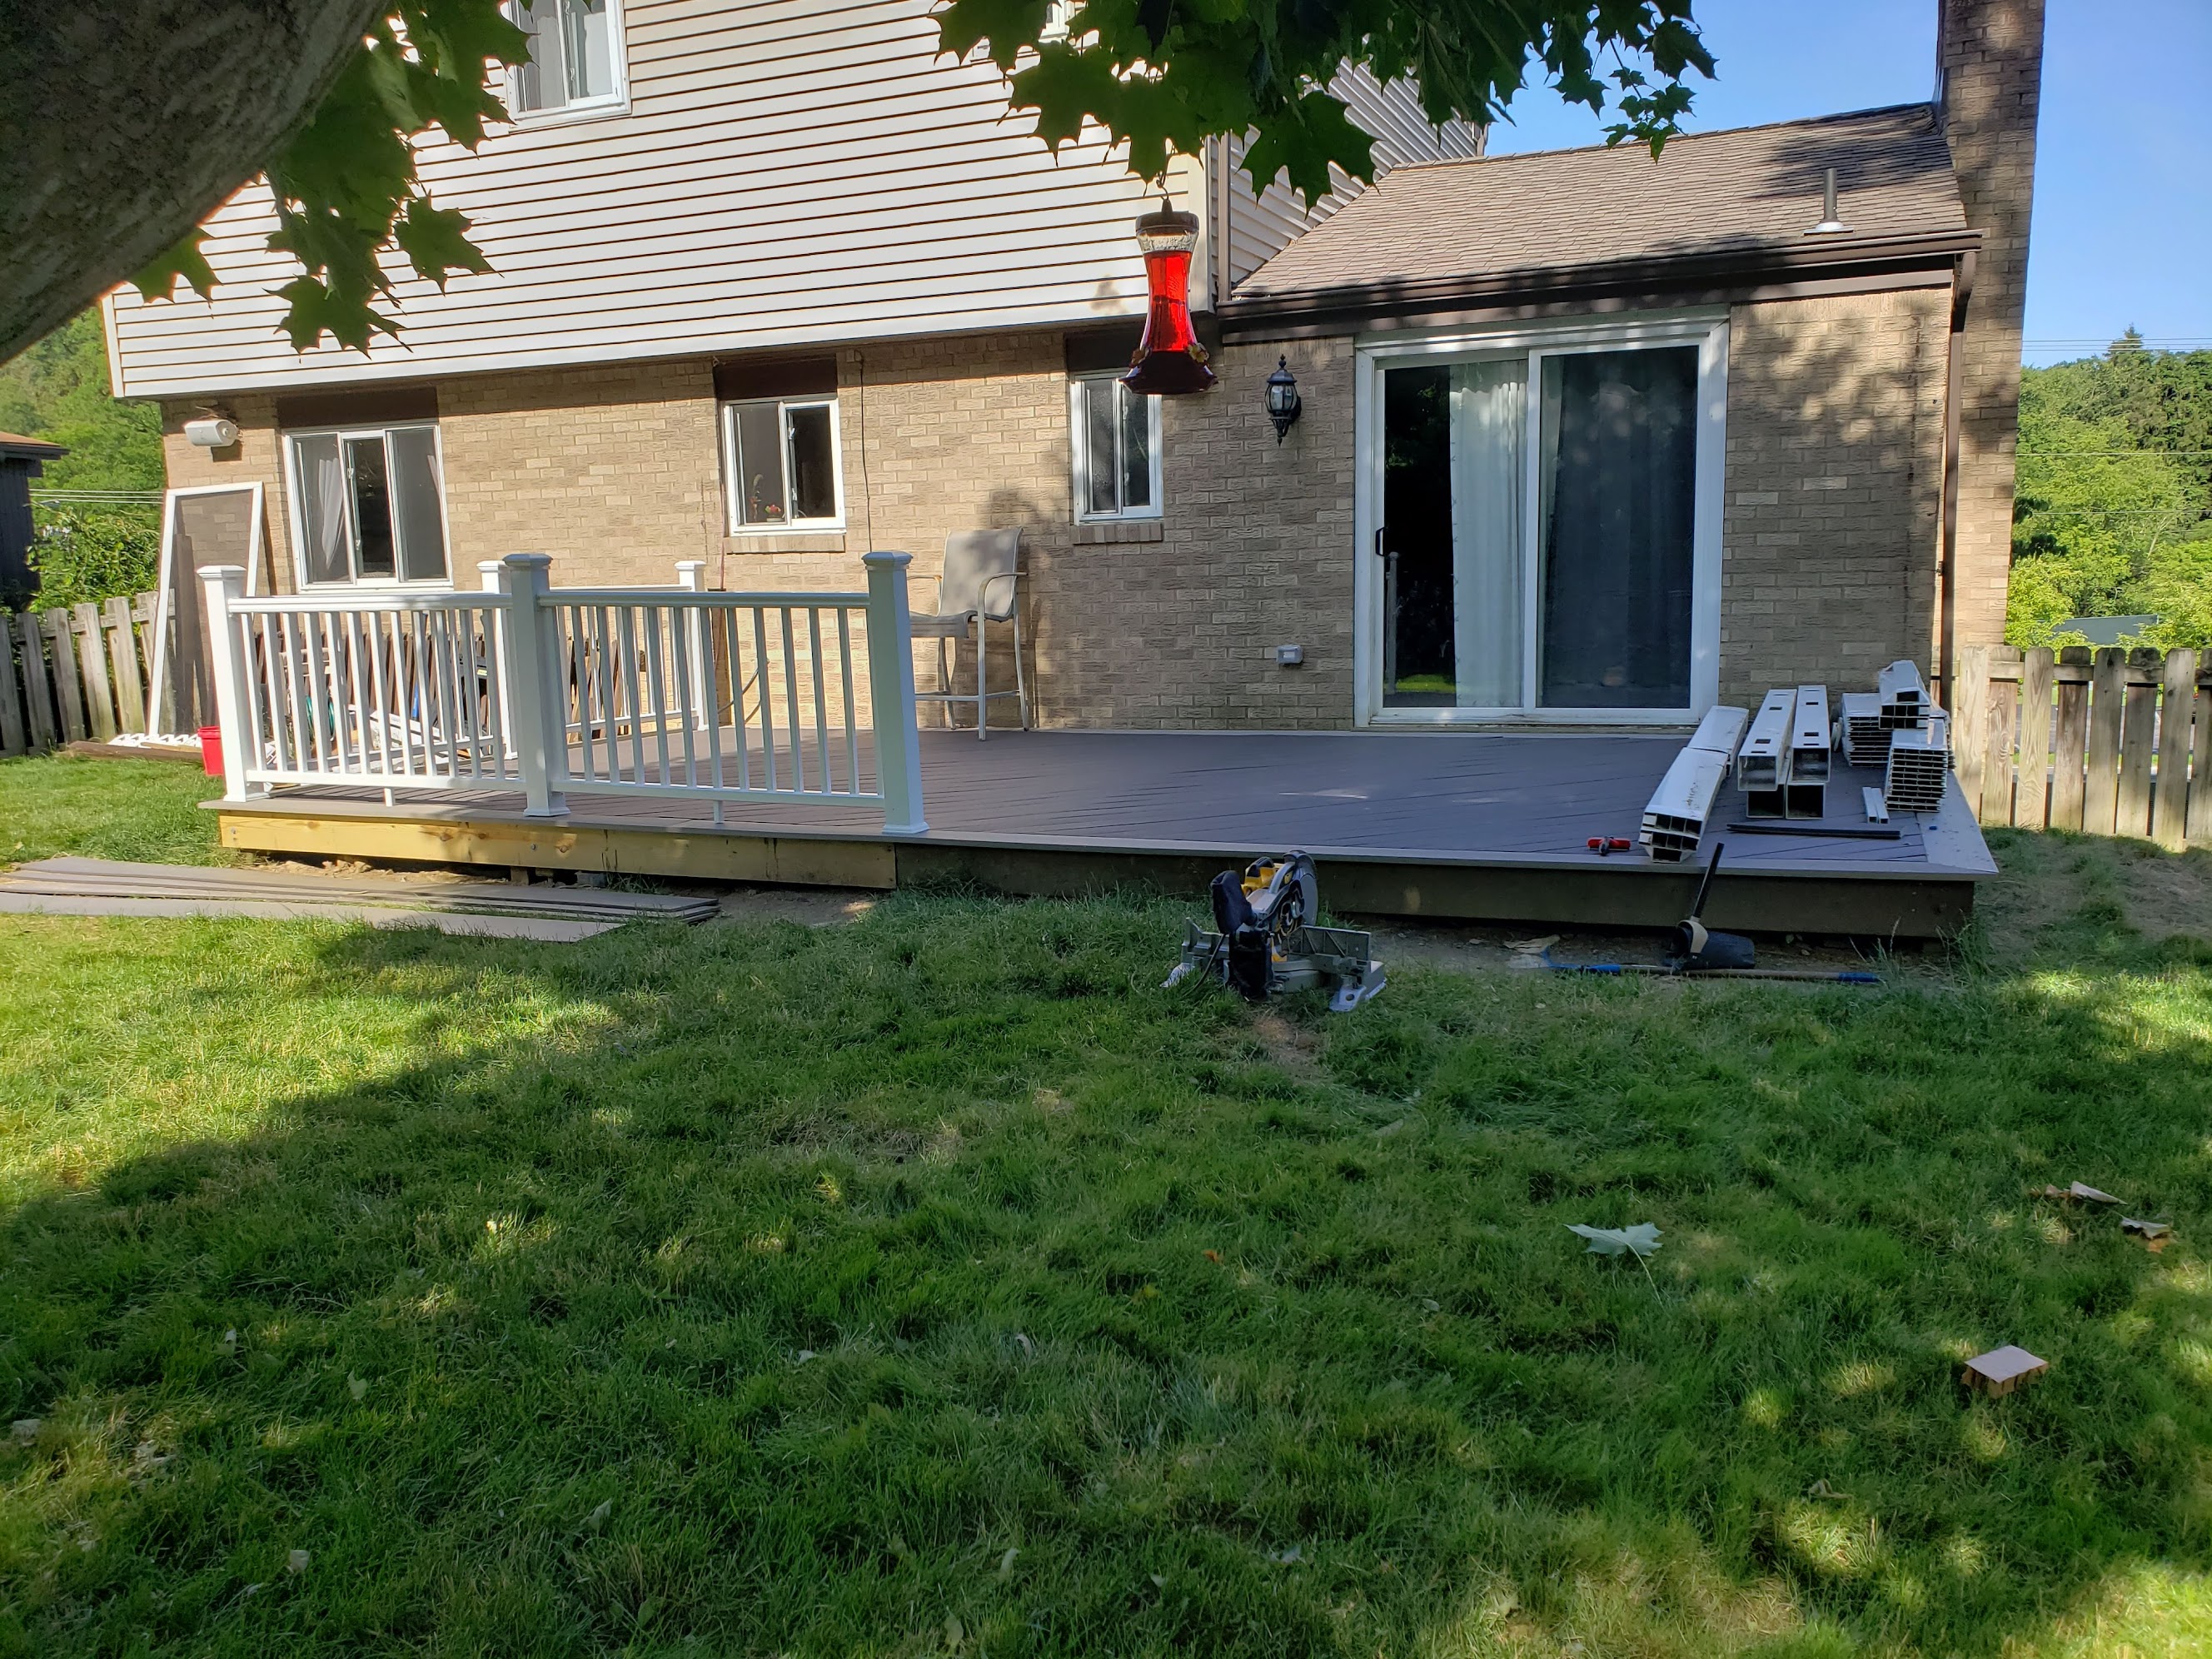
Picture Frame Border
The picture frame runs in a light gray Azek around the entire perimeter, a deliberate contrast to the darker diagonal field. That color difference is exactly what makes it look sharp, and exactly what makes the seam unforgiving. Every angled end cut from the diagonal boards terminates right at this border, so the line has to be clean. A fascia board in the same light gray was wrapped around the rim joist on all four sides to finish the look from the yard.
 Border board going in along the edge
 Border complete, fence panels staged and waiting
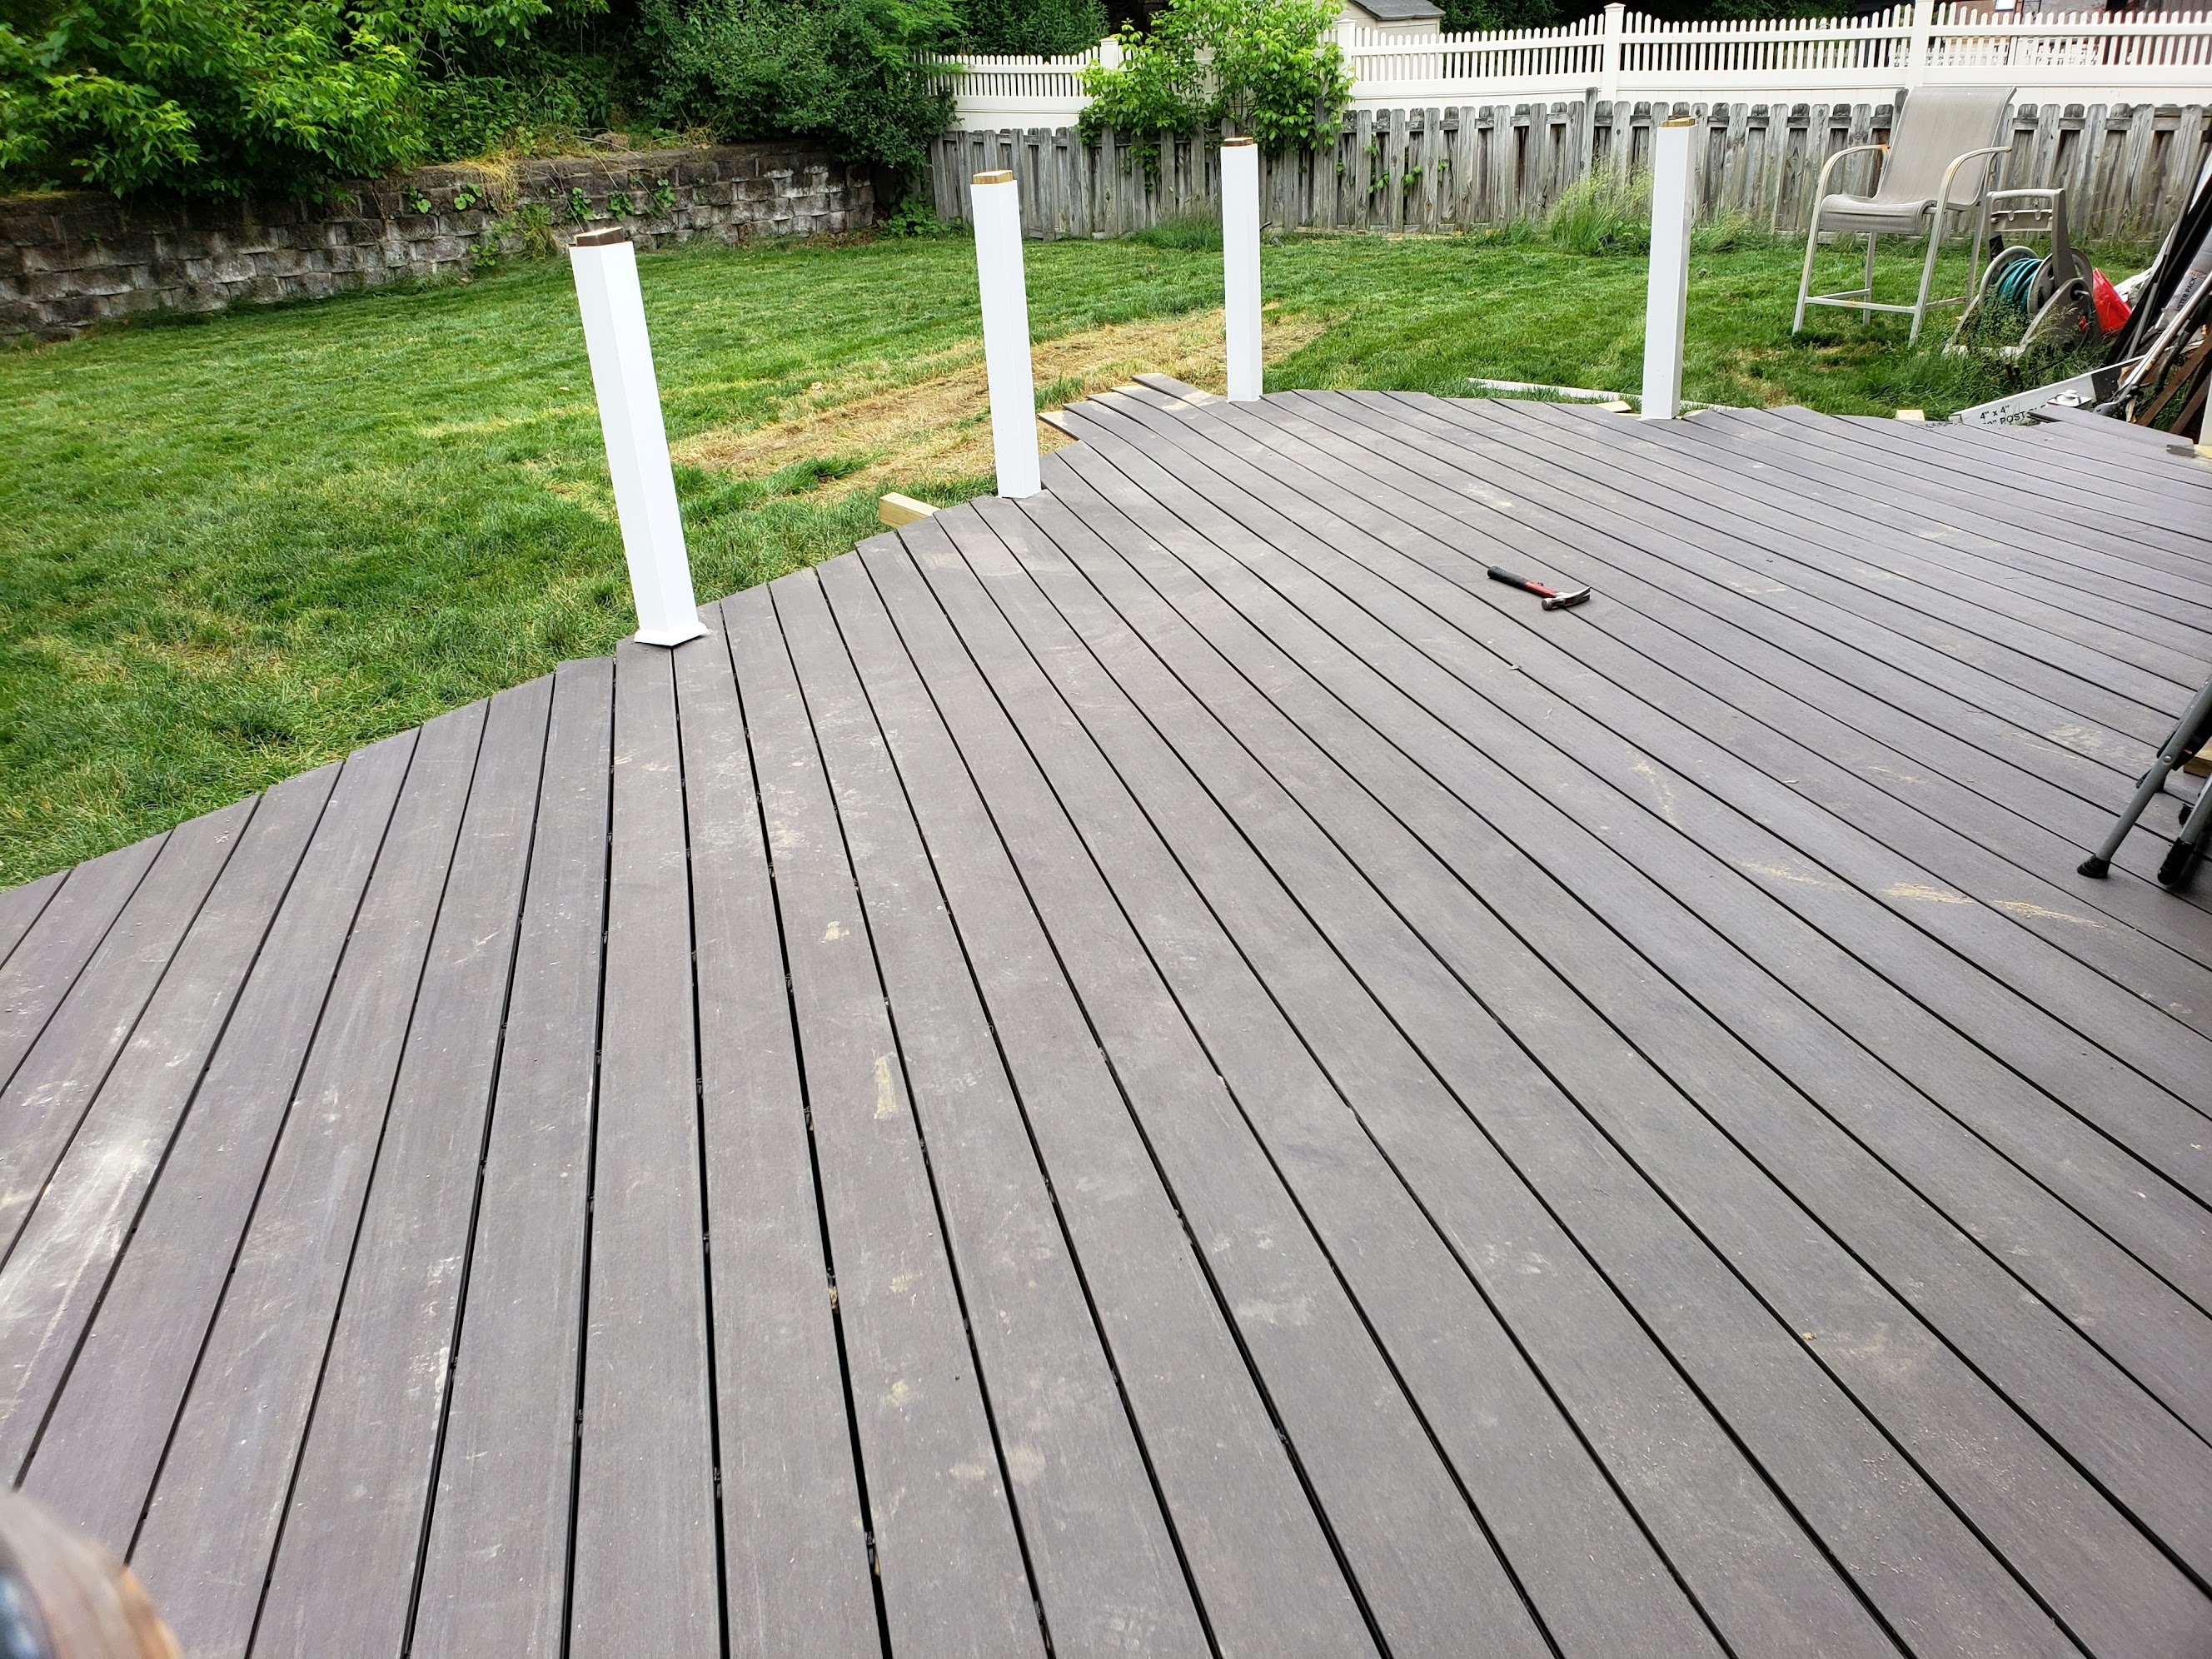
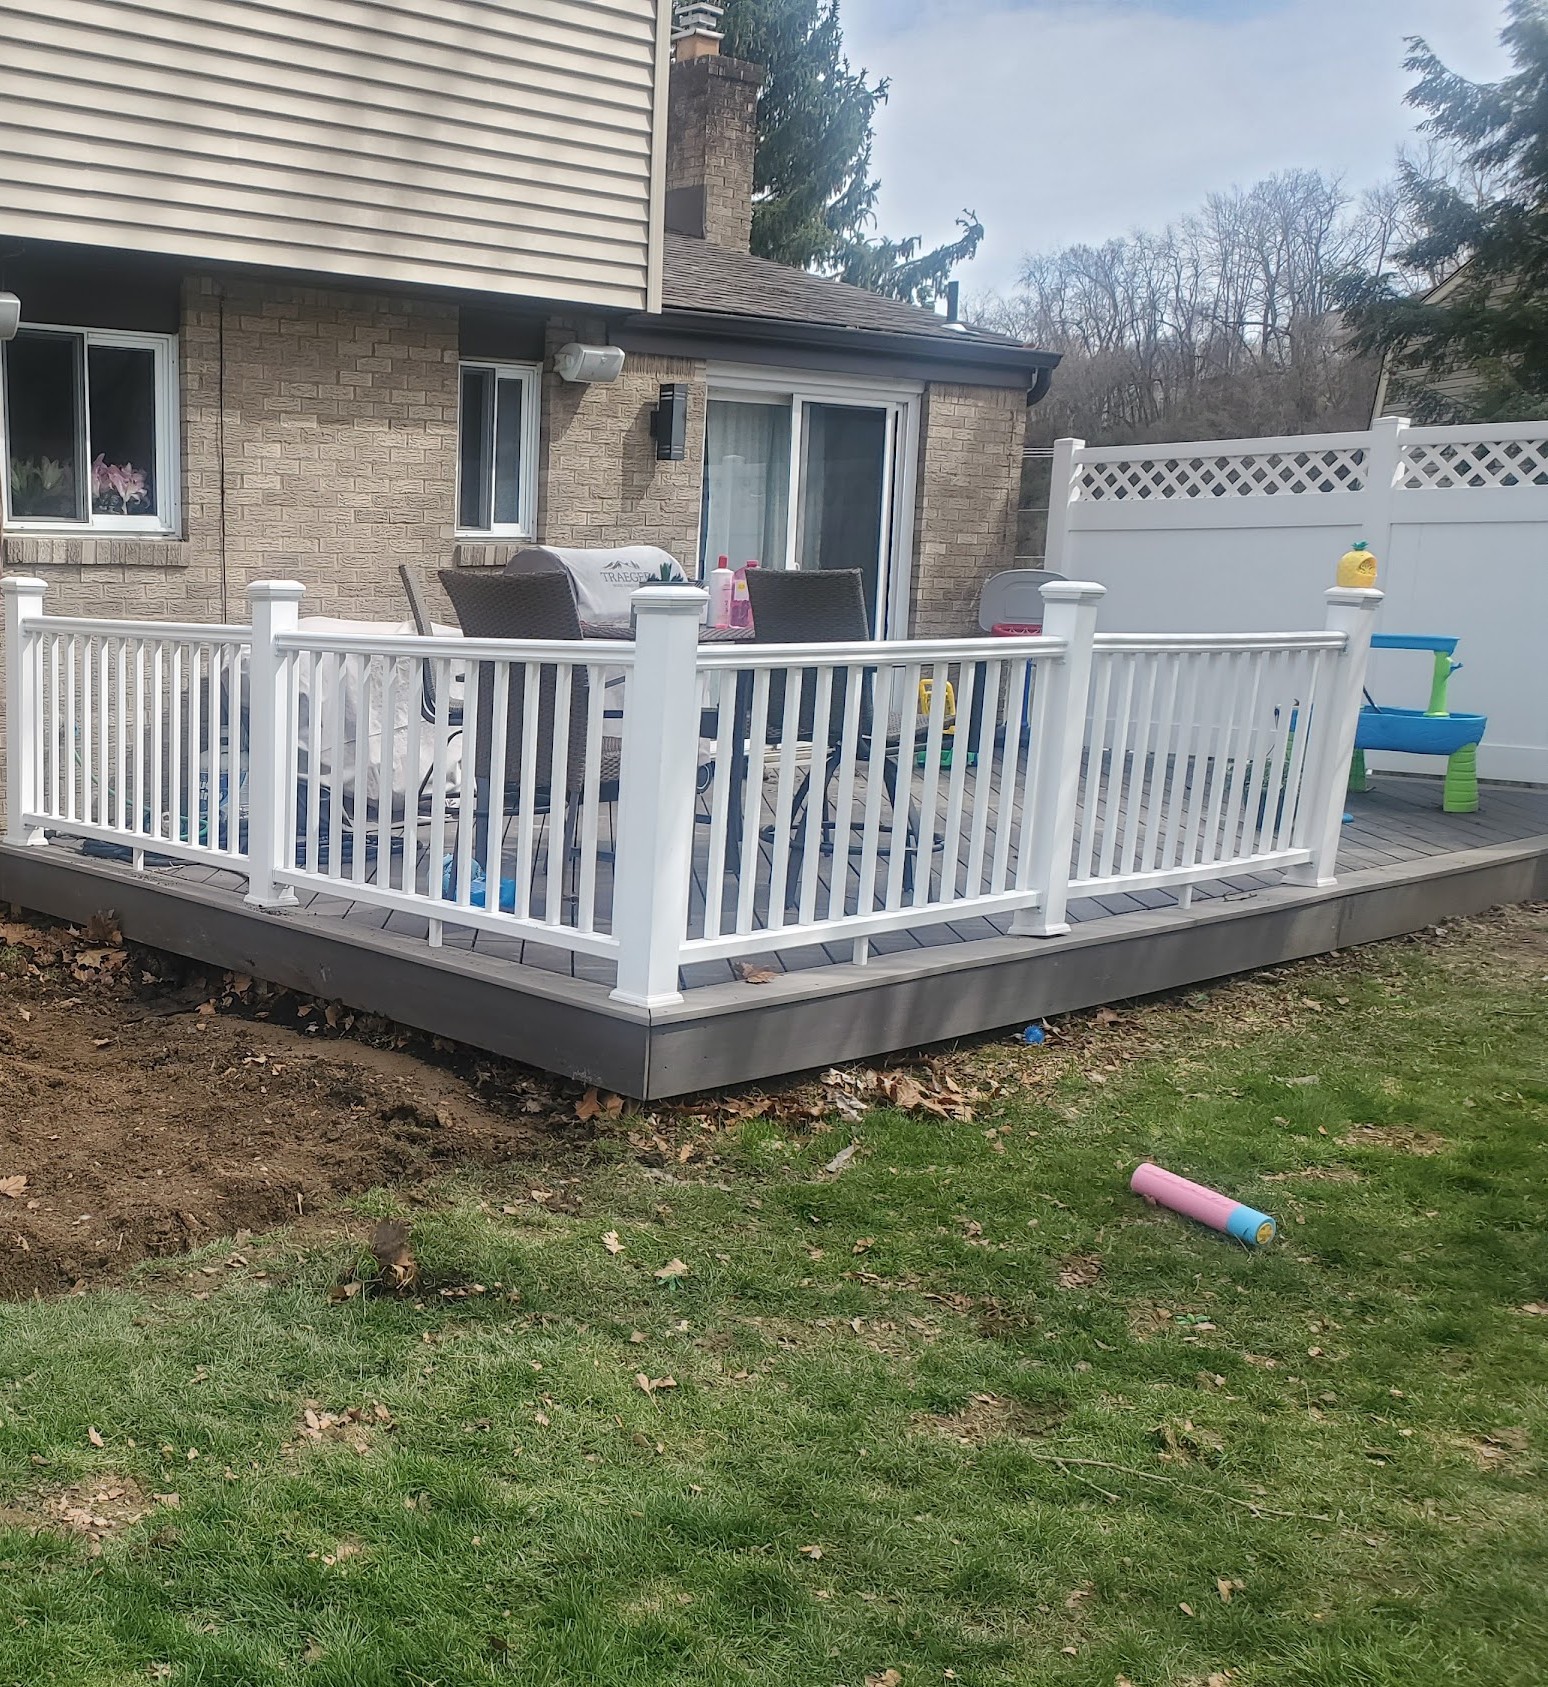
Railing & Lighting
White vinyl railing panels installed section by section around the perimeter. Wiring for the built-in post cap lights was run through the hollow railing posts before the panels were locked in, once it's assembled there's no going back.
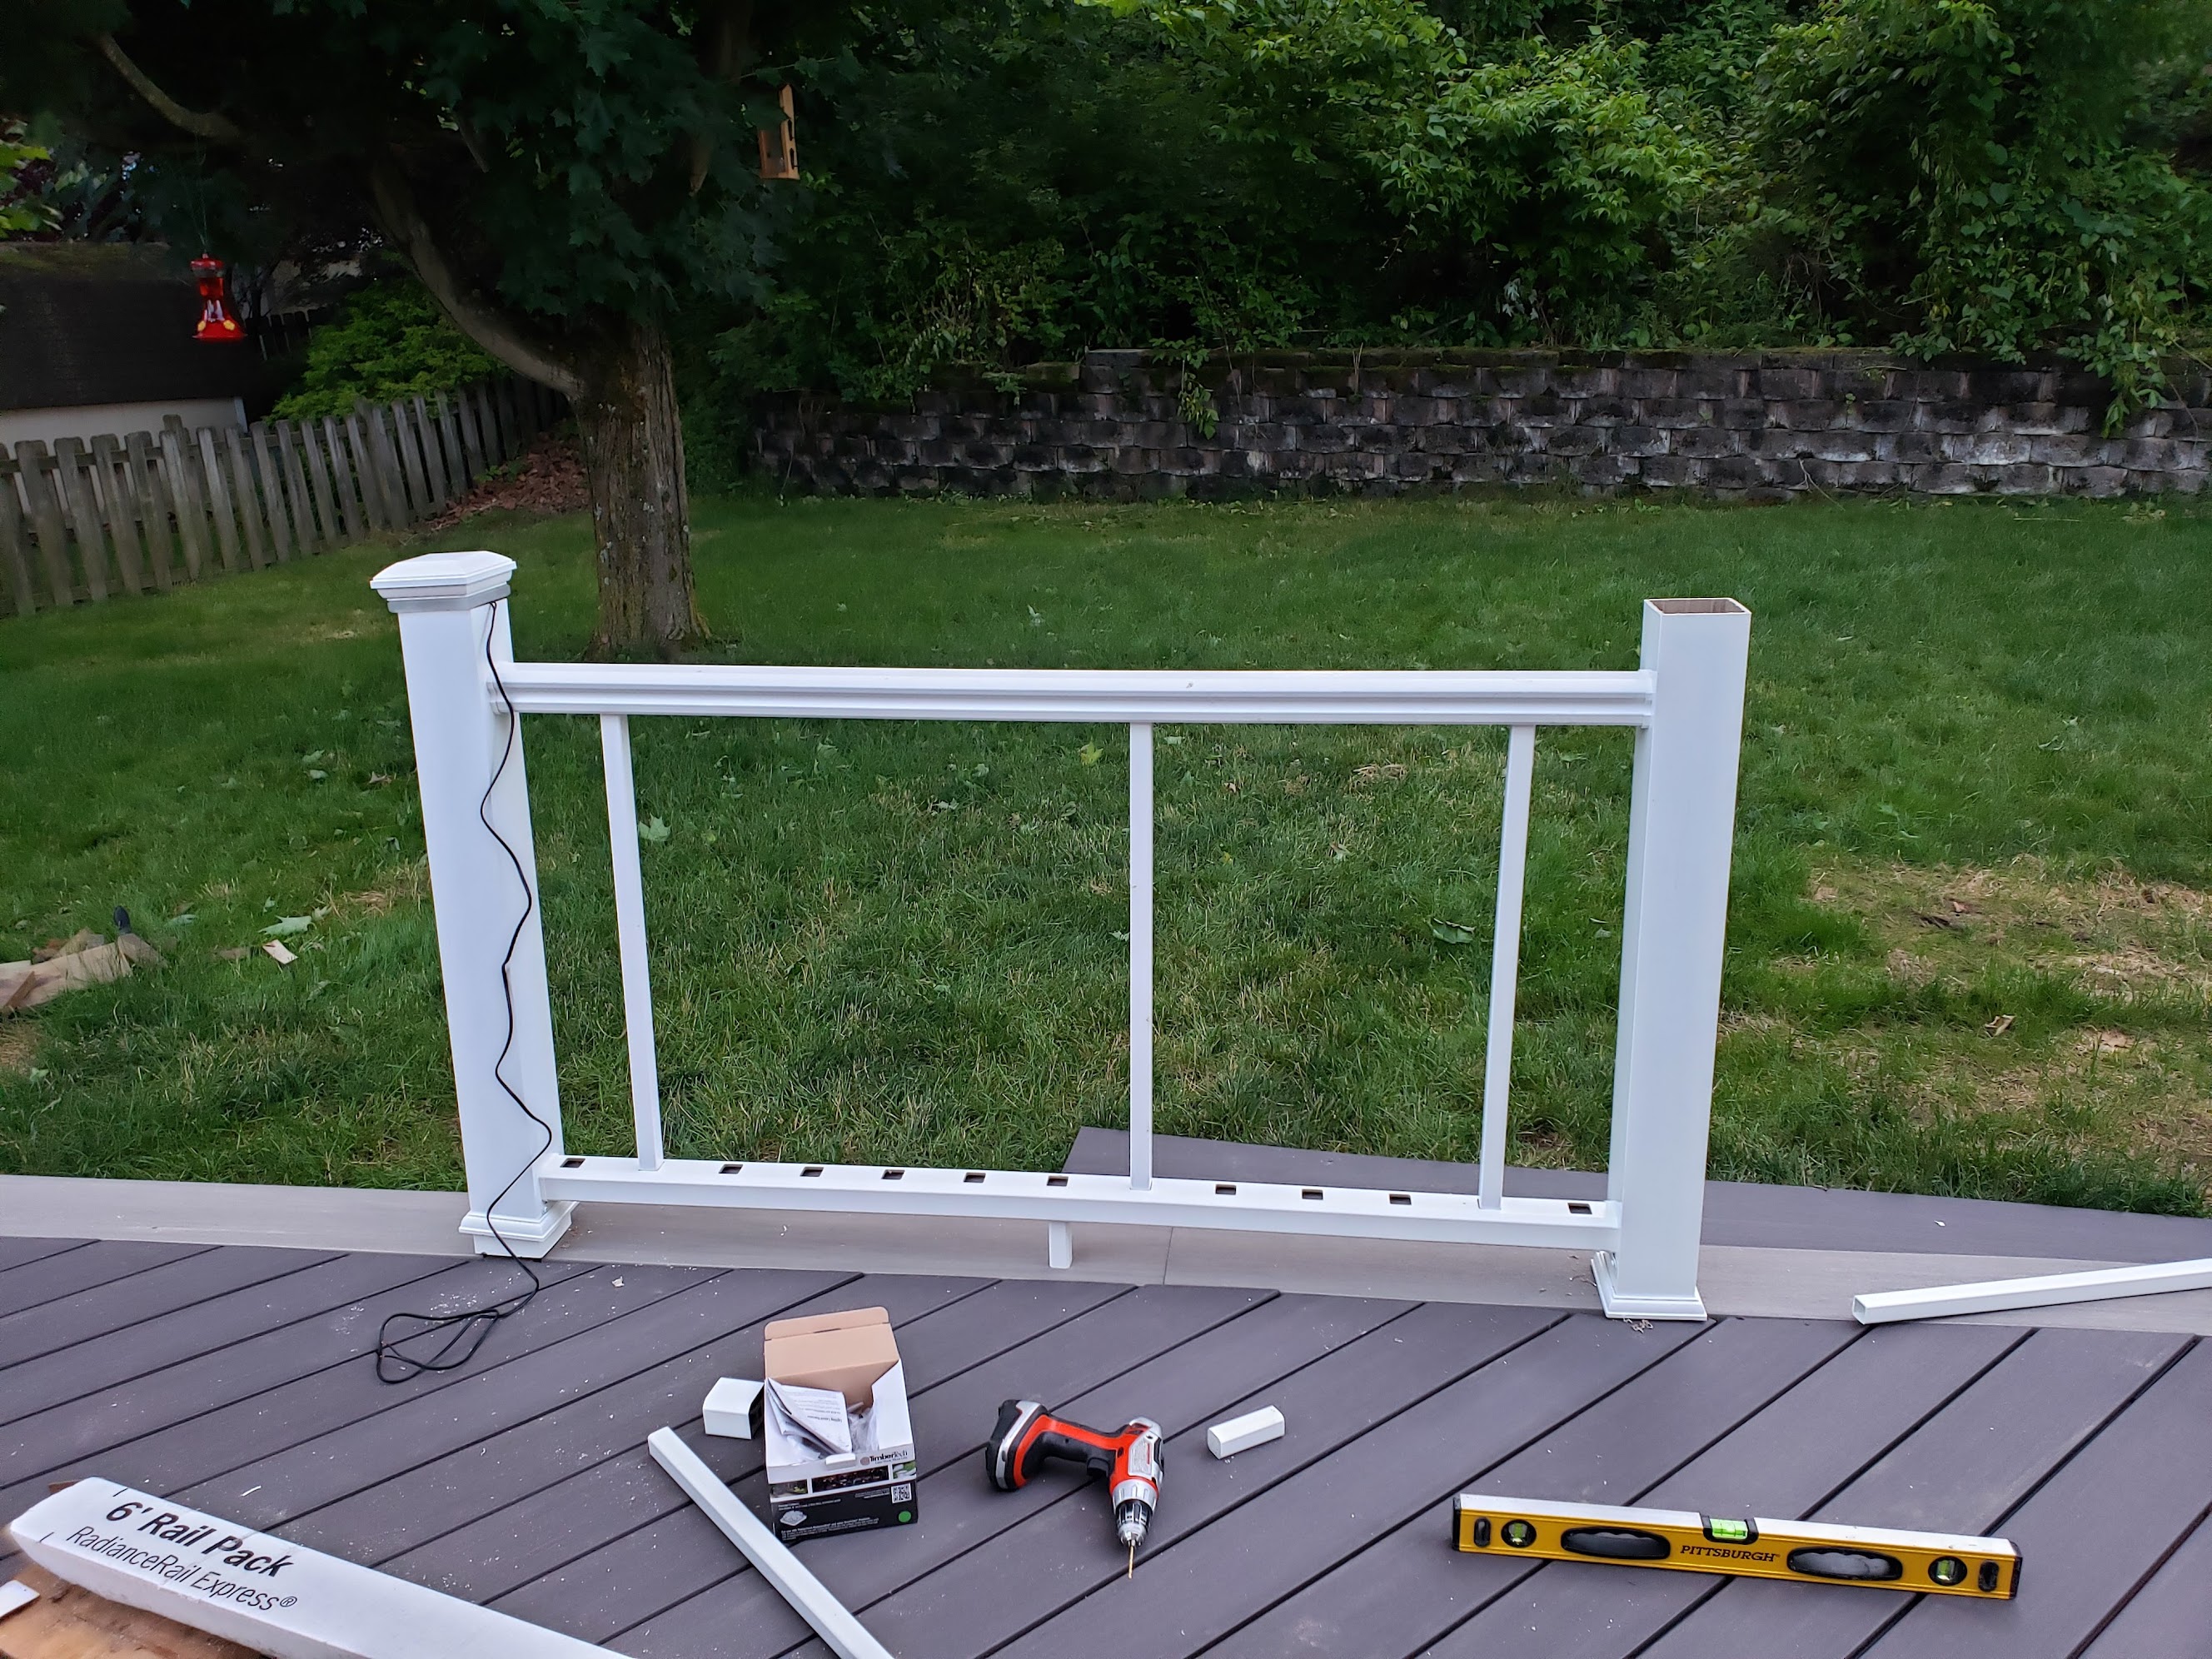 First panel assembled, wire run through the post for lights
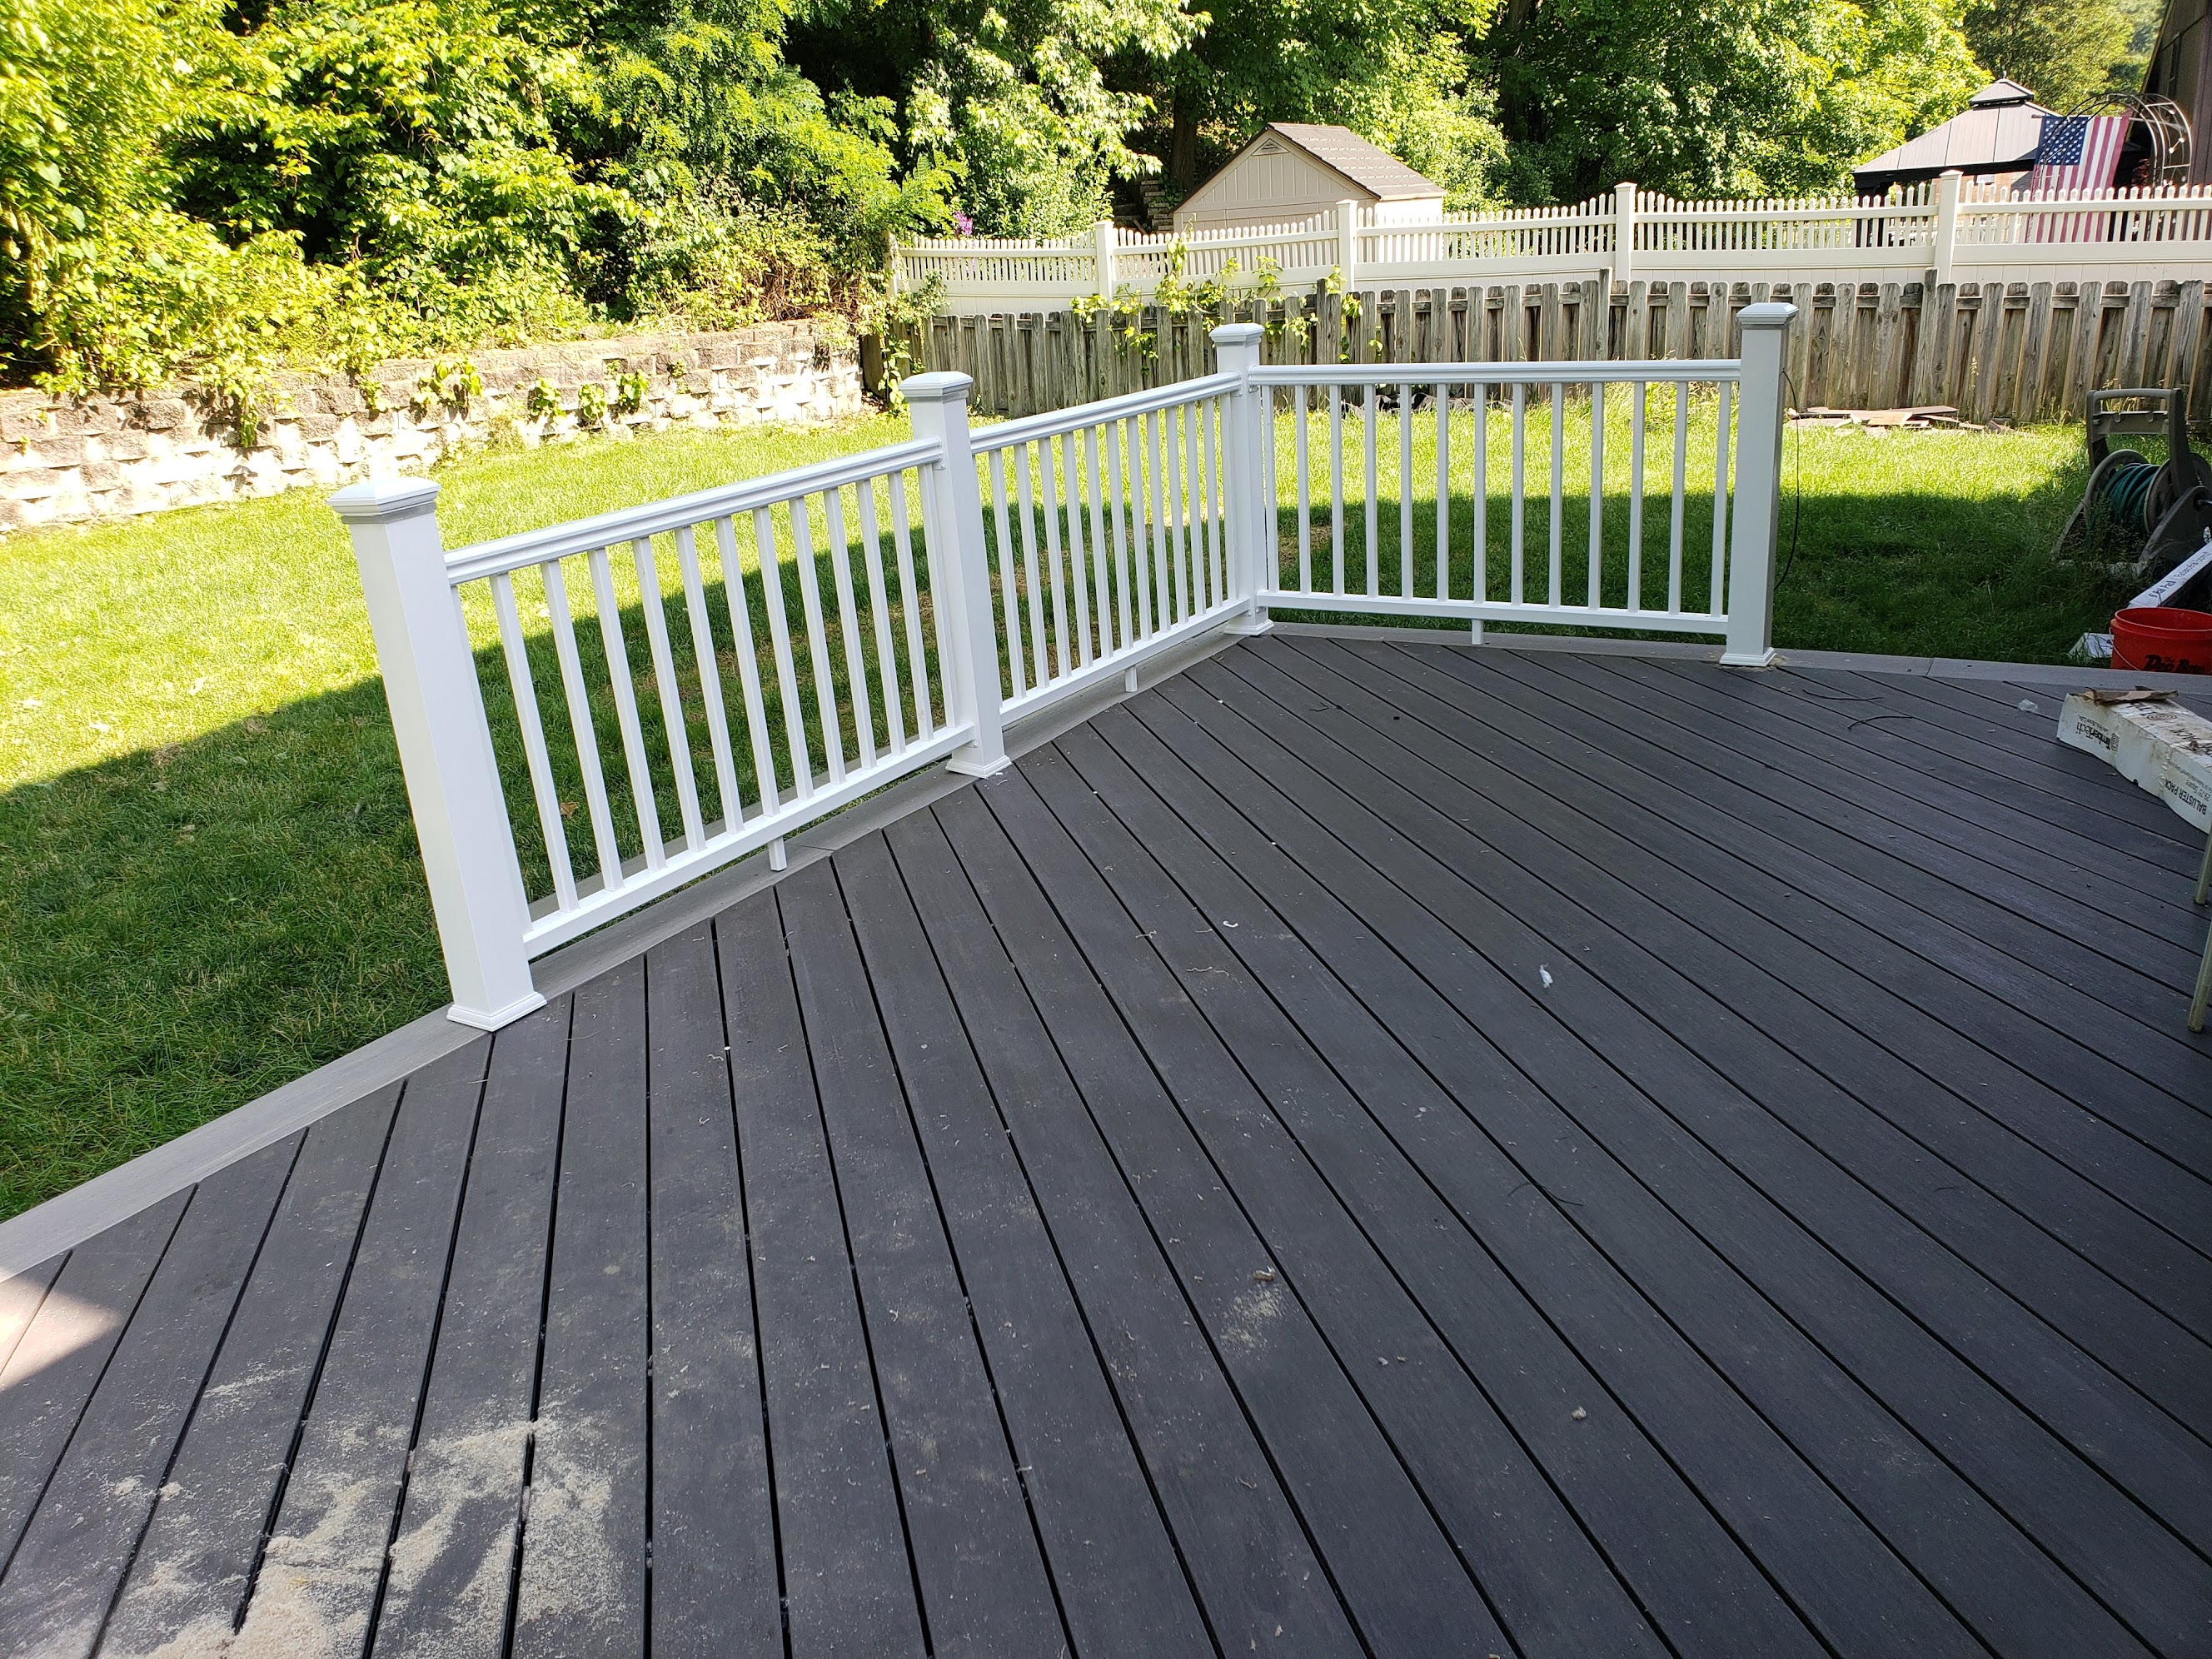 Railing going up, starting to look finished
 Looking out from the deck through the new railing
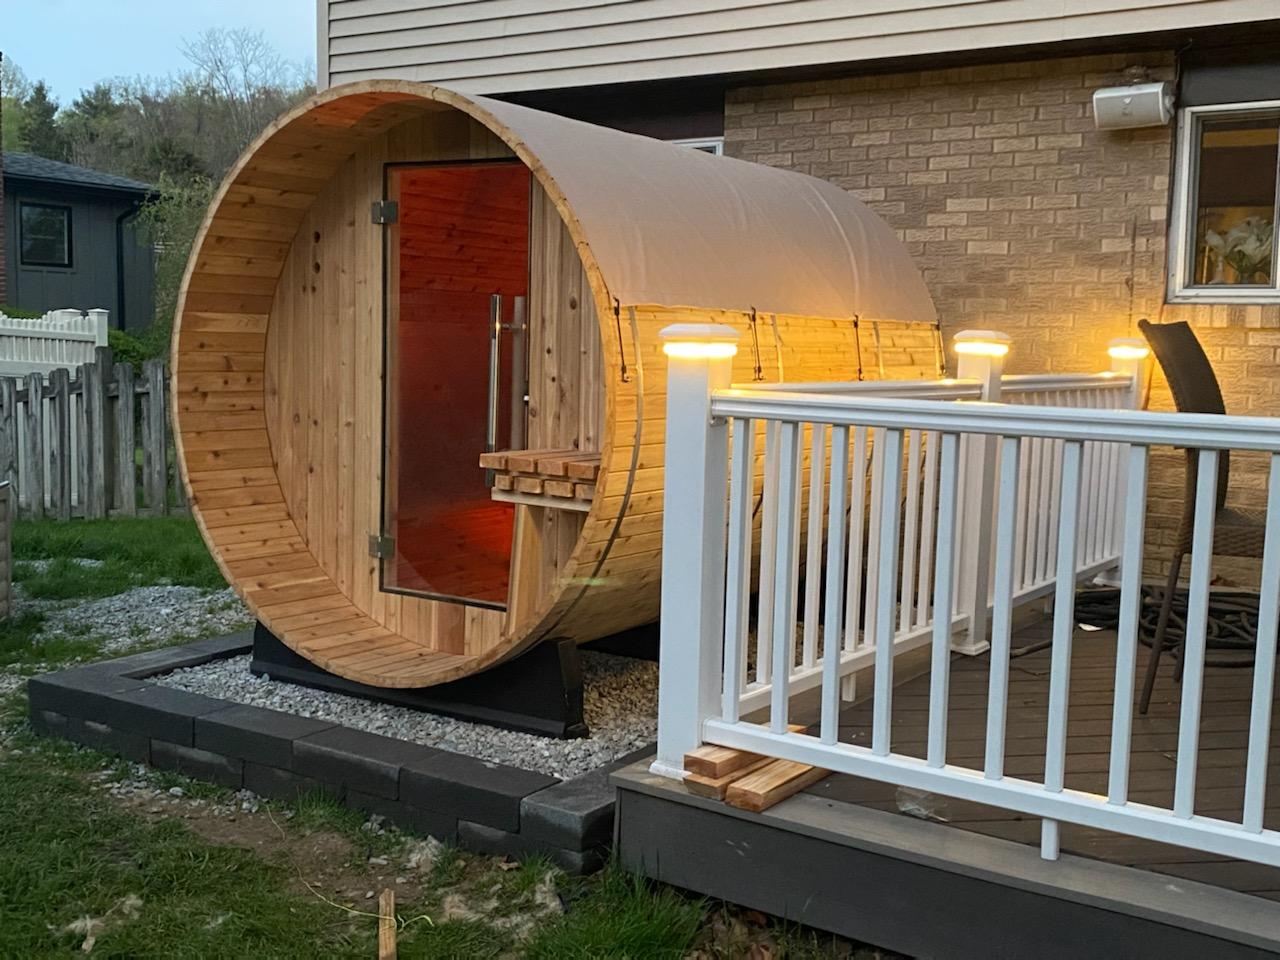 Lights on at dusk, 2022, with the barrel sauna alongside
Vinyl Privacy Fence
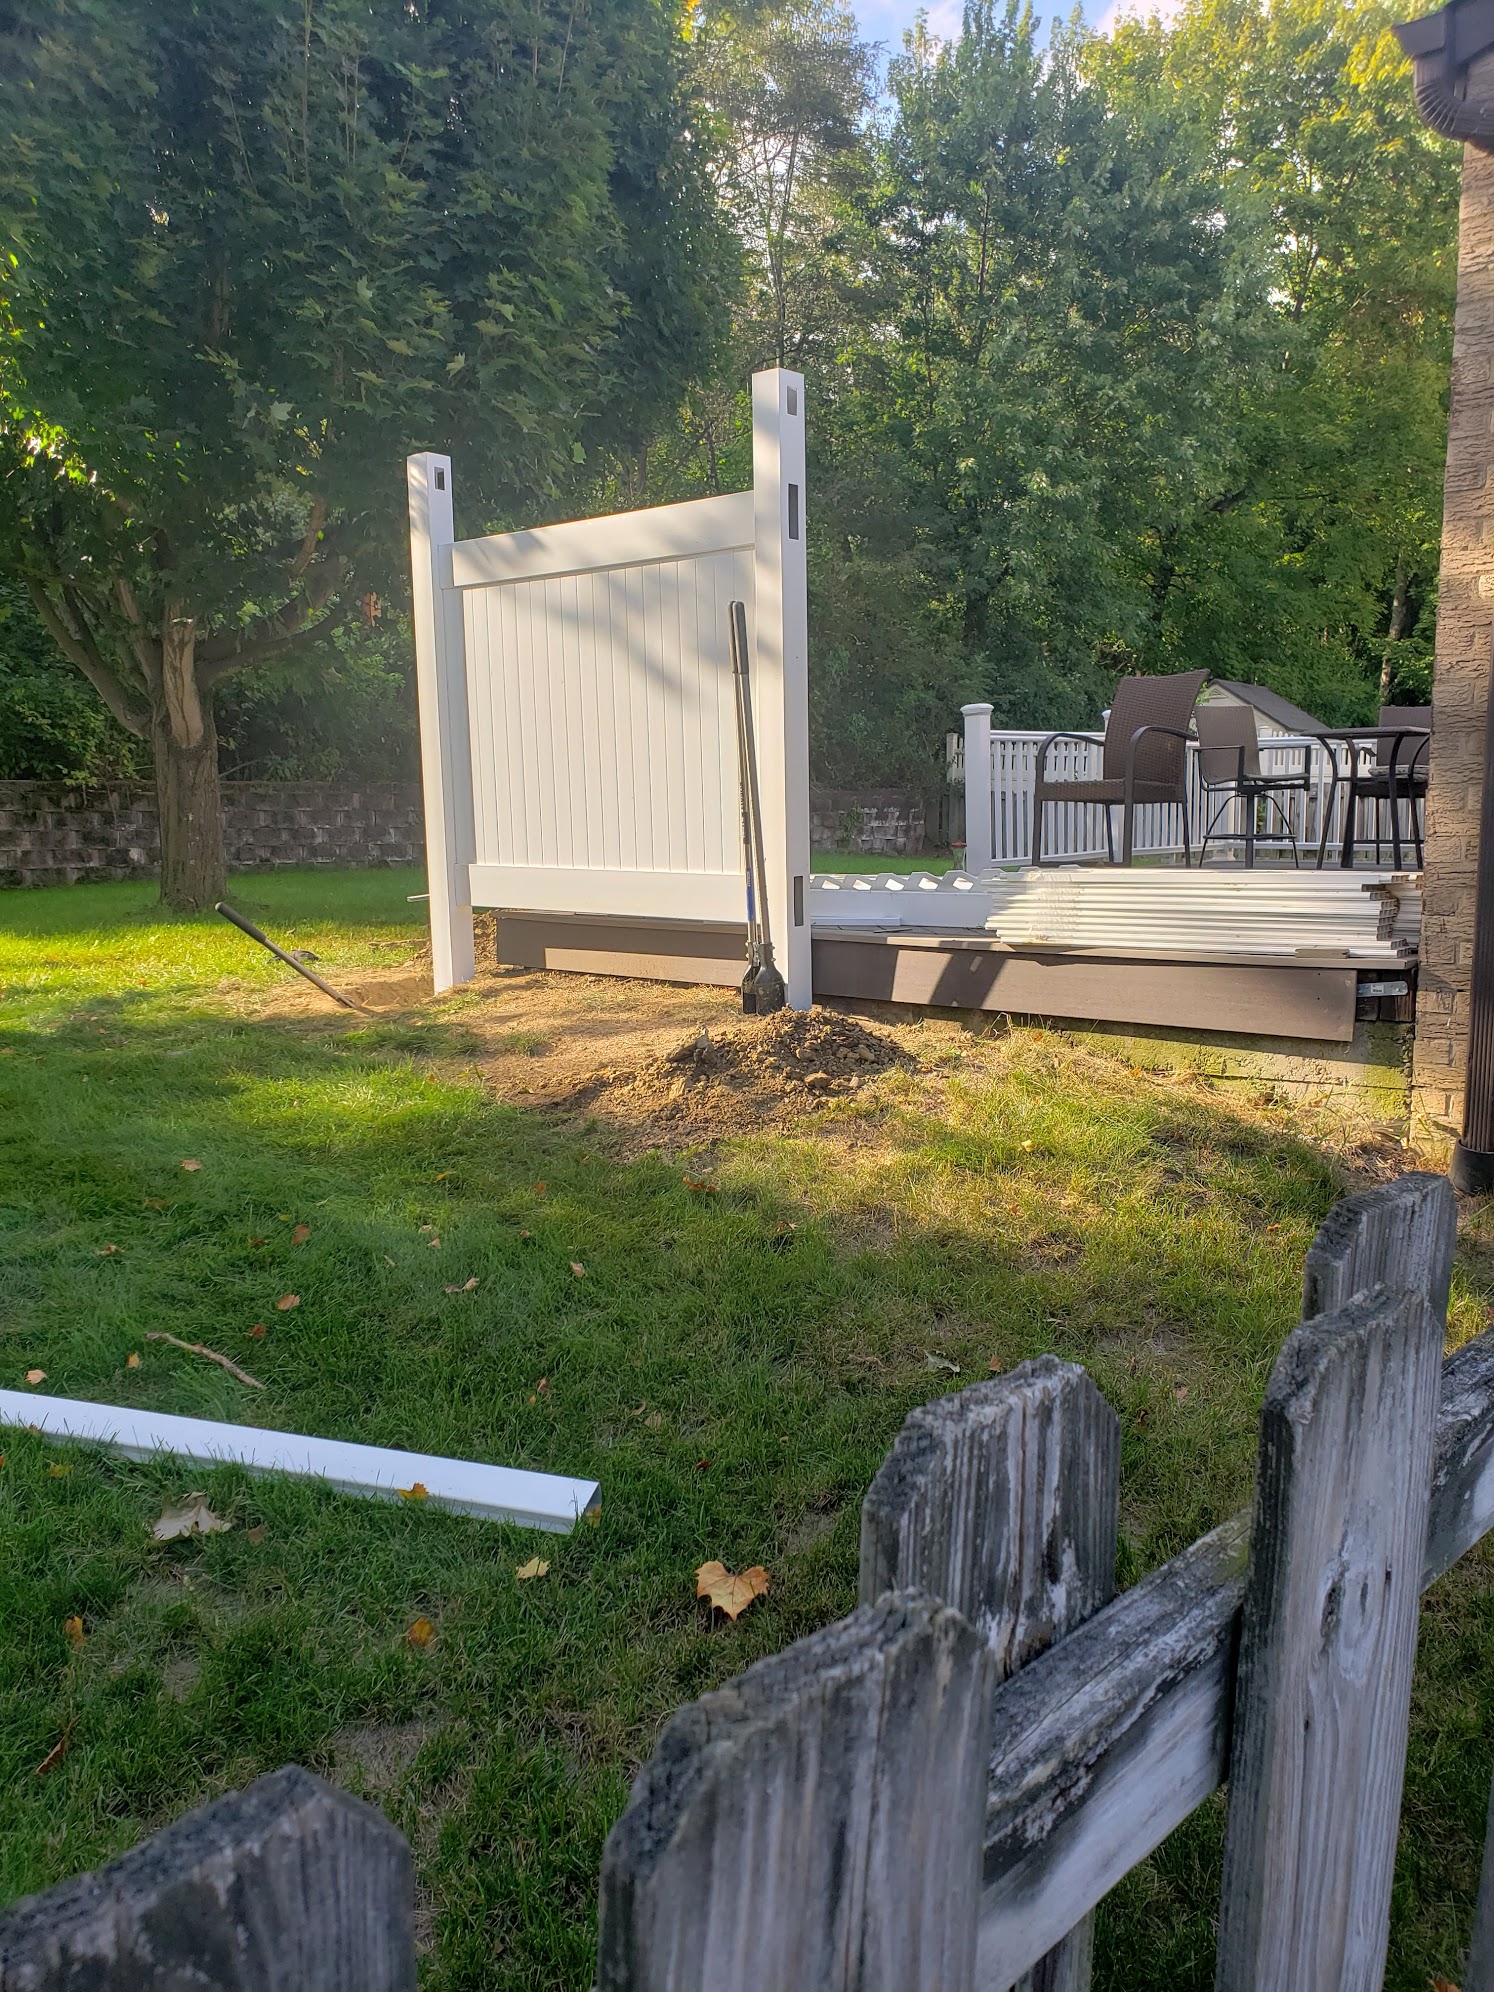
Months after the deck itself was done, the privacy fence went in along the back, post holes dug, posts set in concrete, panels and lattice tops snapped into place. The fence and the deck railing share the same white vinyl, so they read as one thing.
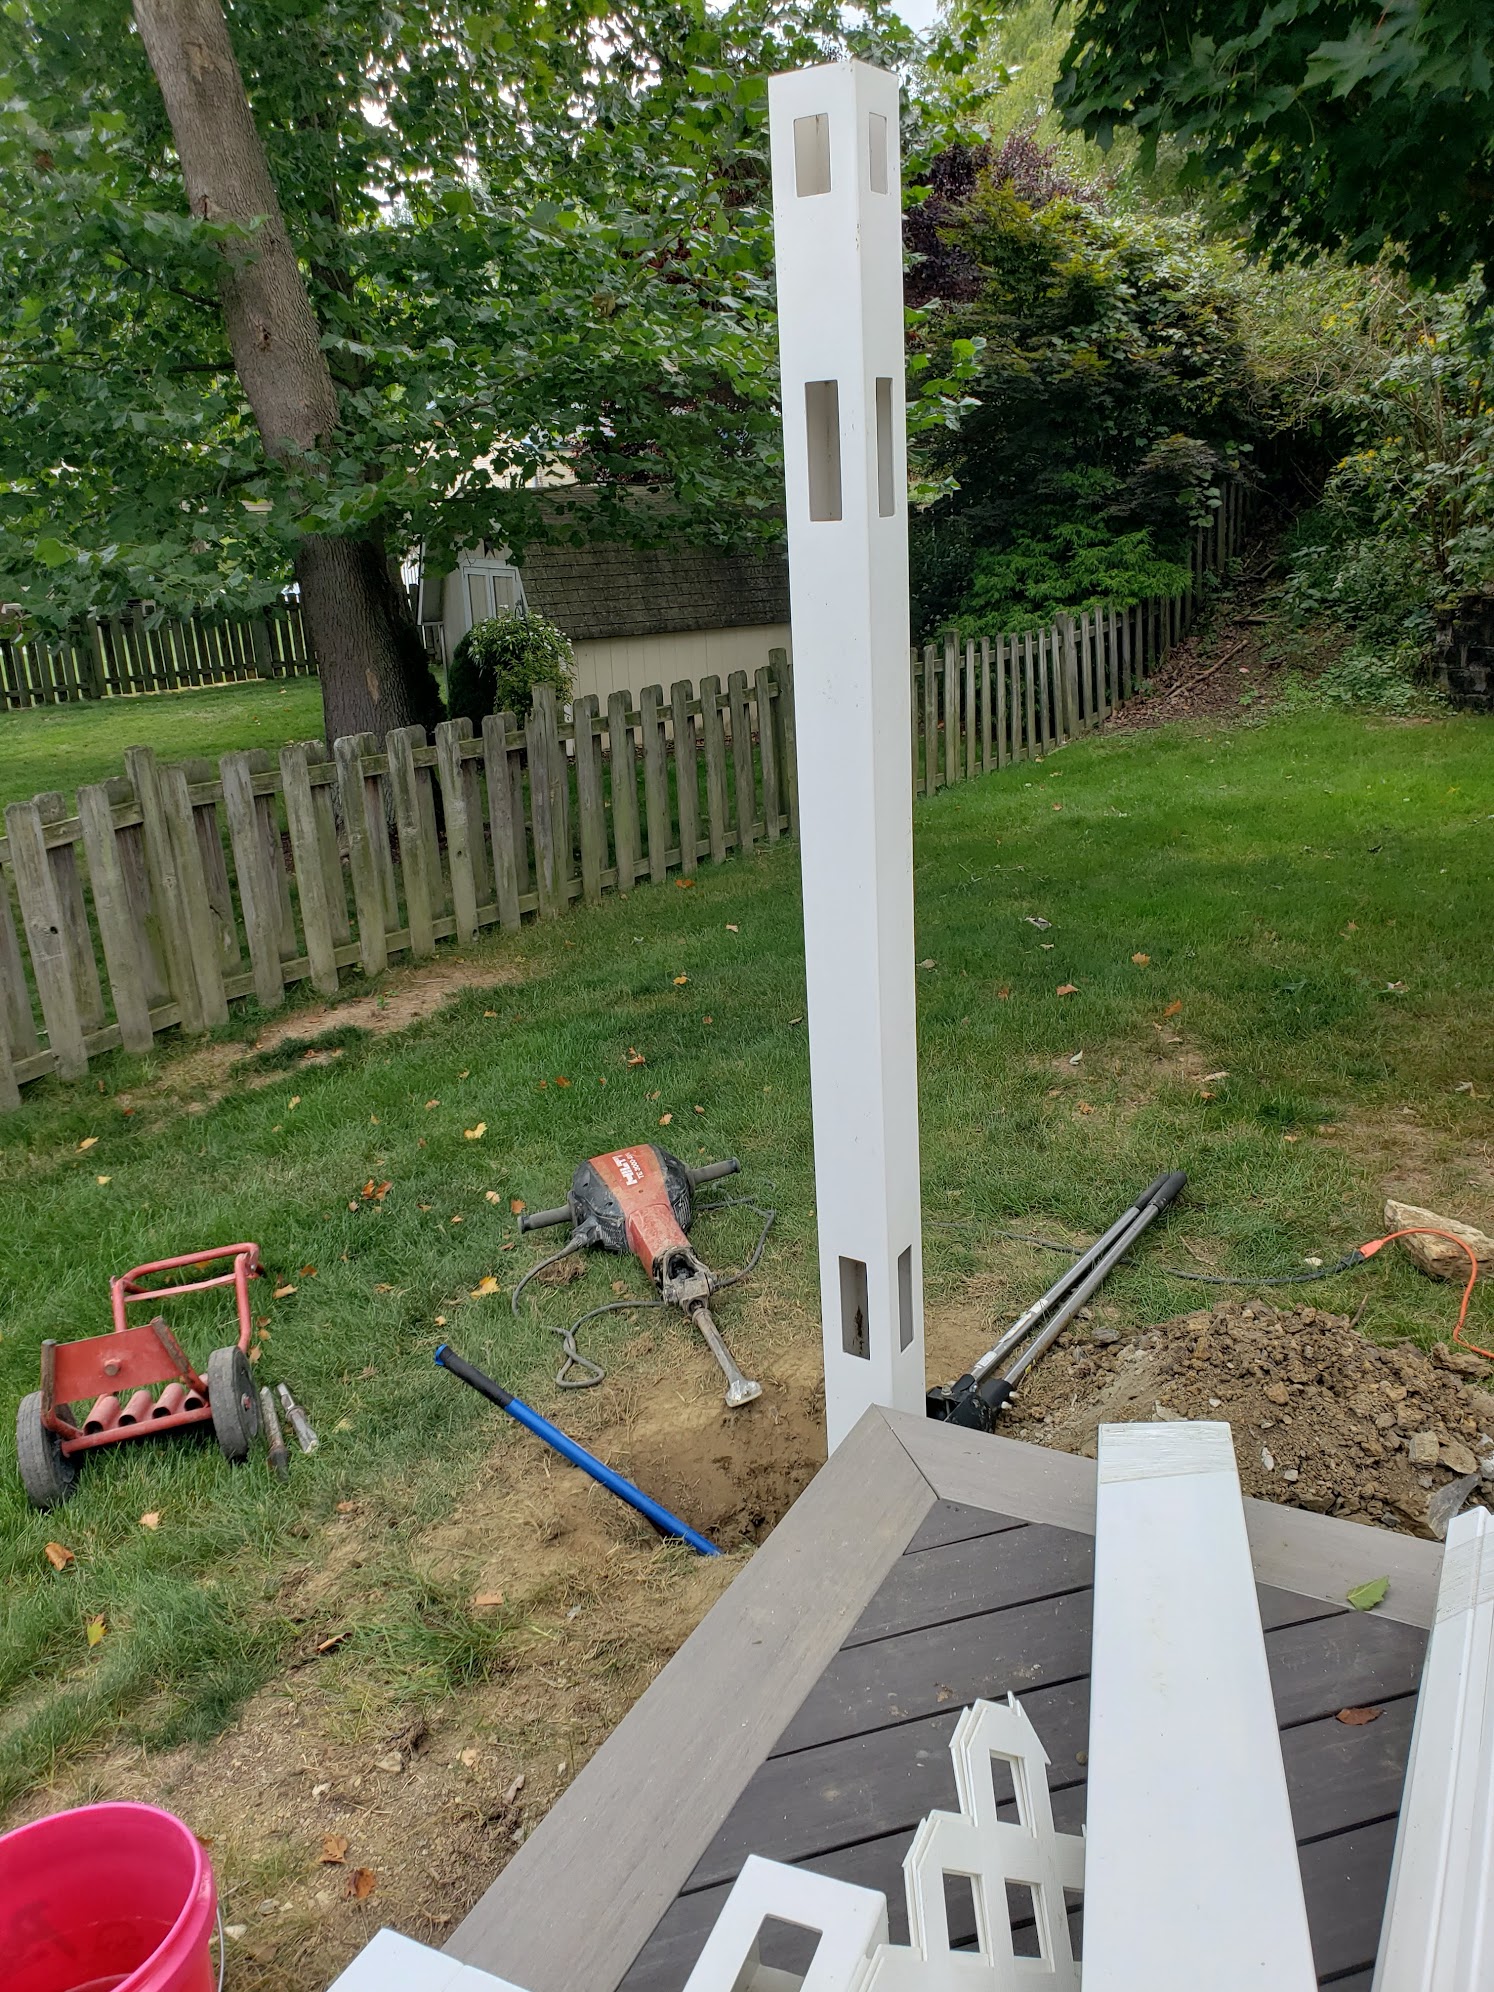 First post set, hole digger still in the background
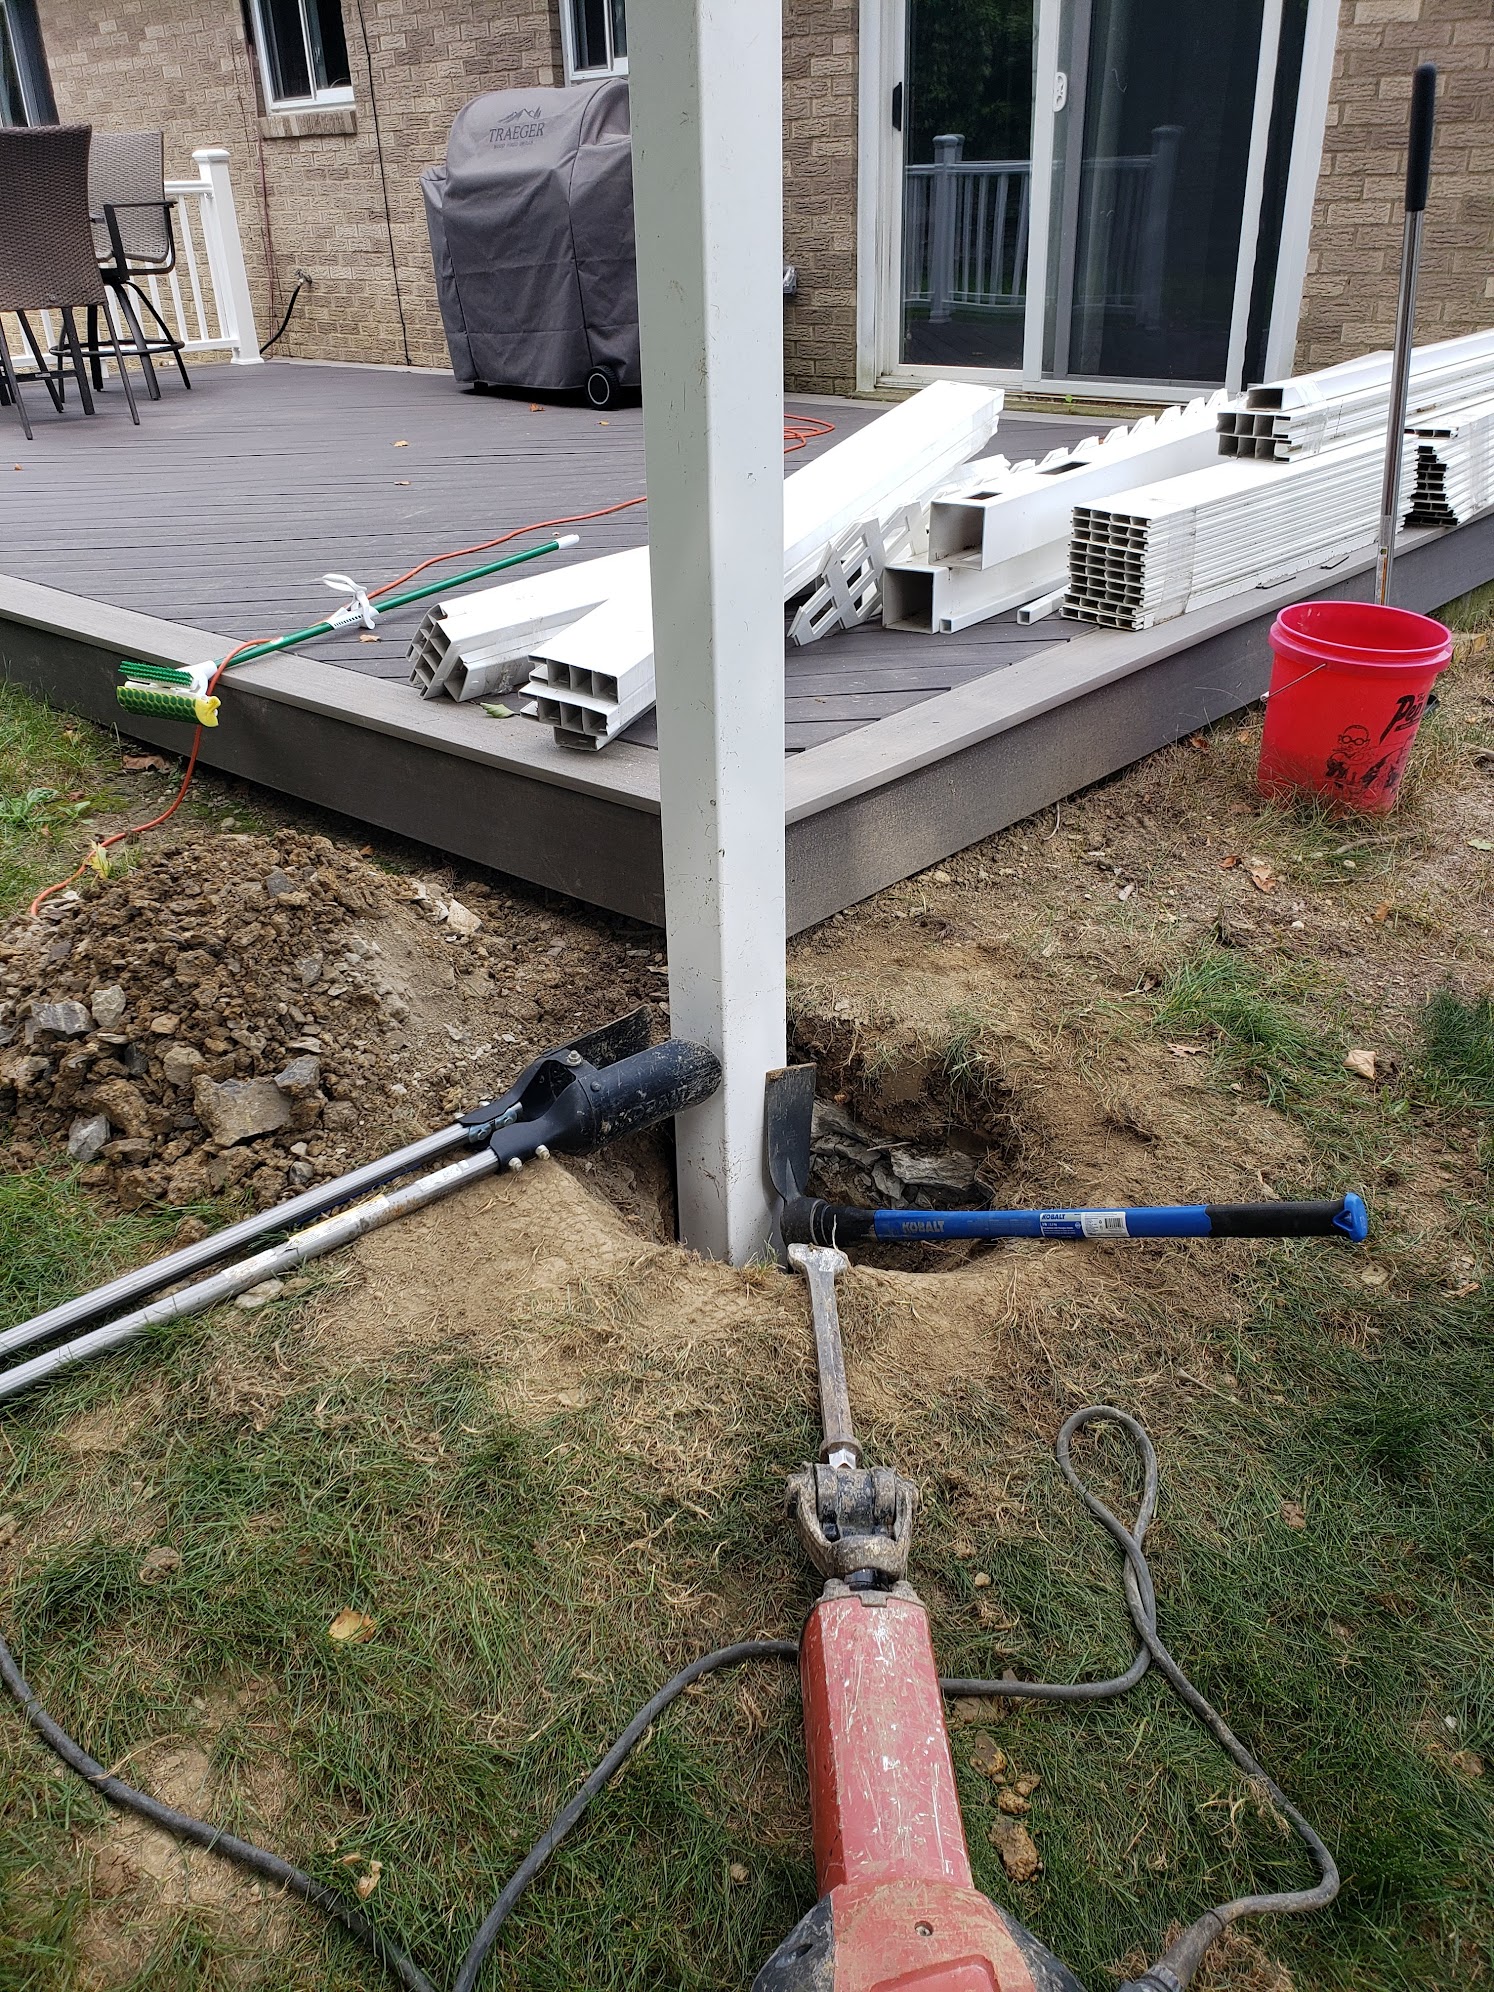 Post work from the lawn, deck visible behind
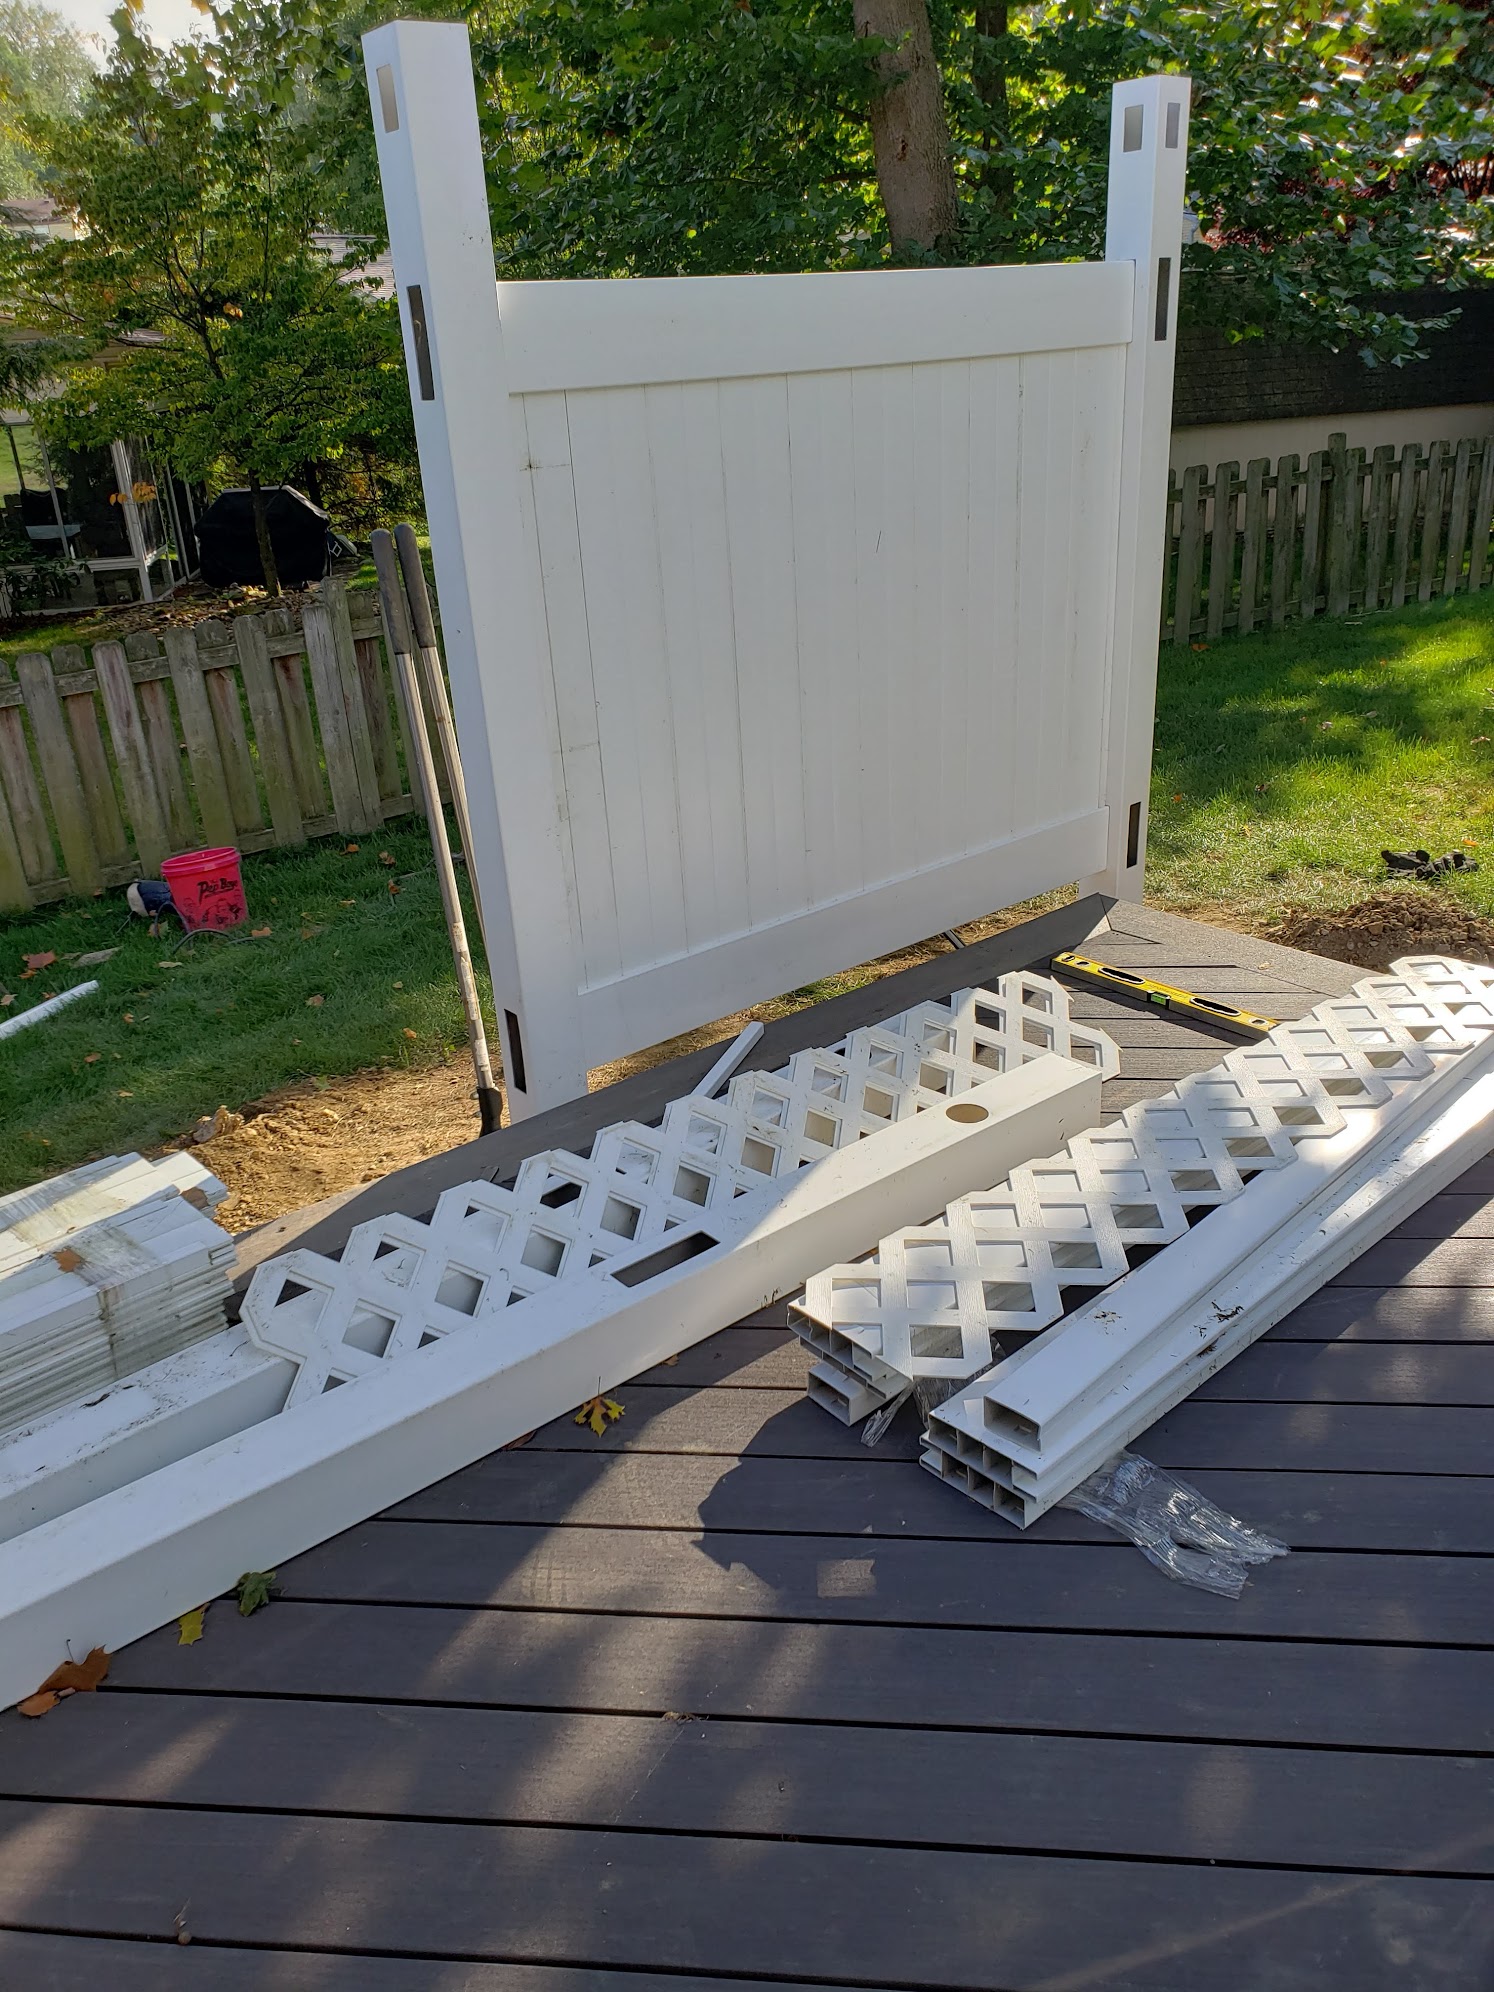 Panels, lattice tops, and gate hardware staged on the deck
 First full panel standing
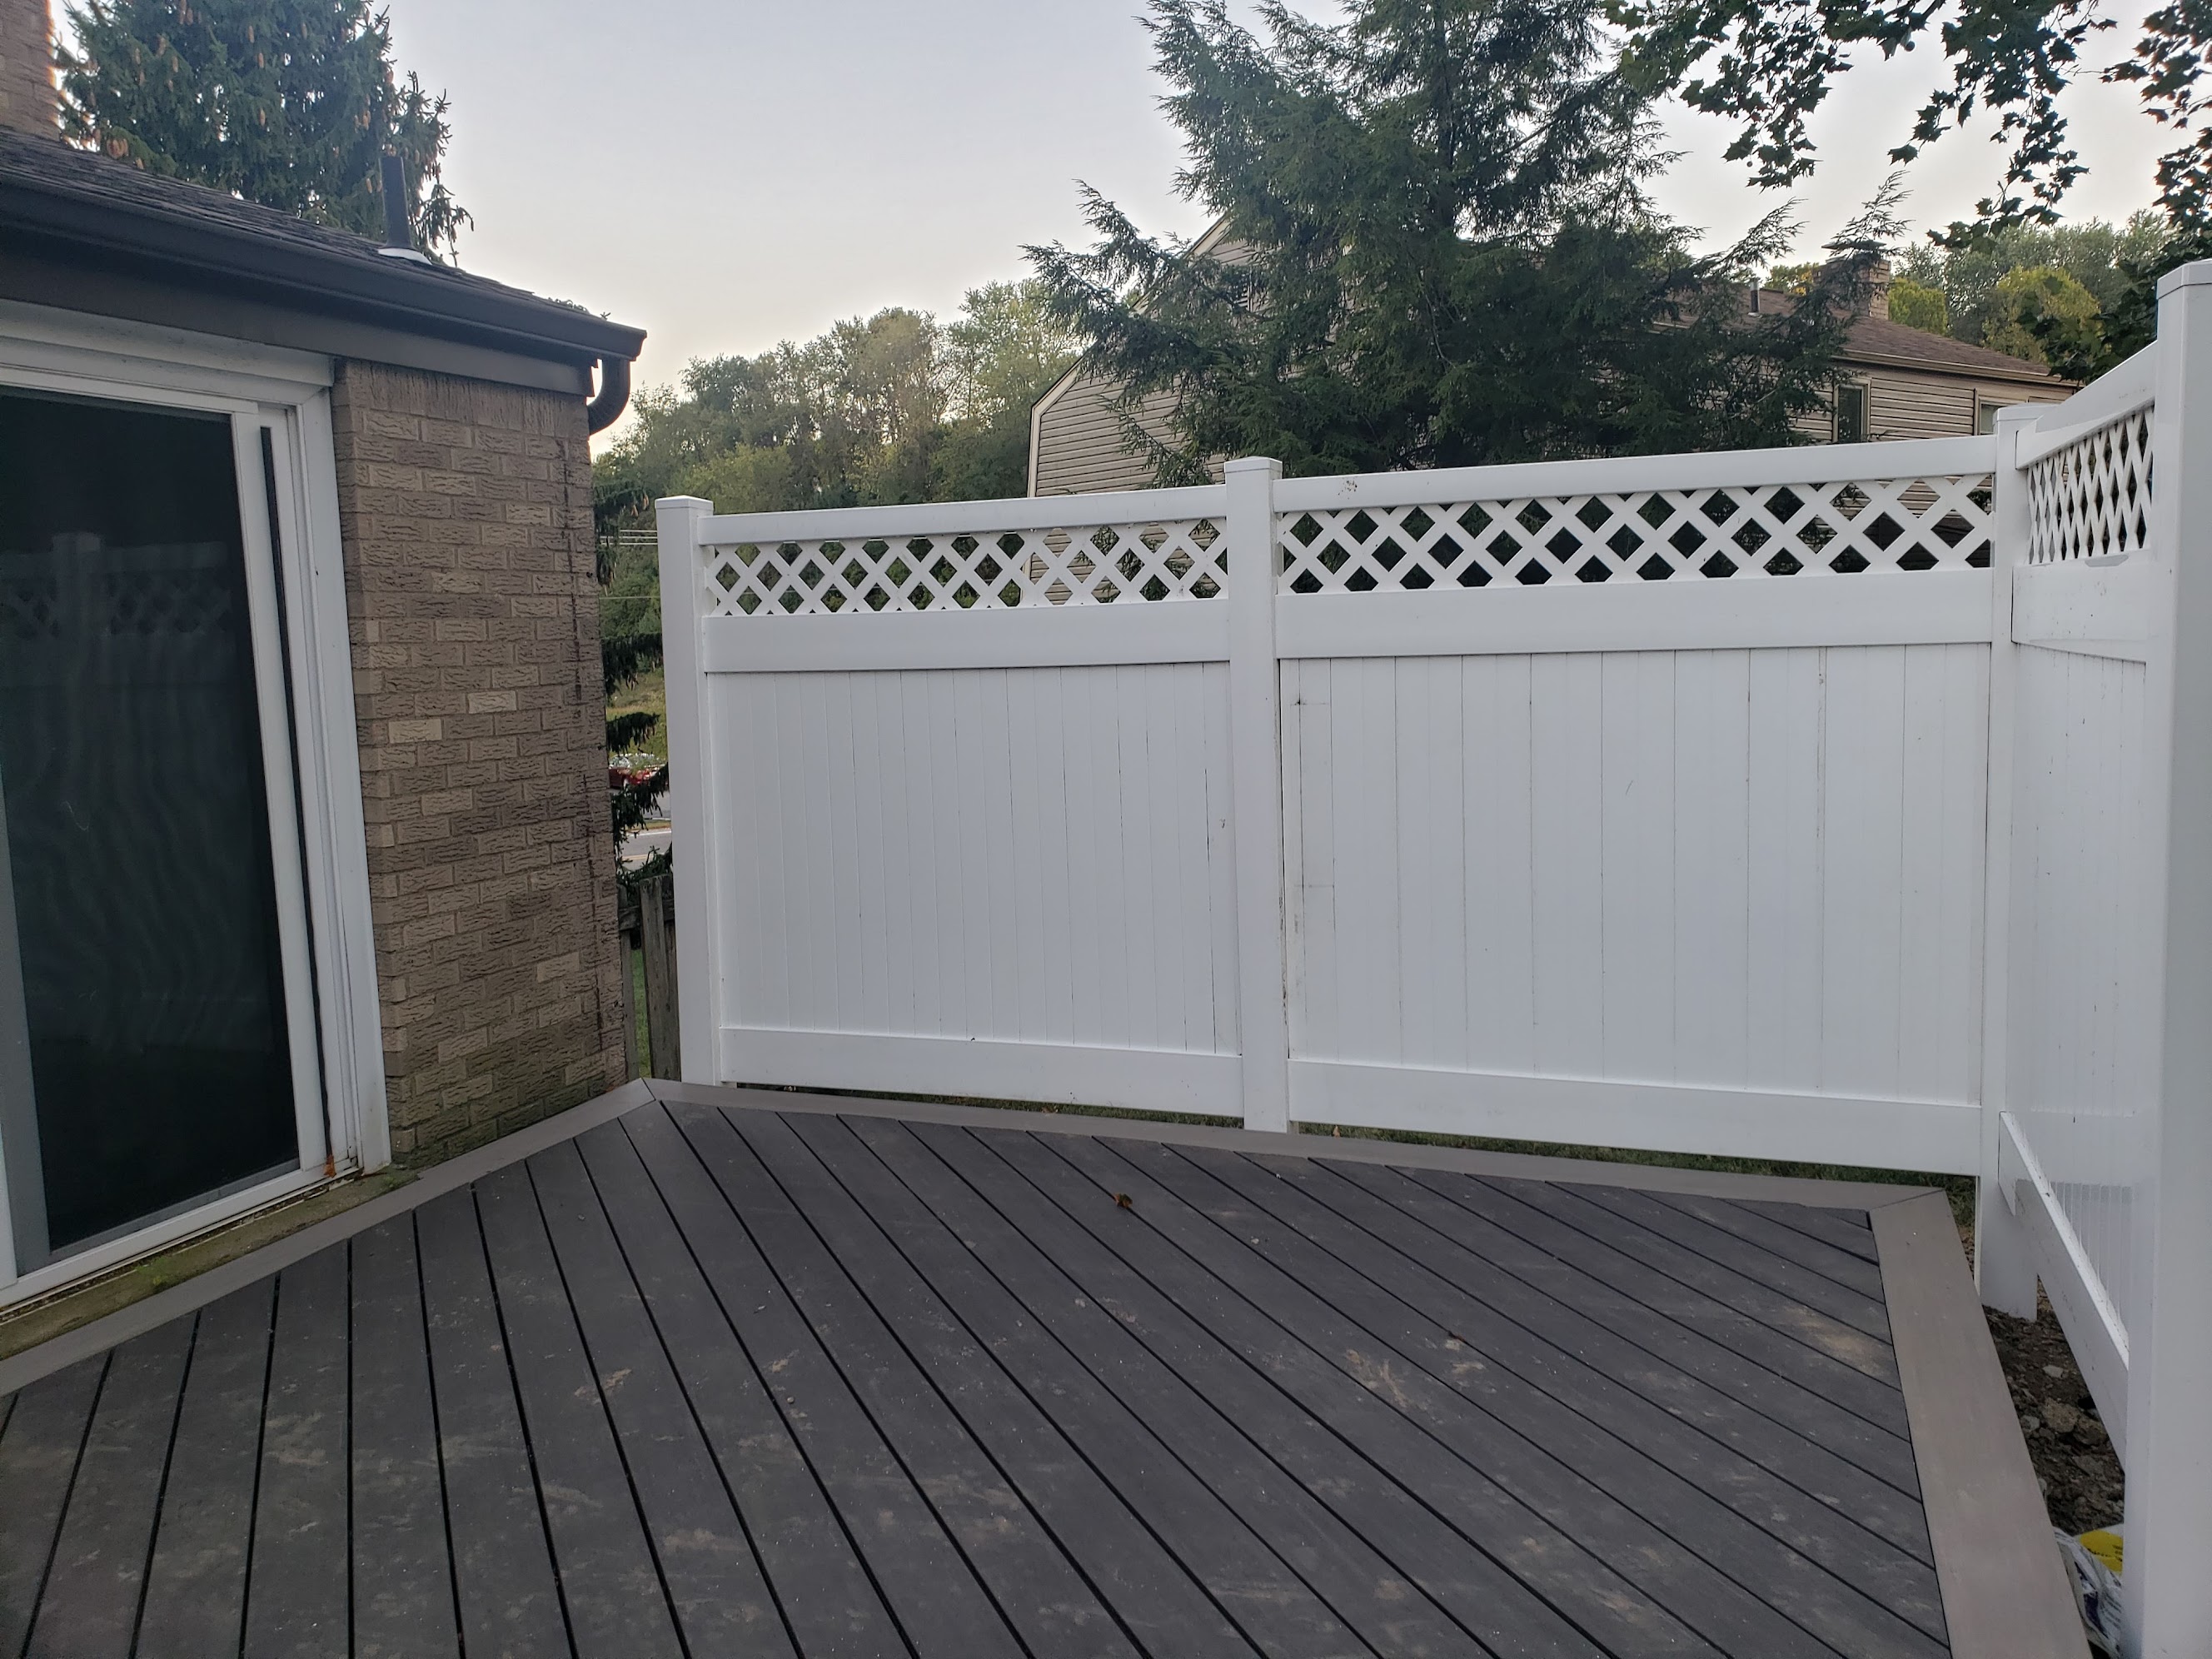 Fence complete, evening light from the deck
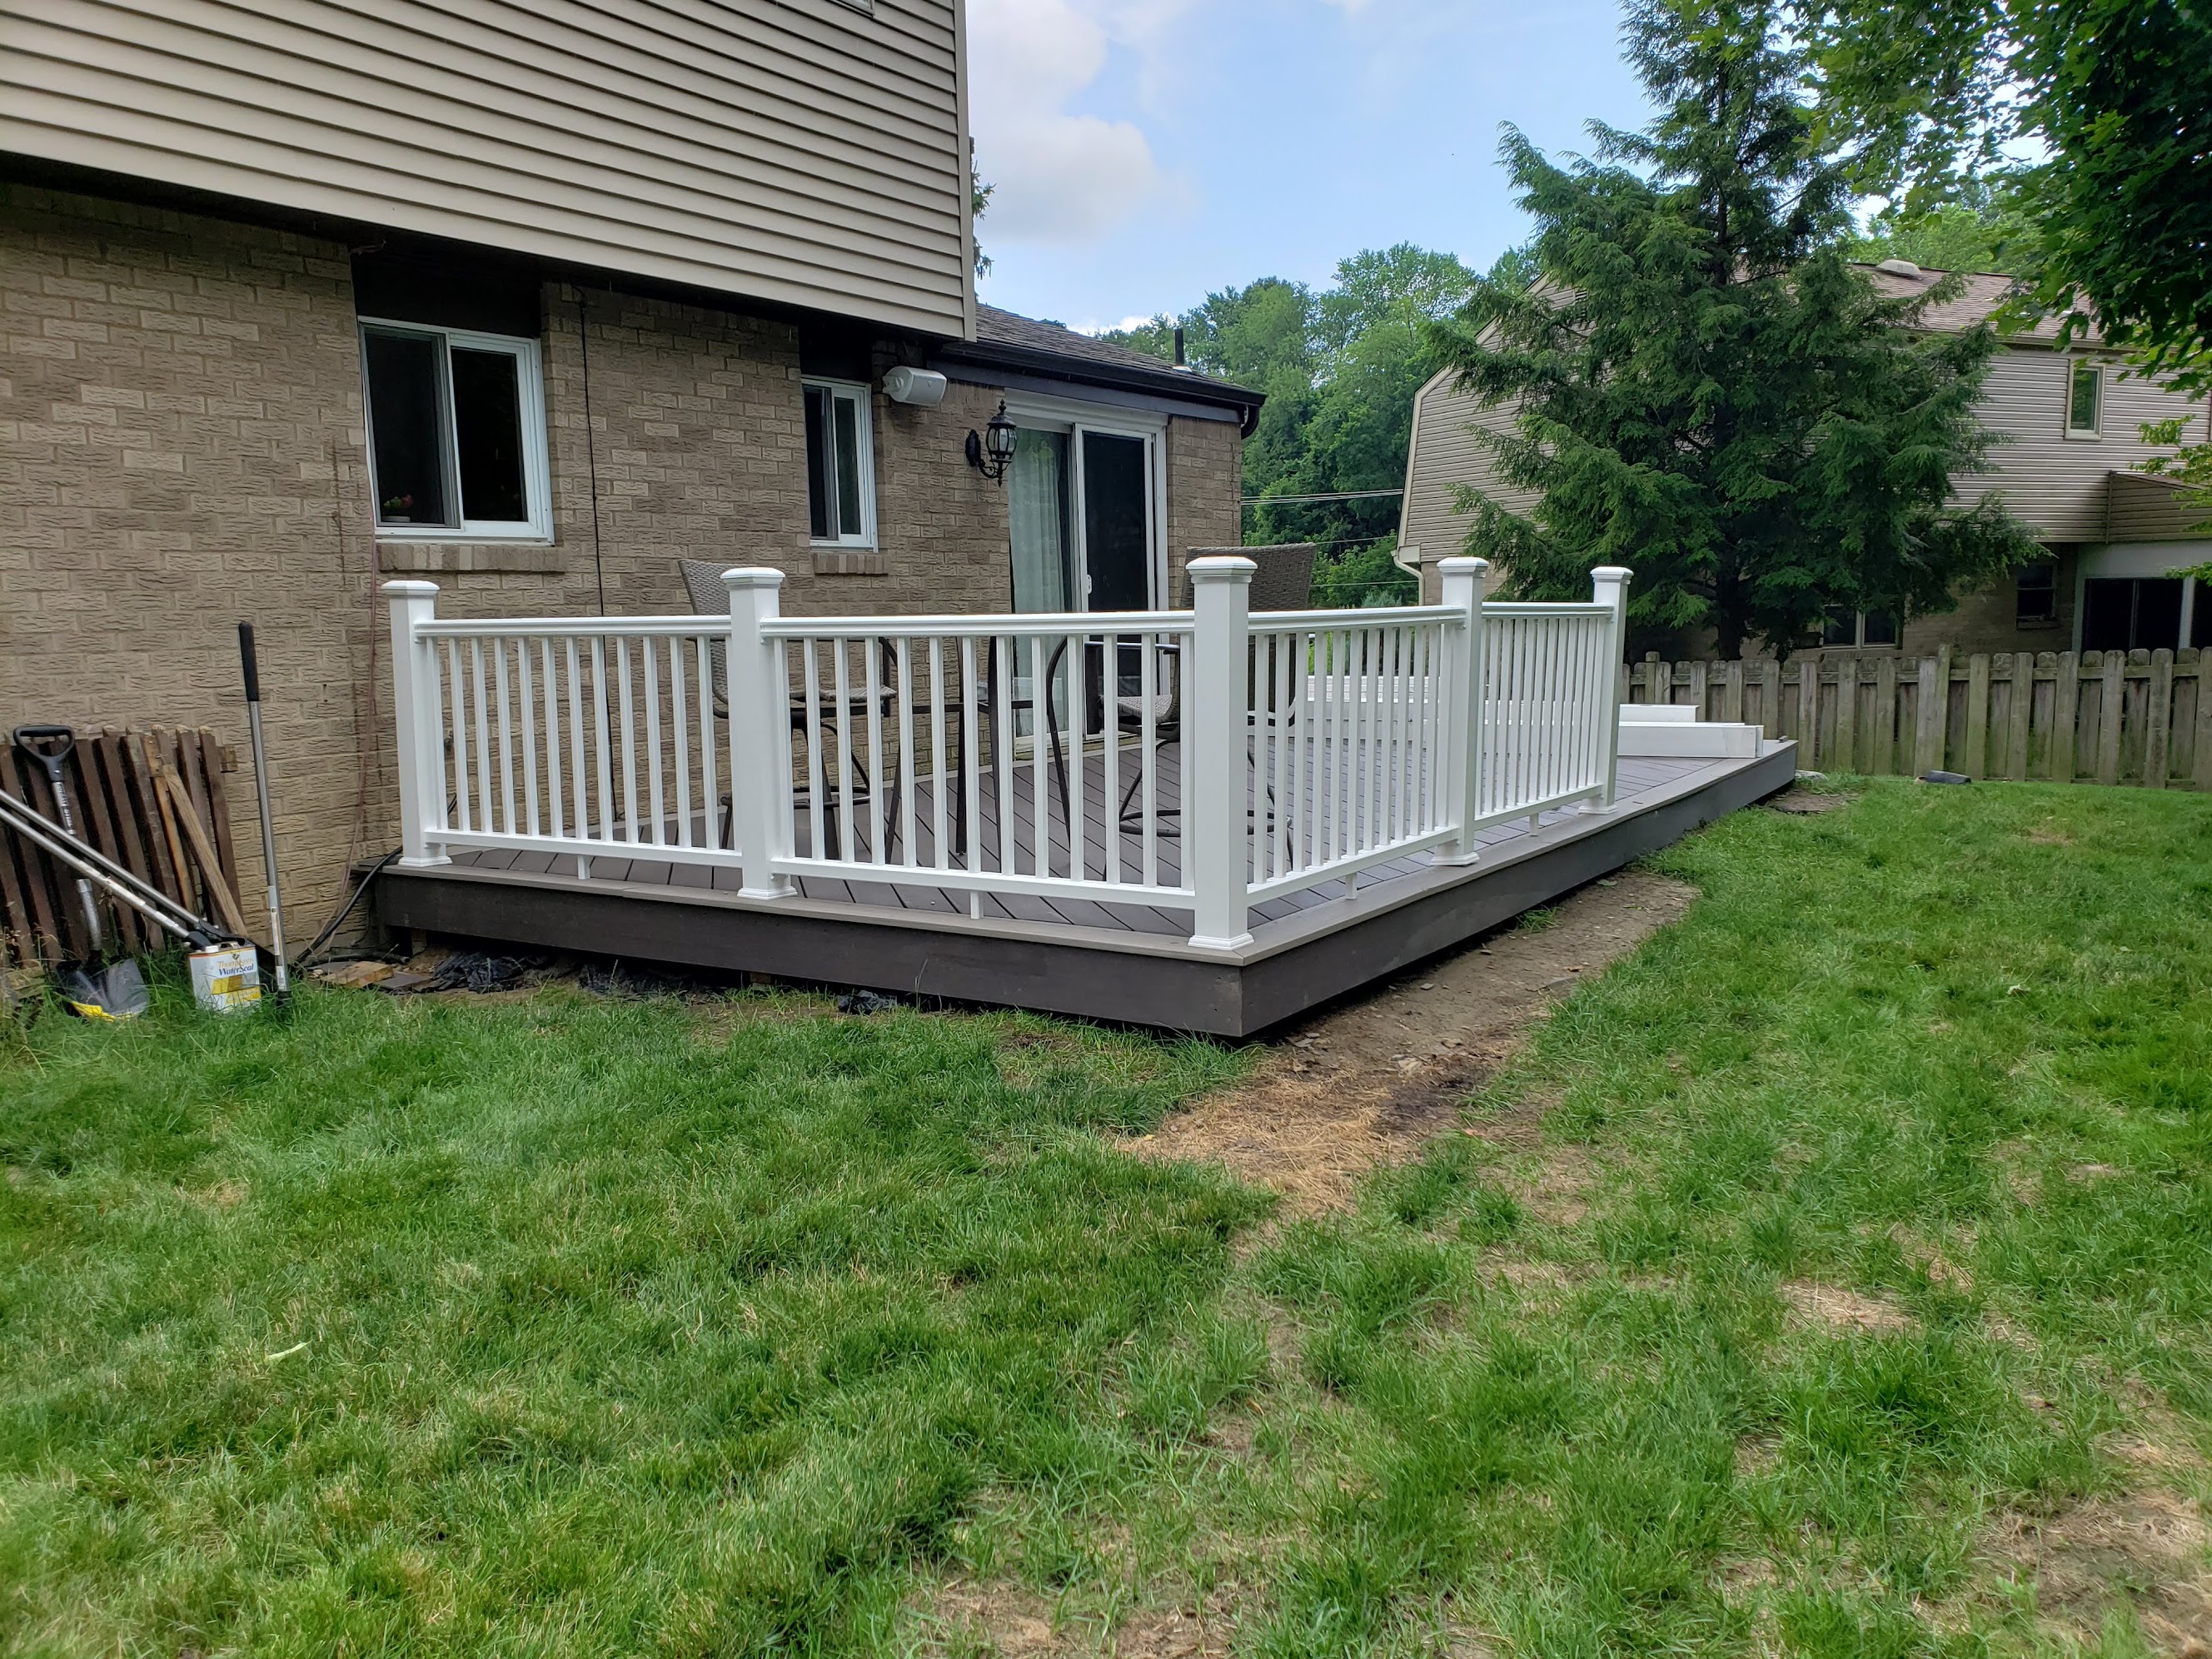
Finished
The Completed Deck
Torn down to the posts. Back to something worth keeping.
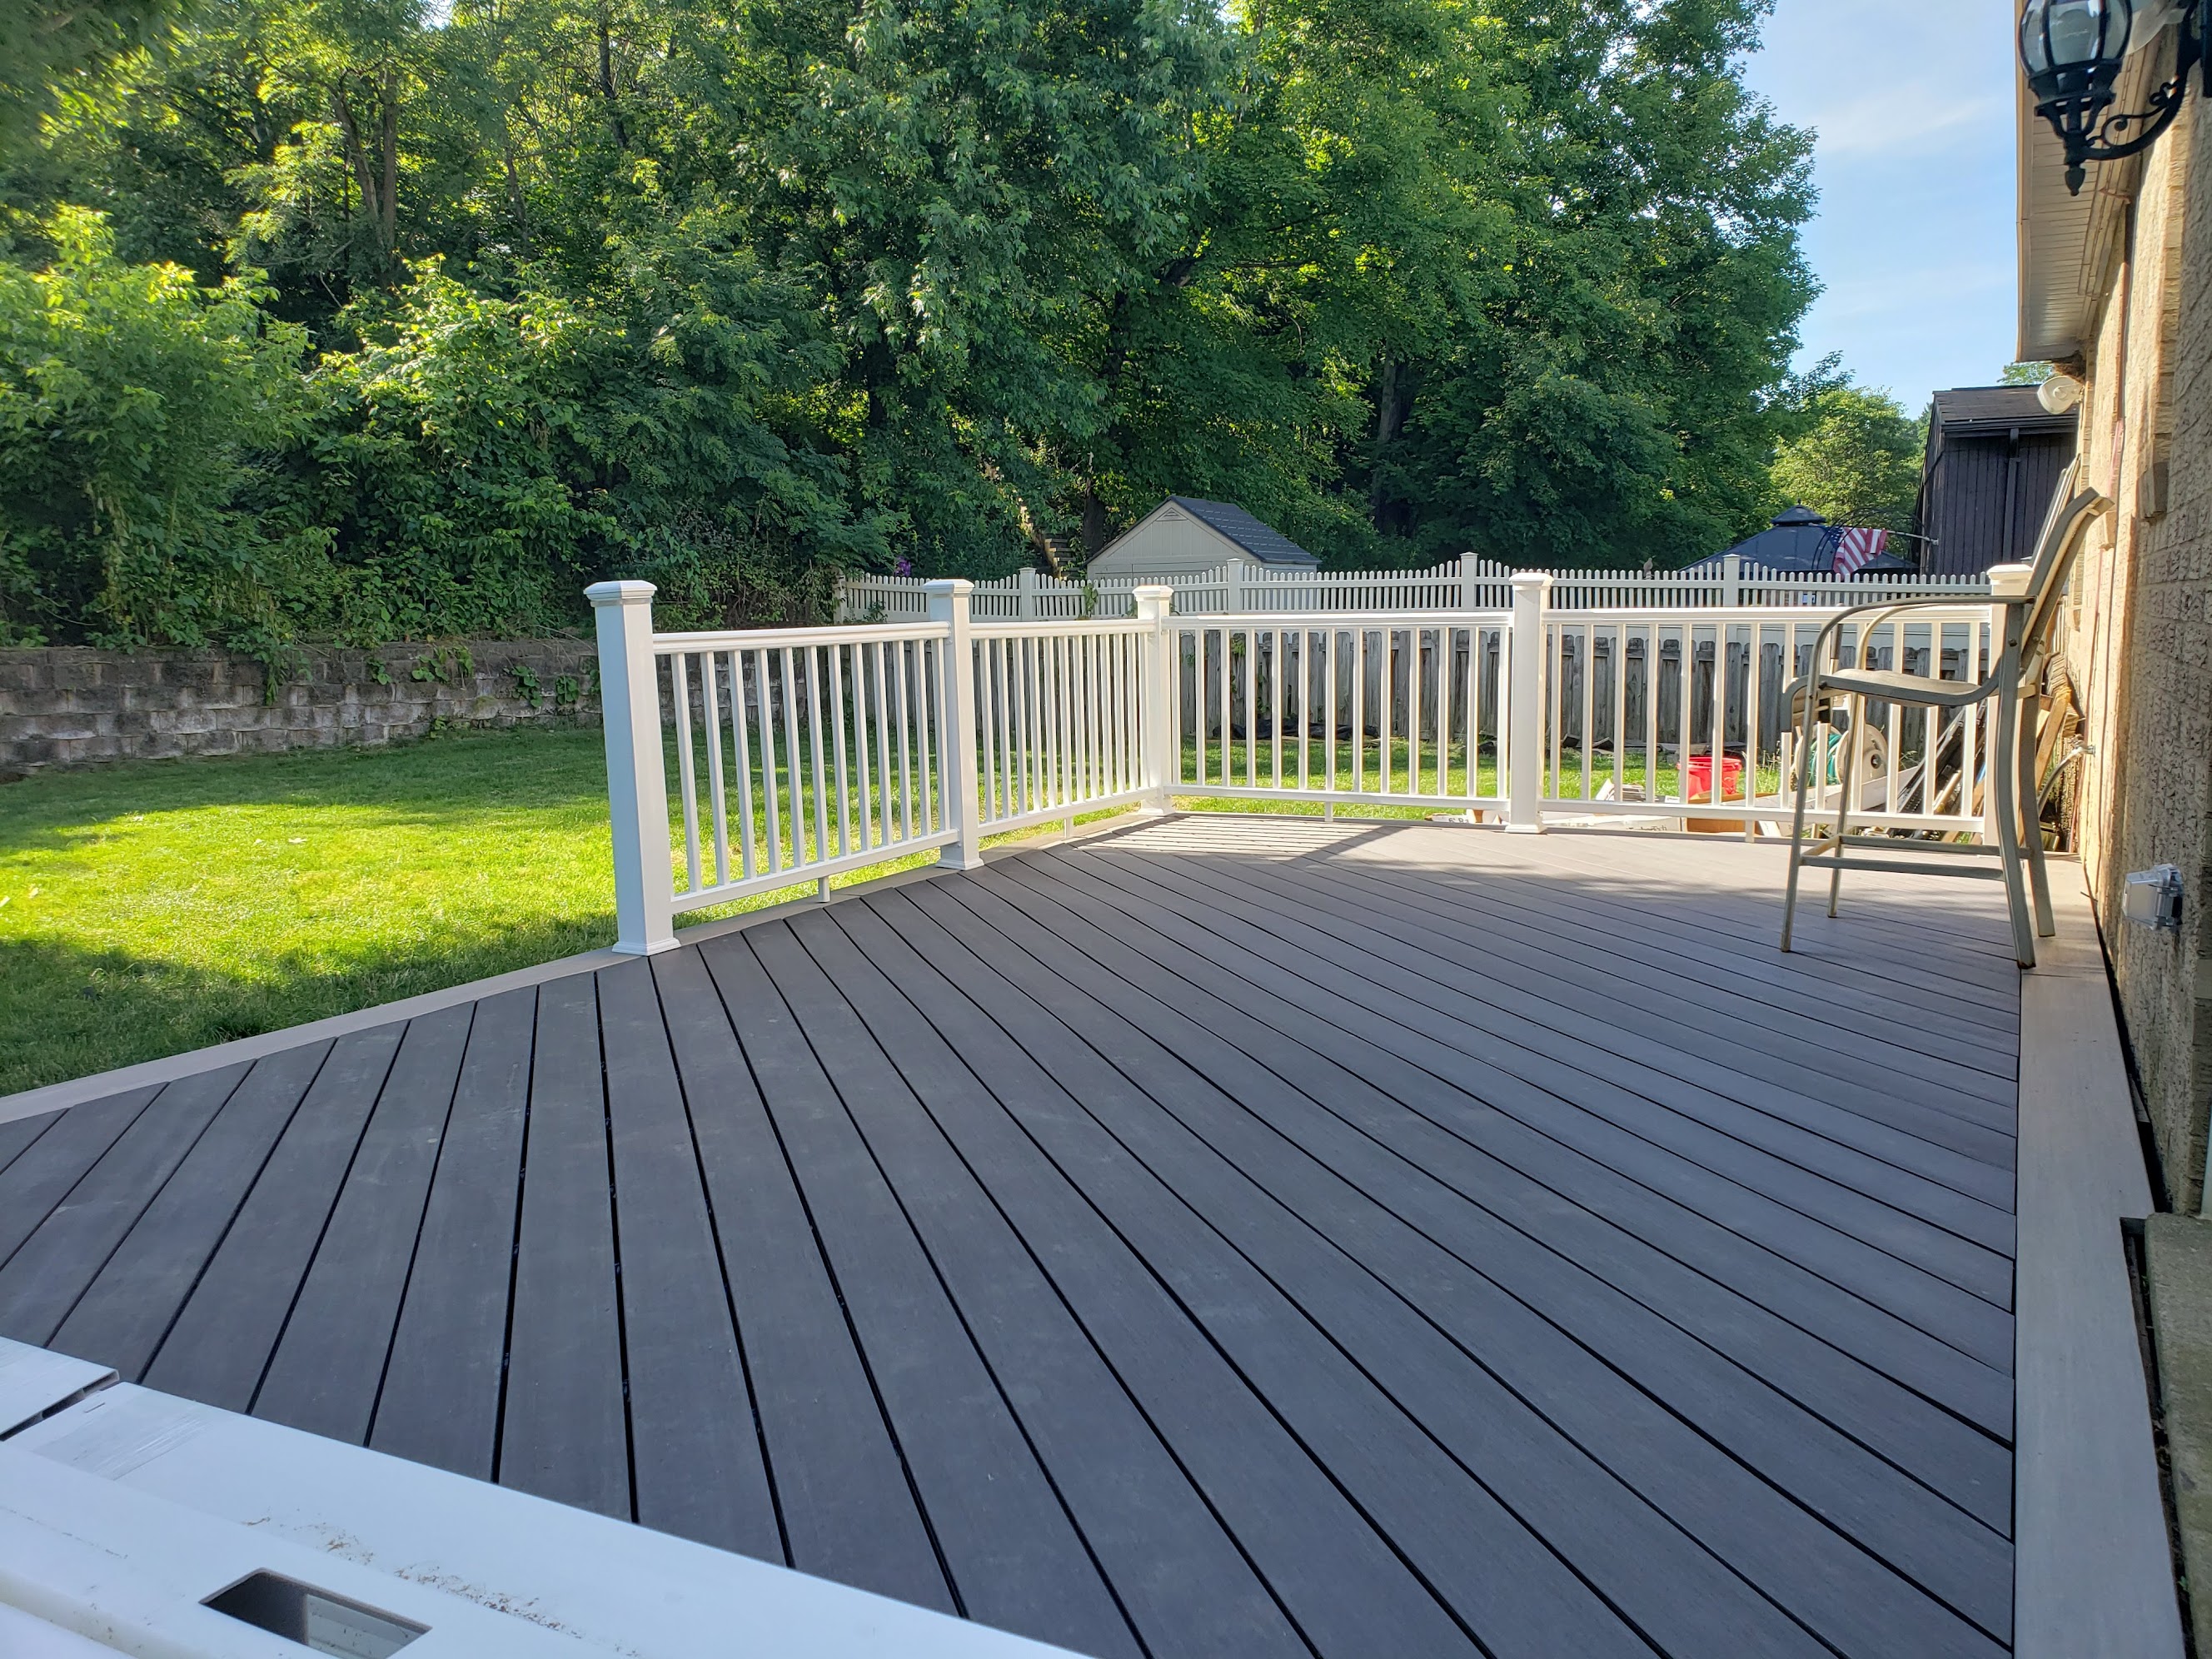
 The finished deck, still looking right three years later
 Finished deck from the yard
 Wide view from the yard
 Full length from the yard
The last photo, fence complete, project done
Full length from the yard
The last photo, fence complete, project done